
In the 2022 State Of Kubernetes Security report from RedHat, 93% of organizations have had a security incident in the past year.
In the same report, it stated that 46% of the security issues are due to misconfigurations.
When you think about those numbers, it’s a no-brainer that you must implement policies for your Kubernetes environment. Without them, you’re not only risking security issues, but you’re risking general misconfigurations in production, which at this stage of Kubernetes is quite common… but it doesn’t have to be.
In this blog post, you’ll learn about what policy enforcement is, why it’s crucial, and how to implement it with both standalone Kubernetes and Portainer.
What Is Policy Enforcement?
When you start a new job or go into the office for the first time, you get handed some paperwork. Inside of that paperwork, there’s typically some type of Code Of Conduct, office rules, company policies, etc… Pretty much all of the Human Resources (HR) information.
All of that information is a set of standards. Standards, policies, and rules to follow for your organization.
That’s what Policy Enforcement is for Kubernetes. Policy Enforcement and the platforms/tools used (which you’ll learn about throughout this blog post) are like the HR department for your Kubernetes cluster.
All Kubernetes clusters, whether they’re two nodes, fifty nodes, or whether you have one Kubernetes cluster, or one hundred, require standards and policies to be set. Who can access the cluster, what’s allowed to occur on the cluster, and how it’s implemented is so incredibly crucial for two reasons:
- Security Misconfigurations
- Without proper security, your production environment will be a nightmare. With misconfigurations, you’re going to end up being underneath a pool of tech debt.
Kubernetes is meant to help streamline containerization. It’s supposed to “make it easier”. However, its job out of the box isn’t to ensure that you do things properly inside of the Kubernetes cluster.
That’s the job of Policy Enforcement.
Any time a central policy manager is implemented, and you’ll learn about the various methods coming up in this blog post, the gist of it is the central policy manager intercepts traffic and requests that are headed toward the API server and confirms that the requests are allowed.
Kicking It Old School
Now that you know what Policy Enforcement is, you’re most likely thinking to yourself, “how do I implement policies?”
Well, there are a few ways. One of the first ways is in a declarative fashion with Admission Controllers.
Admission Controllers from a functionality perspective are great and still very much exist. Admission Controllers, when implemented, intercept requests to the API server prior to creating and/or modifying the Kubernetes resource/object.
The Admission Controller knows what it should be allowing or blocking based on policies that are implemented.
There are a few steps to implementing an Admission Controller.
First, you have to ensure that the Admission Controller is enabled. To do that, you must ensure to enable it at the creation of the Kubernetes cluster via the Kubernetes API server.

Next, the Kubernetes API server needs to know when/how/why/where to send the incoming requests, which is where a Mutating Webook comes into play.
The Kubernetes resource for this is:

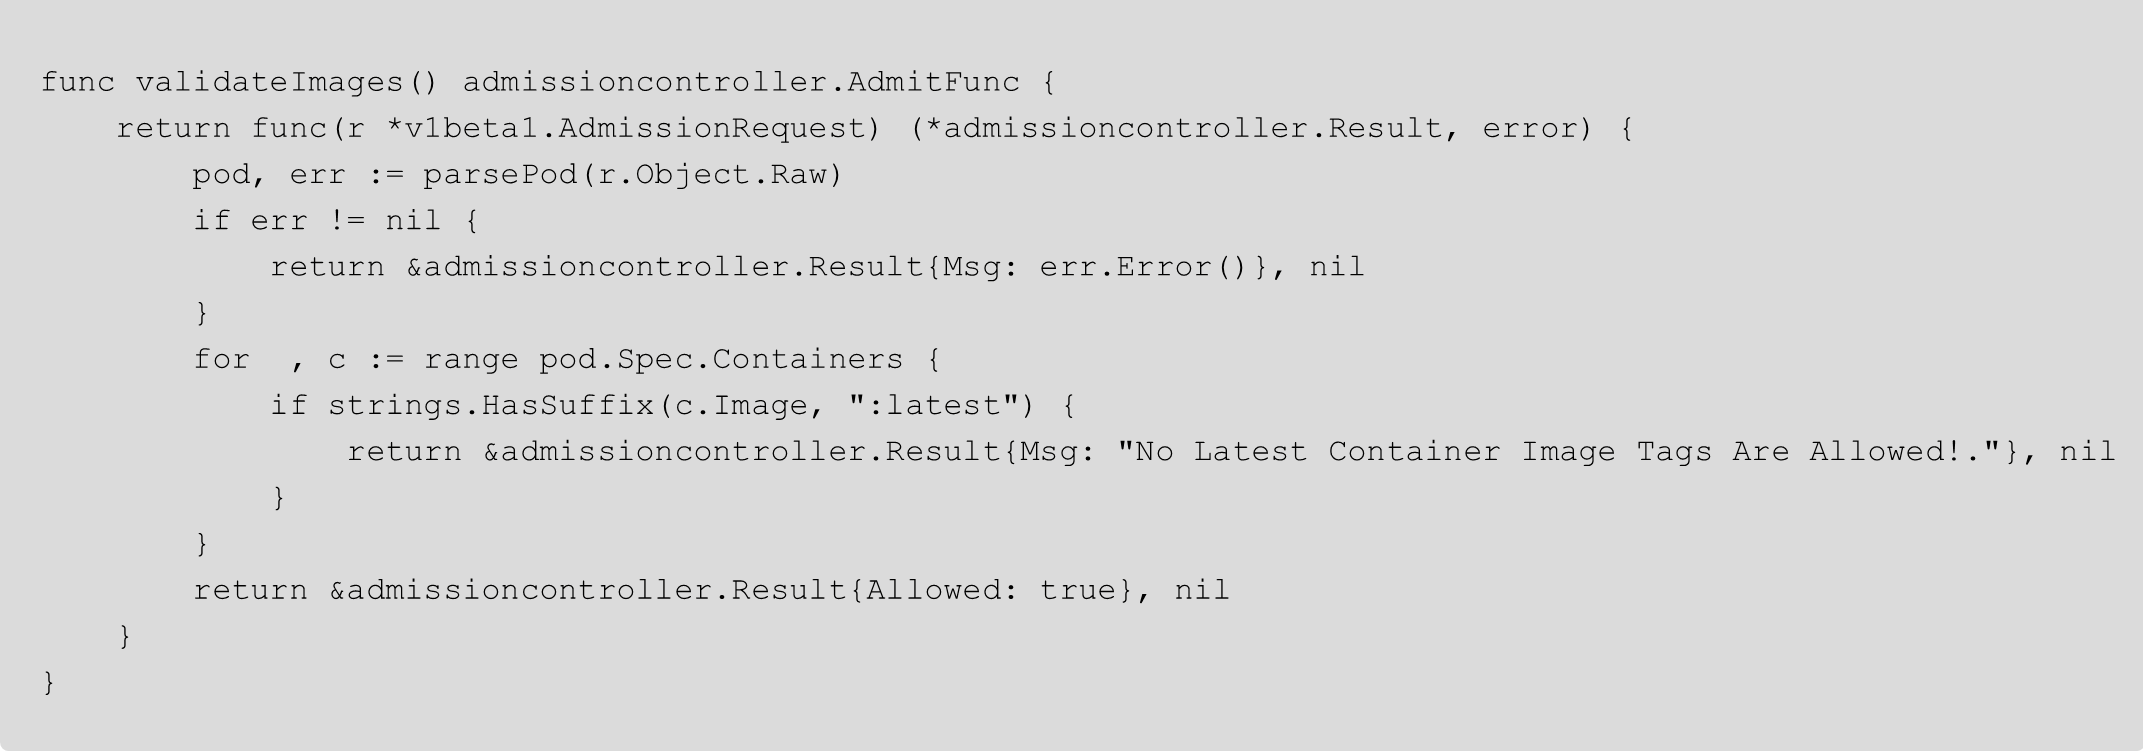
Last but certainly not least, you need a Policy. Policies for the Admission Controller are written in Go, so right off the bat you need to ensure that you have knowledge in the Go programming language. To see an example policy, you can check out the policy below, which blocks the use of the 'latest' container image tag (a very common misconfiguration in many environments).
You also need to deploy the:
- Admission Controller Server
- The Admission Handler
Because of the heavy programmatic use needed, this left a lot to be desired, which is why other policy managers like Open Policy Agent (OPA) were created.
If you’re curious to see the full Go package for Admission Controllers, you can see it here.
What Is OPA?
Open Policy Agent (OPA) is the same exact concept as Admission Controllers. The biggest different is it allows you to configure what you’d configure with Admission Controllers in an easier fashion.
In short, OPA allows you to configure a set of policies and standards.
OPA is for both:
Setting security standards.
Setting configuration standards.
It allows you to control every single layer of your Kubernetes environment and every single resource. Whether you need policies for Pods, Services, Users, and everything in between, OPA helps you implement them.
To create an OPA policy, there’s a configuration language called Rego. Rego is a bit more straightforward to use than Go, but you still need to learn new “language” for the purposes of implementing anything OPA-policy related.
Implementing Standalone Policy Enforcement
Now that you have the theory behind policy enforcement, in this section, you’re going to learn how to implement policy enforcement in a standalone Kubernetes environment.
Keep in mind that the hands-on portion of this section is needed throughout every Kubernetes cluster that you’re running. For example, if you have three Kubernetes clusters, you have to run the following configurations three times.
Implementing Gatekeeper
First things first, you’ll have to implement Gatekeeper.
Think of Gatekeeper as an intermediary between OPA and Kubernetes. Sort of like a “shim” of sorts. Without Gatekeeper, Kubernetes doesn’t understand OPA policies. Once Gatekeeper is installed, you can use OPA policies in your Kubernetes cluster.
The quickest way to implement Gatekeeper is by utilizing the Helm Chart.
Implementing Policies
Now that OPA is installed, you’ll install the Config, ConstraintTemplate, and the Constraint Config.
First, save the following config. Notice how it’s syncing with the Pod Kubernetes resource. That means that this particular configuration will work against Pods only. The config's biggest job is to tell Gatekeeper what particular Kubernetes resource OPA policies can be created for.

Once saved, run the following command:

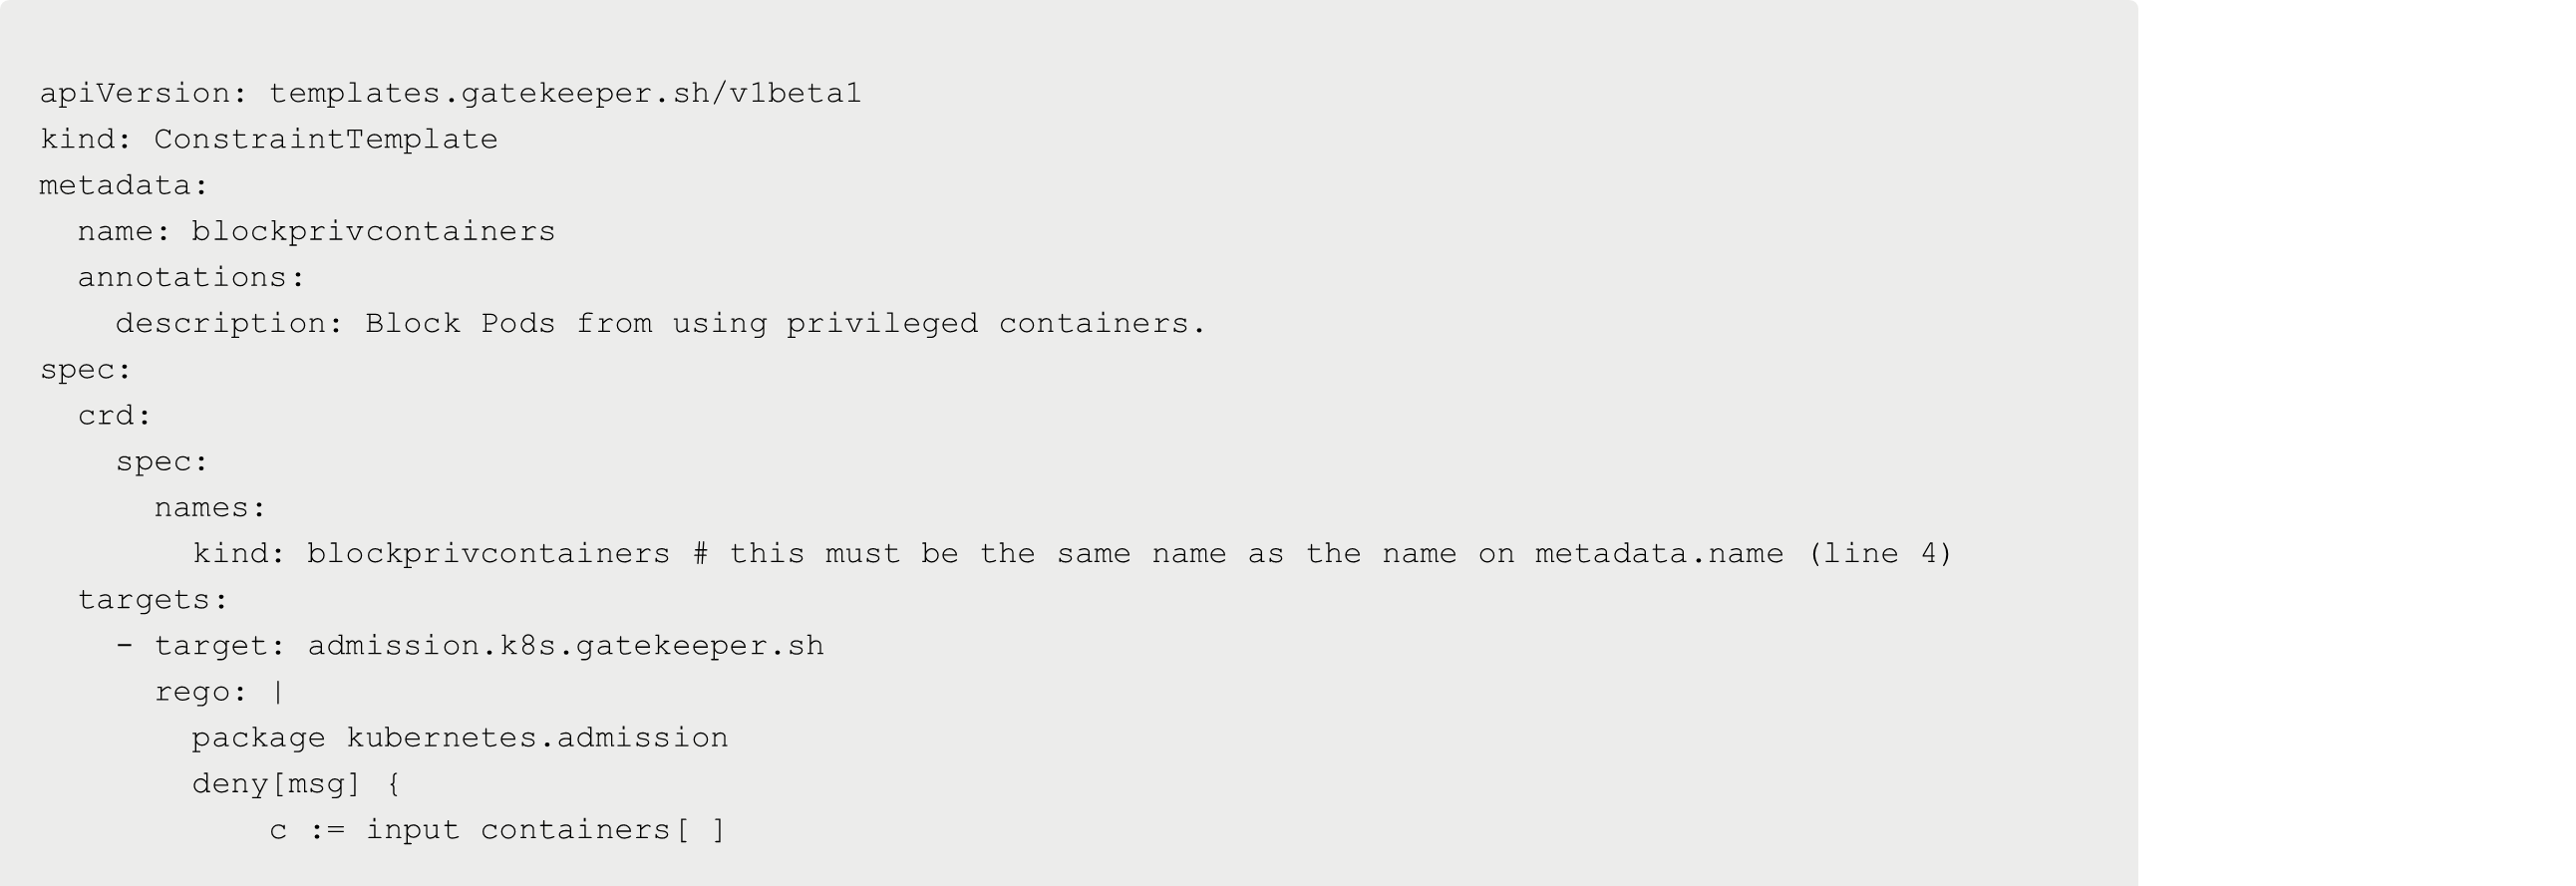
Next, set up the constraint template. The following constraint template is the policy itself that you want to implement. In this example, you’re implementing an OPA policy that blocks the use of privileged containers. Notice how there's a spec for rego.
For every constraint template that you create, whether it’s for blocking privileged containers or the 'latest' container image, or whatever other type of policy you want to implement, you must write it in rego, which means you must learn the rego language.

Save the Kubernetes Manifest above and run it with the following command:

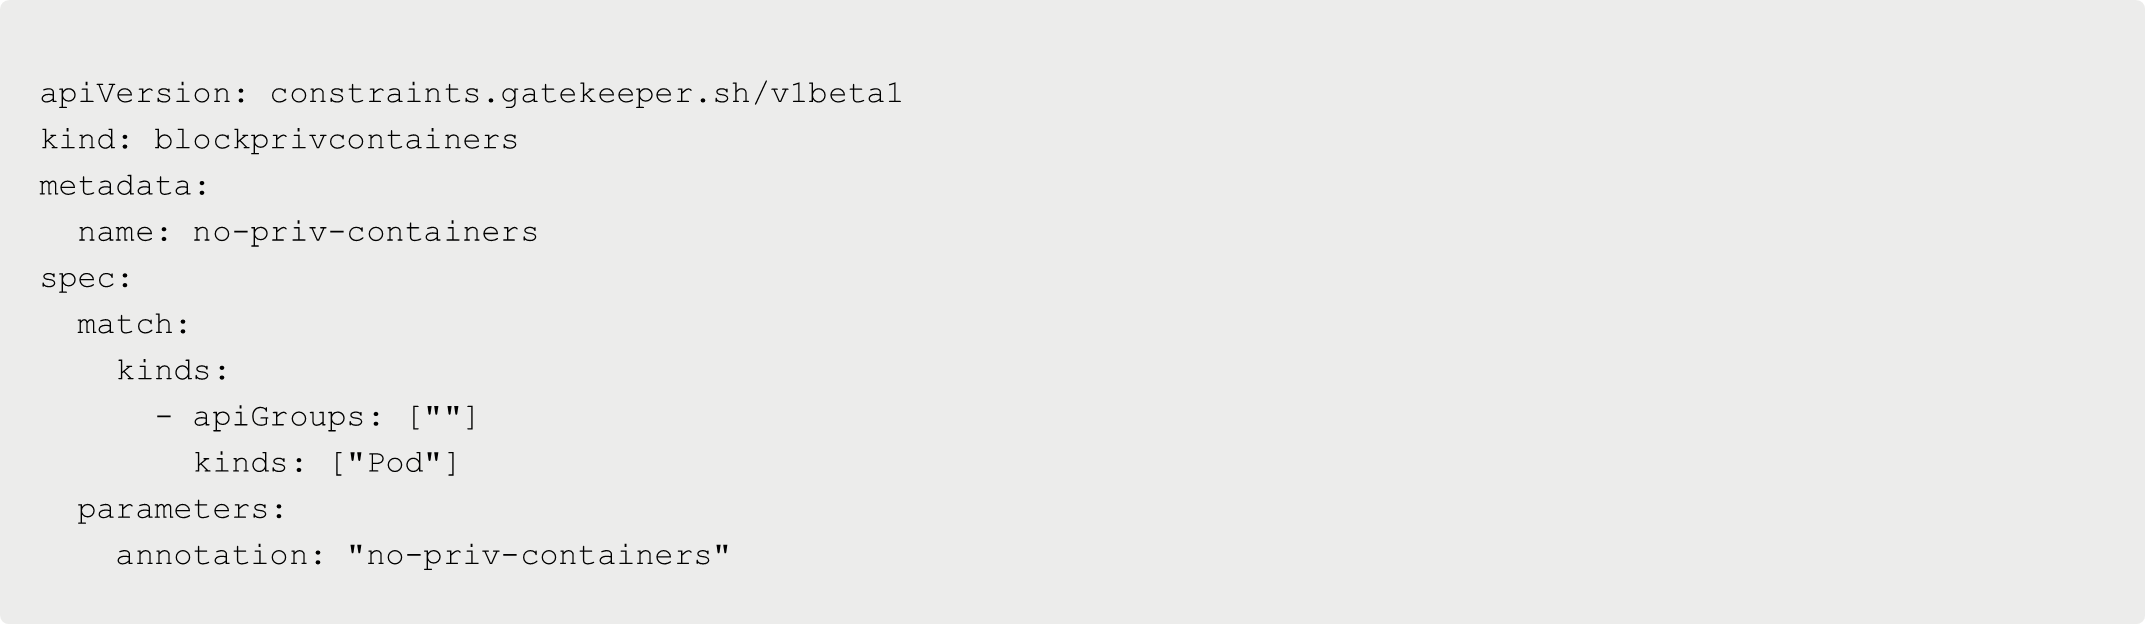
Next, you can set up the constraint configuration. The constraint configuration brings your constraint template to life. The constraint configuration attaches to the template that you created ( blockprivcontainers ).
If you look at the below configuration, it actually creates a resource/object of your constraint template. Much like when you're creating a Pod or a Deployment, you're creating a resource/object.
Run the above Kubernetes Manifest with the command below:

Testing
Once the Config, Constraint Config, and Constraint Template are implemented in your Kubernetes cluster, you can test it to confirm it’s working properly.
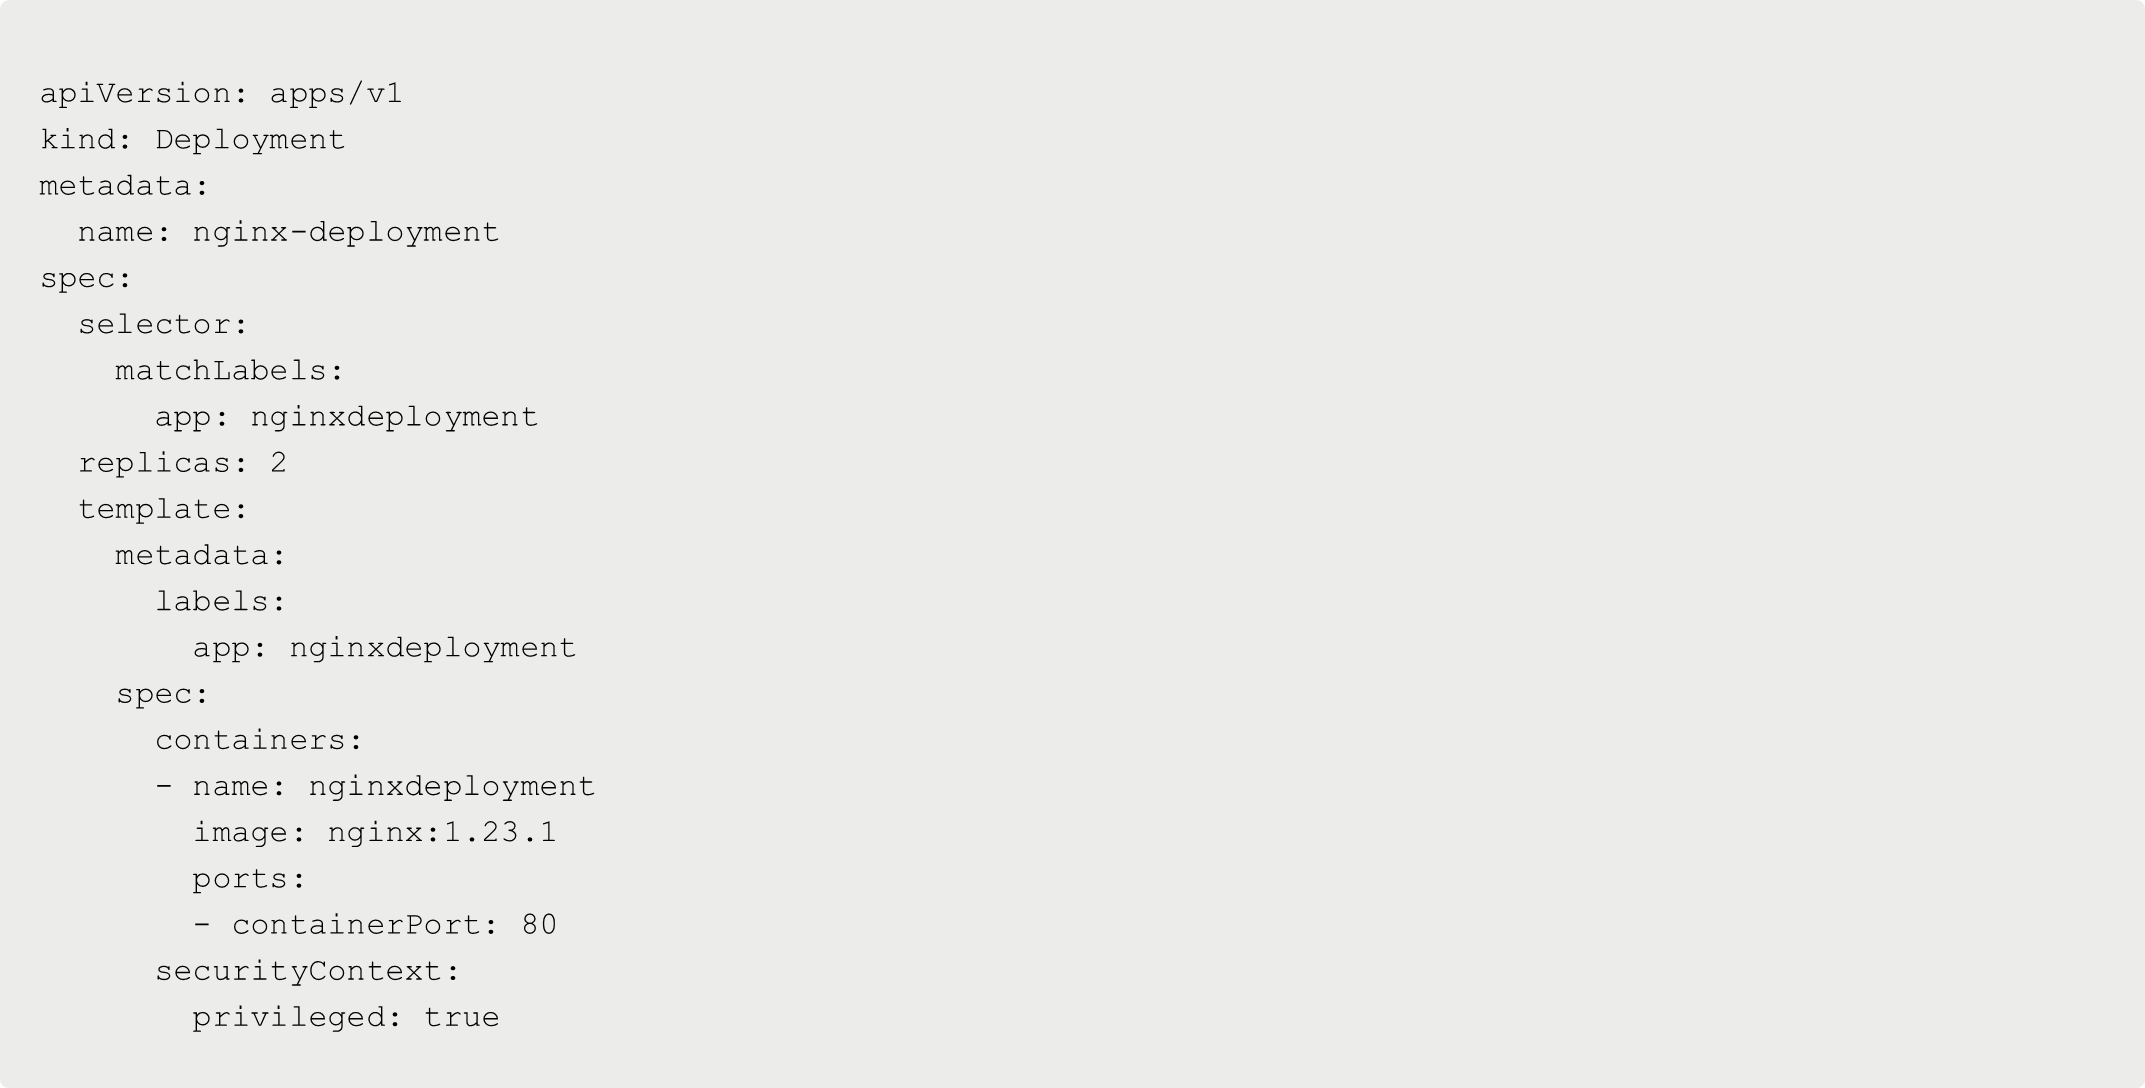
As an example, the following Kubernetes Manifest will not work.
The below Manifest creates a Kubernetes Deployment resource/object that utilizes Nginx and creates two replicas. Under the securityContext spec, it also states that running privileged containers is allowed. Because of the OPA policy that was configured, this Deployment won’t run properly because the Policy states that no Pods can run as privileged .
In the next section, you’ll learn how to make this process 10x easier with Portainer.
Implementing Pod Security Constraints With Portainer
Now that you’ve implemented policy enforcement in a standalone Kubernetes environment, let’s learn how to do the same thing in Portainer.
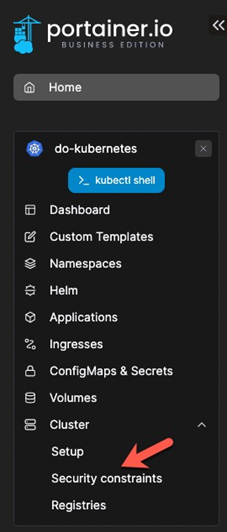
First, log into your Portainer environment and click the Security constraints button under Cluster.
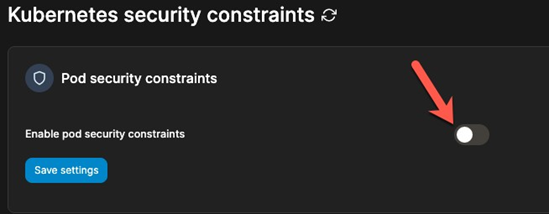
Enable Pod Security Constraints and click the blue Save settings button.
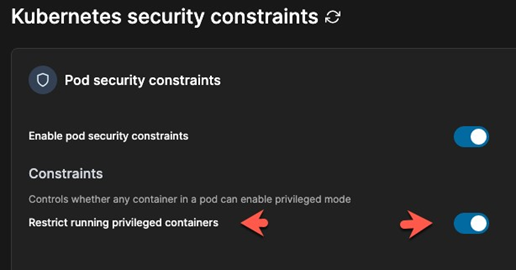
Click the option to restrict running privileged containers.
Click the blue Save settings button.
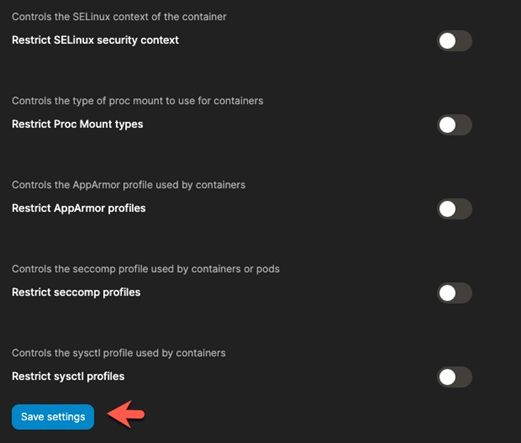
And that’s it. You don’t have to do anything else. You don’t have to run a bunch of YAML or Helm configurations. Click a few buttons, save yourself 80% of the time it would take you to set up OPA in a standalone environment, and you’re off to the “Security Races”.
Keep in mind that what you see above is just one of the Pod Security Constraints that Portainer offers.
You can see the rest of them in the video below.
Try Portainer with 3 Nodes Free
If you're ready to get started with Portainer Business, 3 nodes free is a great place to begin. If you'd prefer to get in touch with us, we'd love to hear from you!
.jpg?width=290&name=Image%20from%20iOS%20(2).jpg)

COMMENTS