


A Pro Mosquitto Step-by-Step Guide
In the dynamic world of IoT, seamless integration and efficient management of services are paramount. That's why we are excited to share the collaborative efforts between Cedalo, the driving force behind the Pro Edition for Eclipse Mosquitto, and Portainer, a leading container management platform. Together, we provide a comprehensive guide on integrating Cedalo's offerings into the Portainer platform.
The following guide will show you how to implement a Pro Mosquitto Trial in your Portainer environment. Ultimately, you will have a trial running with the Management Center for Mosquitto.
Start a Mosquitto Pro trial with Portainer via App Templates
Step 1: Request a Trial License
Pro Mosquitto requires a license to deploy and run. Please contact the Pro Mosquitto team by clicking the link below and requesting a trial license.

Step 2: Navigate to the Portainer Dashboard
Begin by logging into your Portainer instance and accessing the dashboard. Once logged in, you'll be greeted by an intuitive interface simplifying container management.
Step 3: Select "App Templates"
In the left-hand menu, click on "App Templates." This is where you'll find a collection of pre-configured templates for various applications.
Find the App: Pro Mosquitto with Management Center and select it. 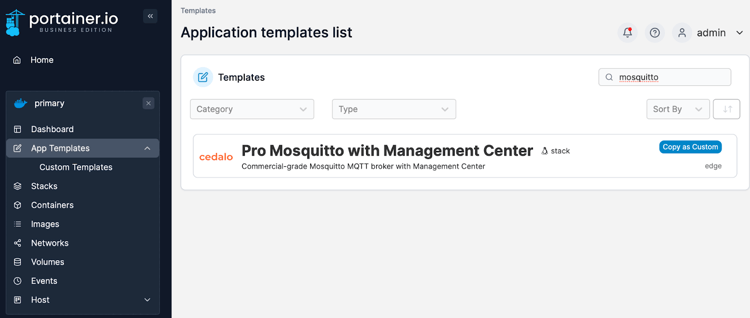
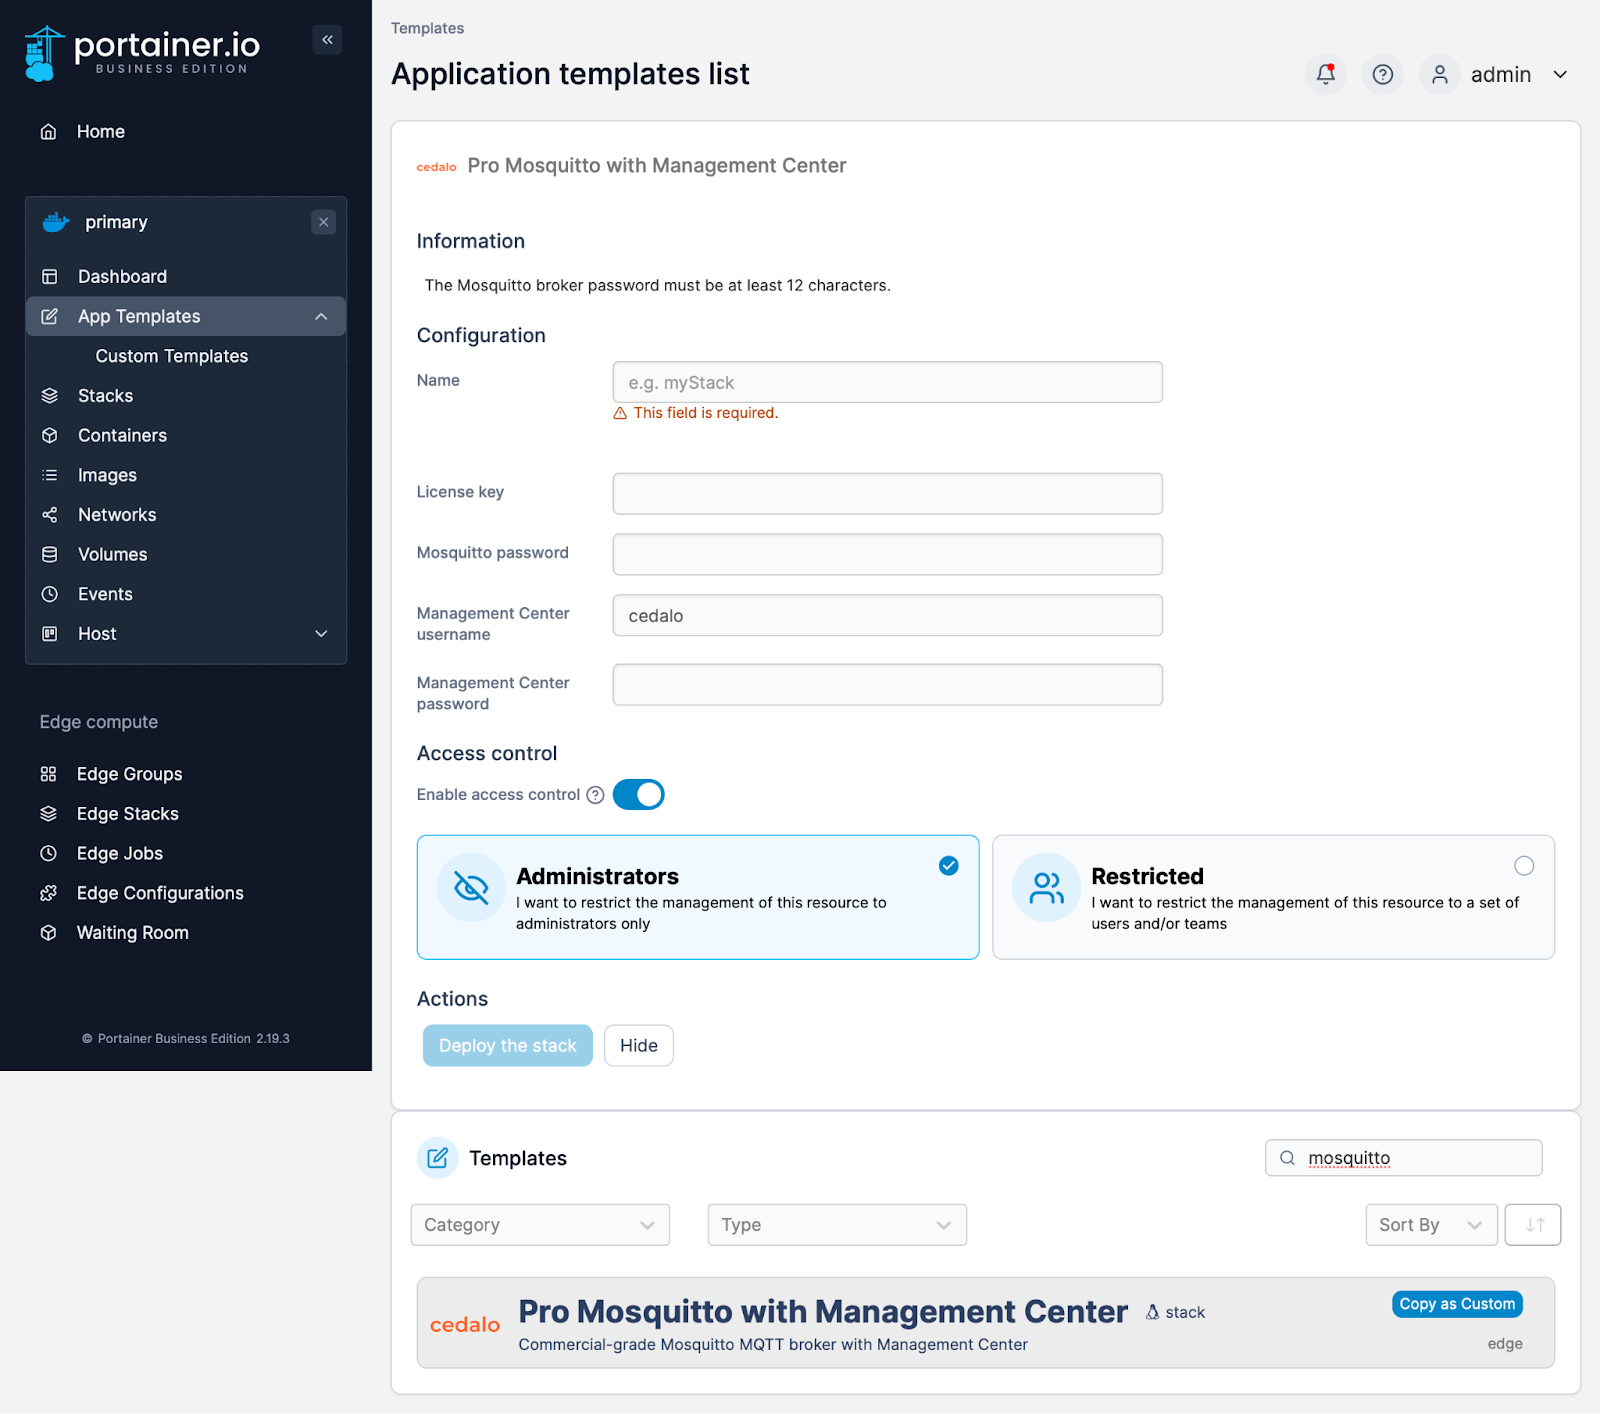
Step 4: Add missing fields
To start the App template for Mosquitto Pro, fill out the prompted missing fields. Aside from the name, you will have the following mandatory fields to fill out:
- Mosquitto Password: Set a Password for the “admin” client on the broker. It needs to be at least 12 characters
- Managment-Center username: Set the username for the WebUI.
- Managment-Center password: Set the password for the WebUI.
- License key: Enter the license key.
Step 5: Deploy the Container
After adding the information above, you can now deploy the template directly from the Portainer dashboard. After the initiation, Pro Mosquitto and the Management Center will be available for you.
Step 6: Configure a Client Account
Portainer assigns the Management Center a specific port. You can look it up in your deployed stack.
Open the Management Center from a browser via localhost:<port> and enter your set credentials to start.
You’ll first need to create a new client account and assign a role. The fastest way to get started is by setting the “client” role to your new client account.
For a full guide, check out this Cedalo blog post.
Step 7: Connect an MQTT Client to the Pro Mosquitto Broker
Use the credentials from the newly created client account to connect to Pro Mosquitto.
You are now able to publish and subscribe to the Mosquitto Broker. If you want to learn more about Pro Mosquitto’s capabilities, please review our documentation and blogs.
Step 8: Configure details
For regular testing, the default configuration should suffice. However, if you need additional configuration options for the Mosquitto Broker, the Management Center, and specific plugins, you can access the configuration files by executing a console session inside the container. To do so, inspect the container via the Portainer UI and click on the console button:

Select /bin/sh as the command and click on connect to establish a console session:

For the Management Center: cd /management-center/config
For Pro Mosquitto:cd /mosquitto/data & cd /mosquitto/config
Conclusion
This collaboration between Cedalo and Portainer exemplifies the commitment to simplifying the deployment and management of IoT services. By following these straightforward steps, you can seamlessly integrate the Mosquitto Broker into your Portainer environment, ensuring a robust foundation for your IoT projects.


COMMENTS