

Share this post
So, you have Portainer running centrally in your work (or home) network and its configured to manage multiple Docker Environments (Standalone and/or Swarm), thats awesome..

But now you want to use the Docker CLI on your laptop to interact directly with the remote Portainer managed environments. Given your only access to these environments is via Portainer, how can you achieve this?
Easy... with a tool Portainer has made available called the Portainer Authenticator.

This "run once" container, which you run on your Laptop (or wherever you will run the Docker CLI), will faciliate the creation of a docker config.json on your machine containing the authorisation headers needed.
Now there is a pre-requisite for this to functionality to work. Your Portainer instance MUST be running with a real SSL cert. Not the self-signed certificate that Portainer generates. Why? Because we need to connect using the Docker TLS connection, and that requires us to have a CA cert, which you dont get with a self signed cert. So you need a real cert. You need to have a copy of the CA public cert too.
Lets see how.
On your Dev machine, open the command window (either Linux Console, or WSL console).
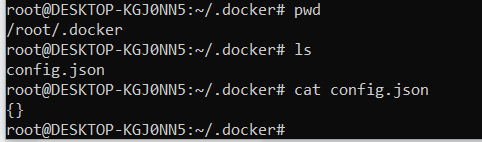
Navigate to the ~/.docker folder (if you dont have one, create a folder)

Inside that folder, see if you have an existing config.json file. If you dont, create one with content of {} then save it.

You should now have a blank config.json in the ~/.docker/ folder.
OK, so now we need to run the portainer authenticator.
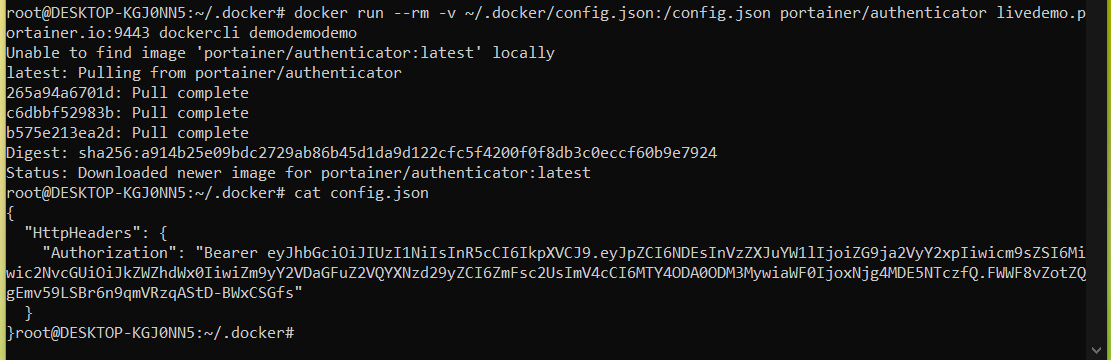
Enter the command:
docker run --rm -v ~/.docker/config.json:/config.json portainer/authenticator <PORTAINER_URL>:9443 username password
Dont forget to change the portainer URL to your real URL, and put in your portainer username and password.
The command will run, and update the config.json with the bearer token. You can cat the file to see the results.
OK, so now you have the token, how can you use it?
We need to create a docker context.
But you first need to prepare three things.. you need to tell Docker to use the config file, you need to know the endpoint ID of the Docker environment you want to manage, and you need the CA cert that the Portainer instance is using.
1) Lets configure Docker CLI to use the config file.
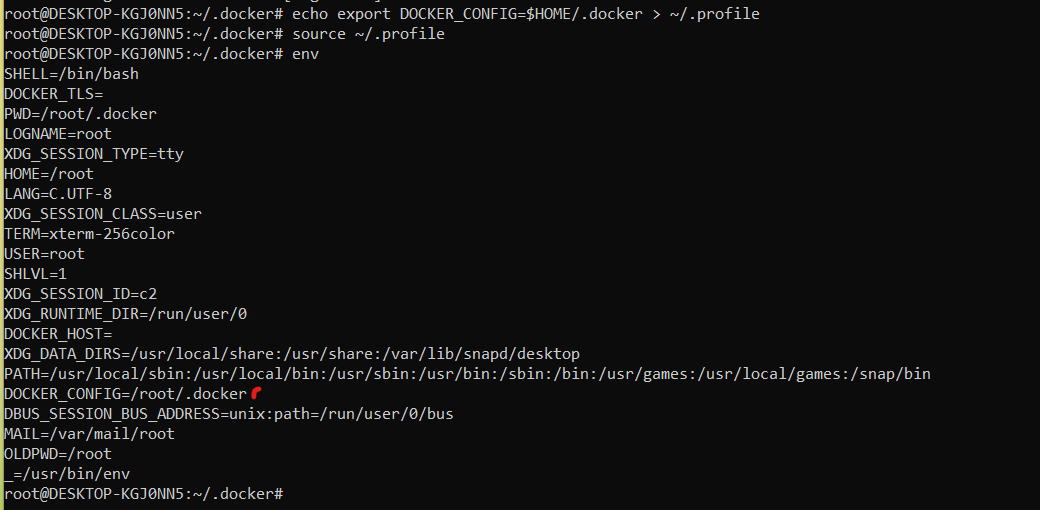
Type the following commands to set the environment variable needed
echo export DOCKER_CONFIG=$HOME/.docker > ~/.profile
source ~/.profile
As you can see by my example below.
2) Lets get the endpoint ID.
Switch back to your Portainer screen, select one of the environments for management, and then note the ID number in the address bar. That is your endpoint ID. For my demo, its #2. Capture as many endpoint IDs as you want to manage.

3) Finally, now get your CA cert, and copy it into your host, in the path ~/.docker/ca.pem
Now we are ready to create the context.
Type the command
docker context create portainer --description "<FRIENDLY NAME>" --docker "host=tcp://<PORTAINER_URL>:9443/api/endpoints/<ENDPOINT_NUMBER>/docker,ca=./ca.pem"
As you can see by my example below.

Repeat for each endpoint ID that you want to add (with a different context name and friendly name).
Now we can switch to that context.
The command "docker context ls" will list your current contexts, and "docker context use <NAME>" will switch to your new context.

Now that you have that context selected, you can go ahead and run docker commands on your local laptop, and these will run in the remote Docker environment, via Portainer, which acts as an authenticated (and RBAC secured) API proxy.
From our testing, the following commands do not work via the proxy
- docker run (so you cannot deploy new containers)
- docker logs -f (follow does not work)
- docker exec
- docker attach
- docker stats
The following commands DO work as tested.
- docker stop / docker start
- docker rm
- docker image commands (all of them)
- docker network commands (all of them)
- docker volume commands (all of them)
- docker logs (just no -f)
- docker node commands (all of them)
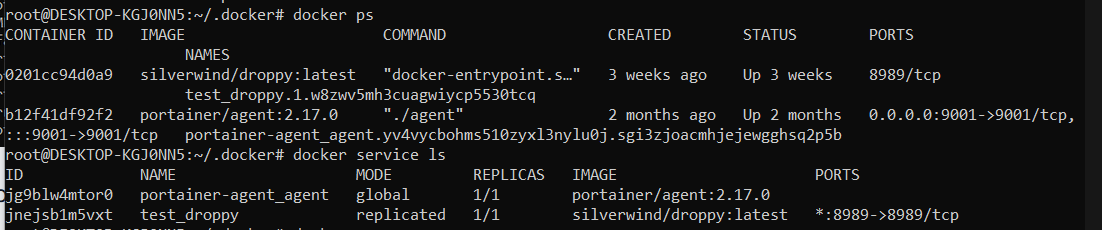
- docker ps
- docker service commands (all of them)
- docker stack commands (all of them)
- docker cp command
- docker pull/push/tag
Give this a try and let us know what you think.
Neil


.png)