**Updated Sept 2022**.
Deploying Portainer on MicroK8s is extremely easy and fast. We are going to describe here how to have Portainer up and running in no time with one simple command. We've also posted a quick 5 minute video on our YouTube channel here.
First some pre-reqs:
- Make sure that you run the commands as root
- Ubuntu server v22.04 or any other linux distribution/OS that can run MicroK8s (installation details can be found here: https://microk8s.io/docs)
- MicroK8s v1.24.0
- Before deploying portainer we have to make sure that MicroK8s has been deployed with the following addons enabled:
- dns
- ha-cluster
- ingress
- metrics-server
- rbac
- hostpath-storage
- Before deploying portainer we have to make sure that MicroK8s has been deployed with the following addons enabled:
In order to check which addons are already enabled please run the command microk8s status.
The output should be something similar to this:
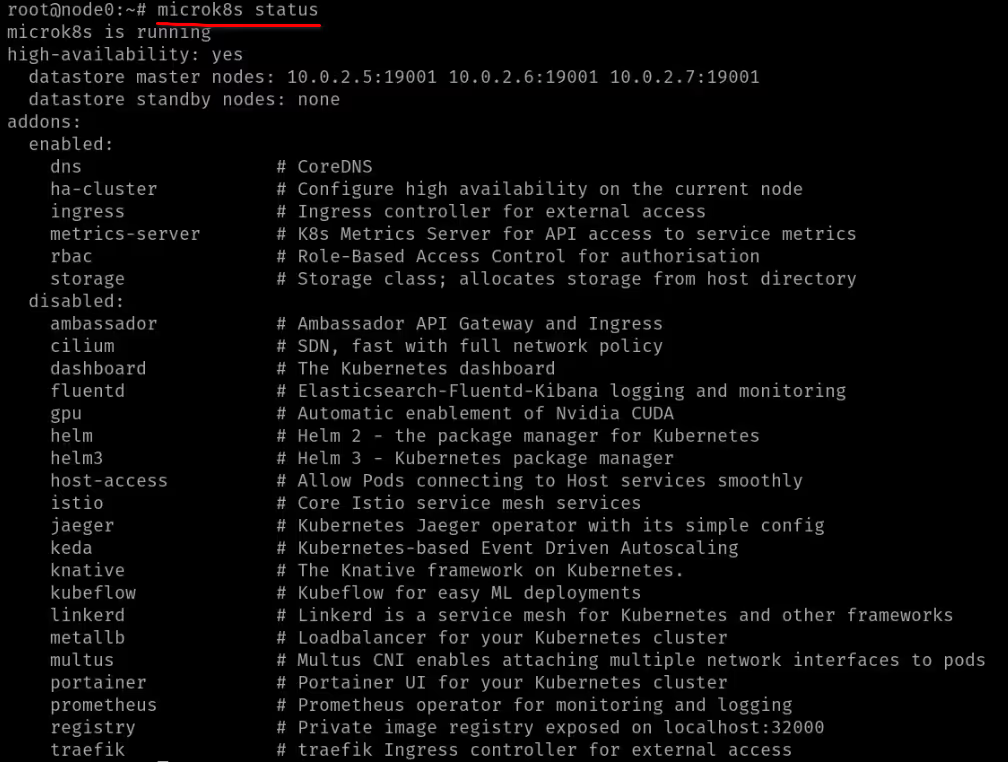
We can see here that the addons mentioned above are already deployed.
Enabling Portainer is as simple as running microk8s enable community
and then microk8s enable portainer.
It takes less than a minute to install.
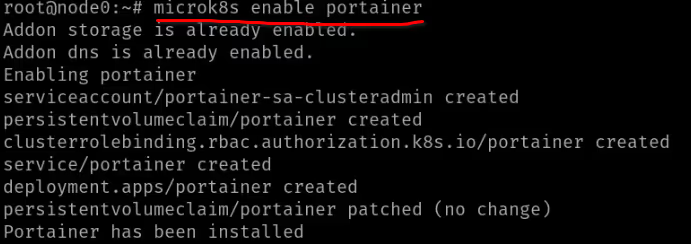
You can check the progress of the installation by running kubectl get pods -n portainer.

It shouldn't take more than 25s to download, install and start. We can now swtich to a web browser to load the Portainer interface. Please make note of the IP address of the machine that is running Portainer.
You can check the IP address on linux by running ip a or ifconfig.
Portainer for MicroK8s runs on port 30779 and in our case the IP address of the node running Portainter was 10.51.1.200 so in order to load the web interface we used https://10.51.1.200:307779 on our web browser.

Finally now we can finish installing Portainer on the web browser in 3 simple steps:
1. Create the initial adminstrator user and password (you can change the default admin to any other username):
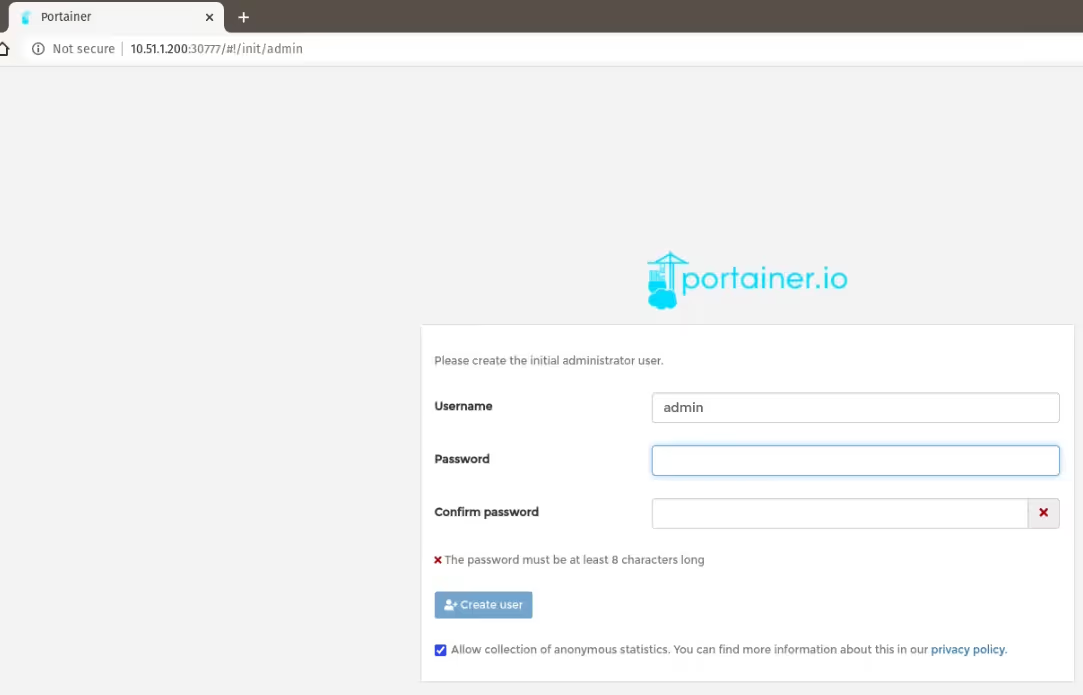
2. Connect Portainer to the local Kubernetes environment:
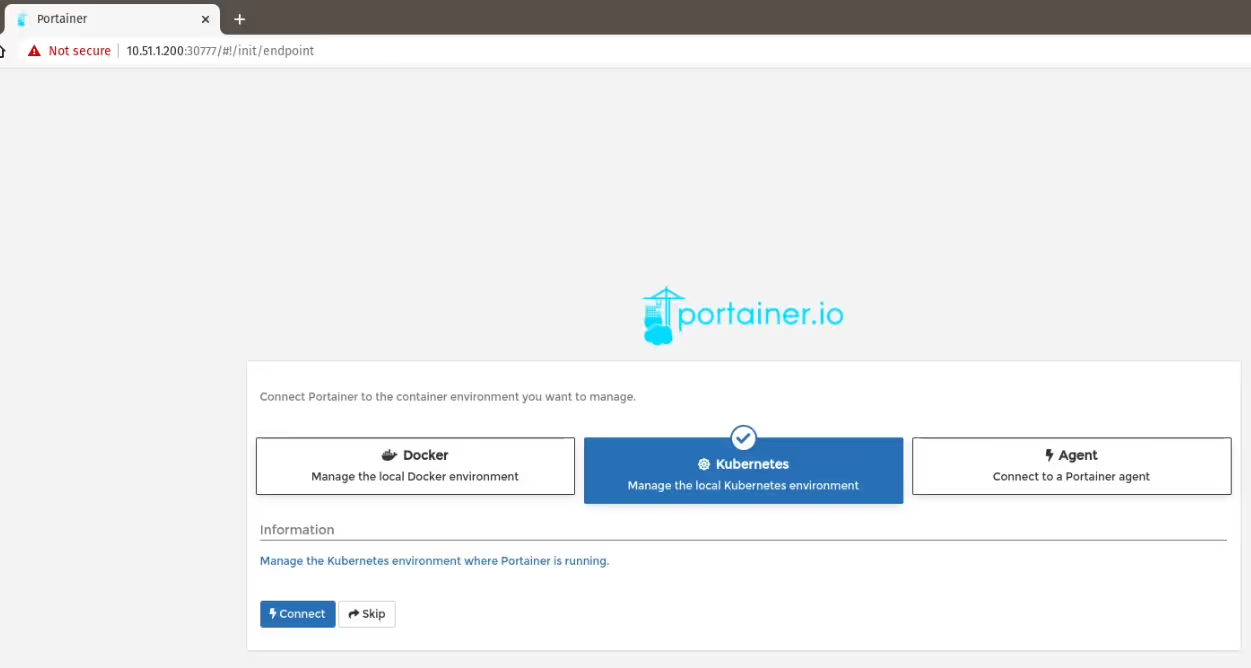
3. The last step is to configure the Kubernetes features you would like to enable on your installation:
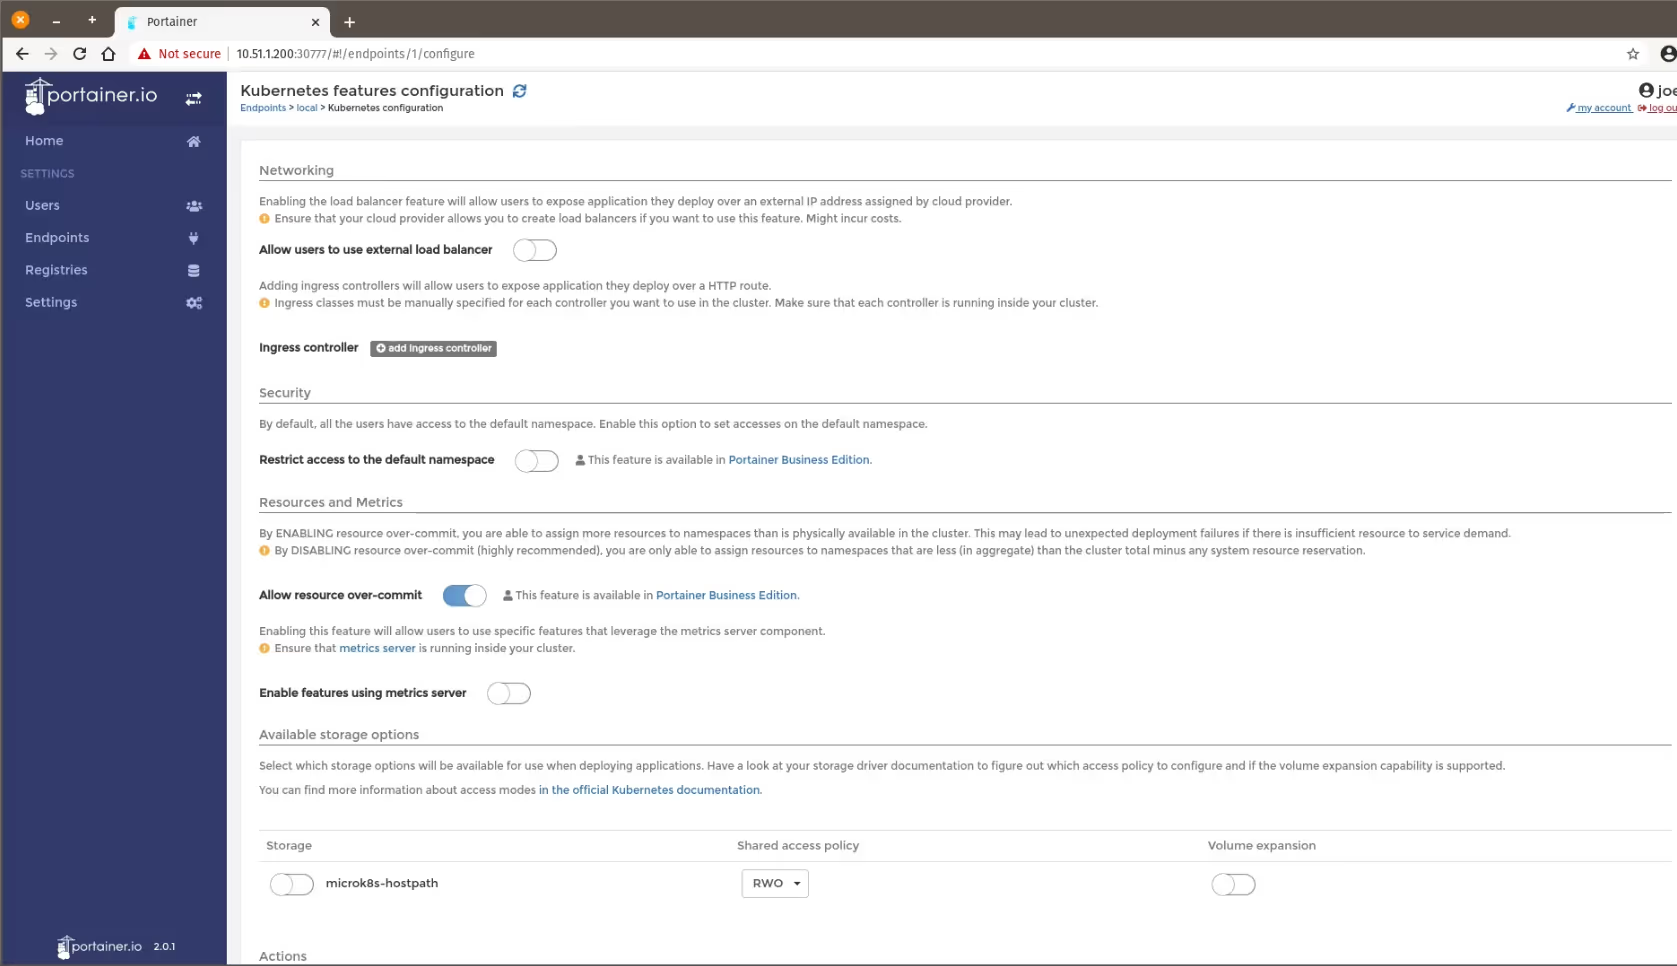
If the default ones are ok, you can simply click on Save configuration by scrolling down to the end:

You should see your local endpoint up and running with all the hardware resources recognized by Portainer:

Hope that worked well for you, and you're up and running with Portainer. If you have any questions or comments, please drop them into the comments section below, or join us on our Slack channel.


