

Share this post
Portainer already has a good continuous delivery (CD) engine built in, one that ensures applications running in Portainer managed Kubernetes clusters are consistent with their mainifest definitions stored within a Git repo.

But, what if you want to use ArgoCD? Does that mean you can't use Portainer for your centralized Kubernetes management? The answer is 'no'. This two-part blog shows you how to set it up.
Part 1 is deploying an ArgoCD management instance on a Kubernetes cluster. Part 2 is connecting that management instance to additional Kubernetes clusters. This blog focuses on Part 1, with Part 2 linked at the end.
The easiest way to get ArgoCD installed is to use the helm chart provided in Portainer, under our HELM page.
Jump Into Portainer and connect to the Kubernetes environment that you want to host the ArgoCD server. In my case, it's my laptop, but for an organization, this will likely be an instance in your data center.
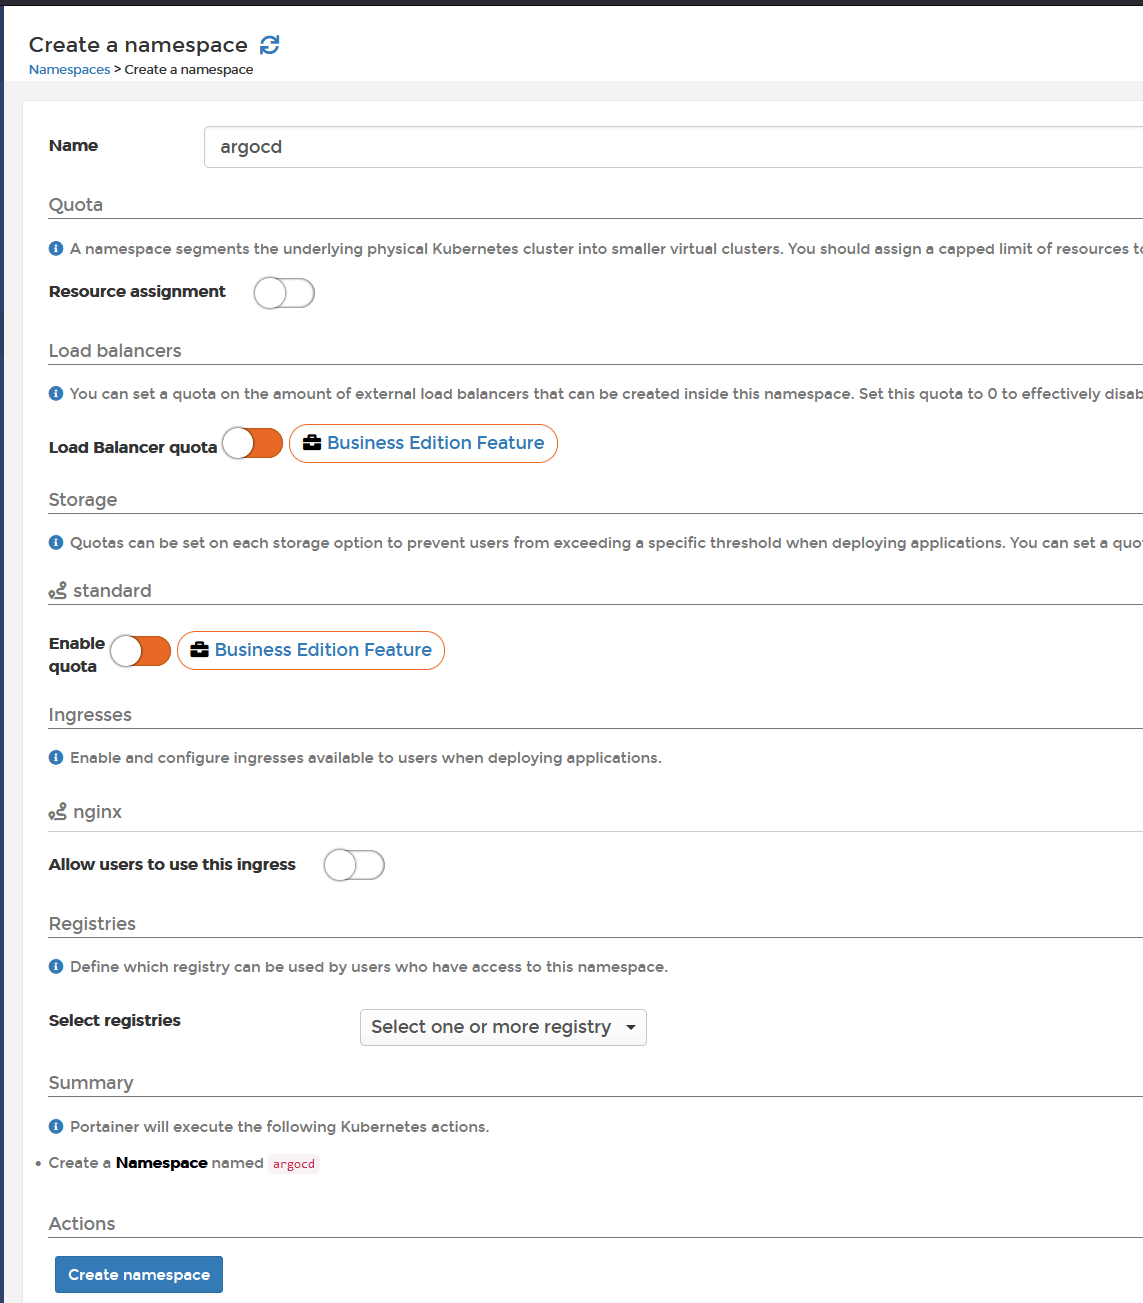
Click on namespaces, and create a namespace called argocd (note it has to be called this to work, else you need to modify the argo manifests)
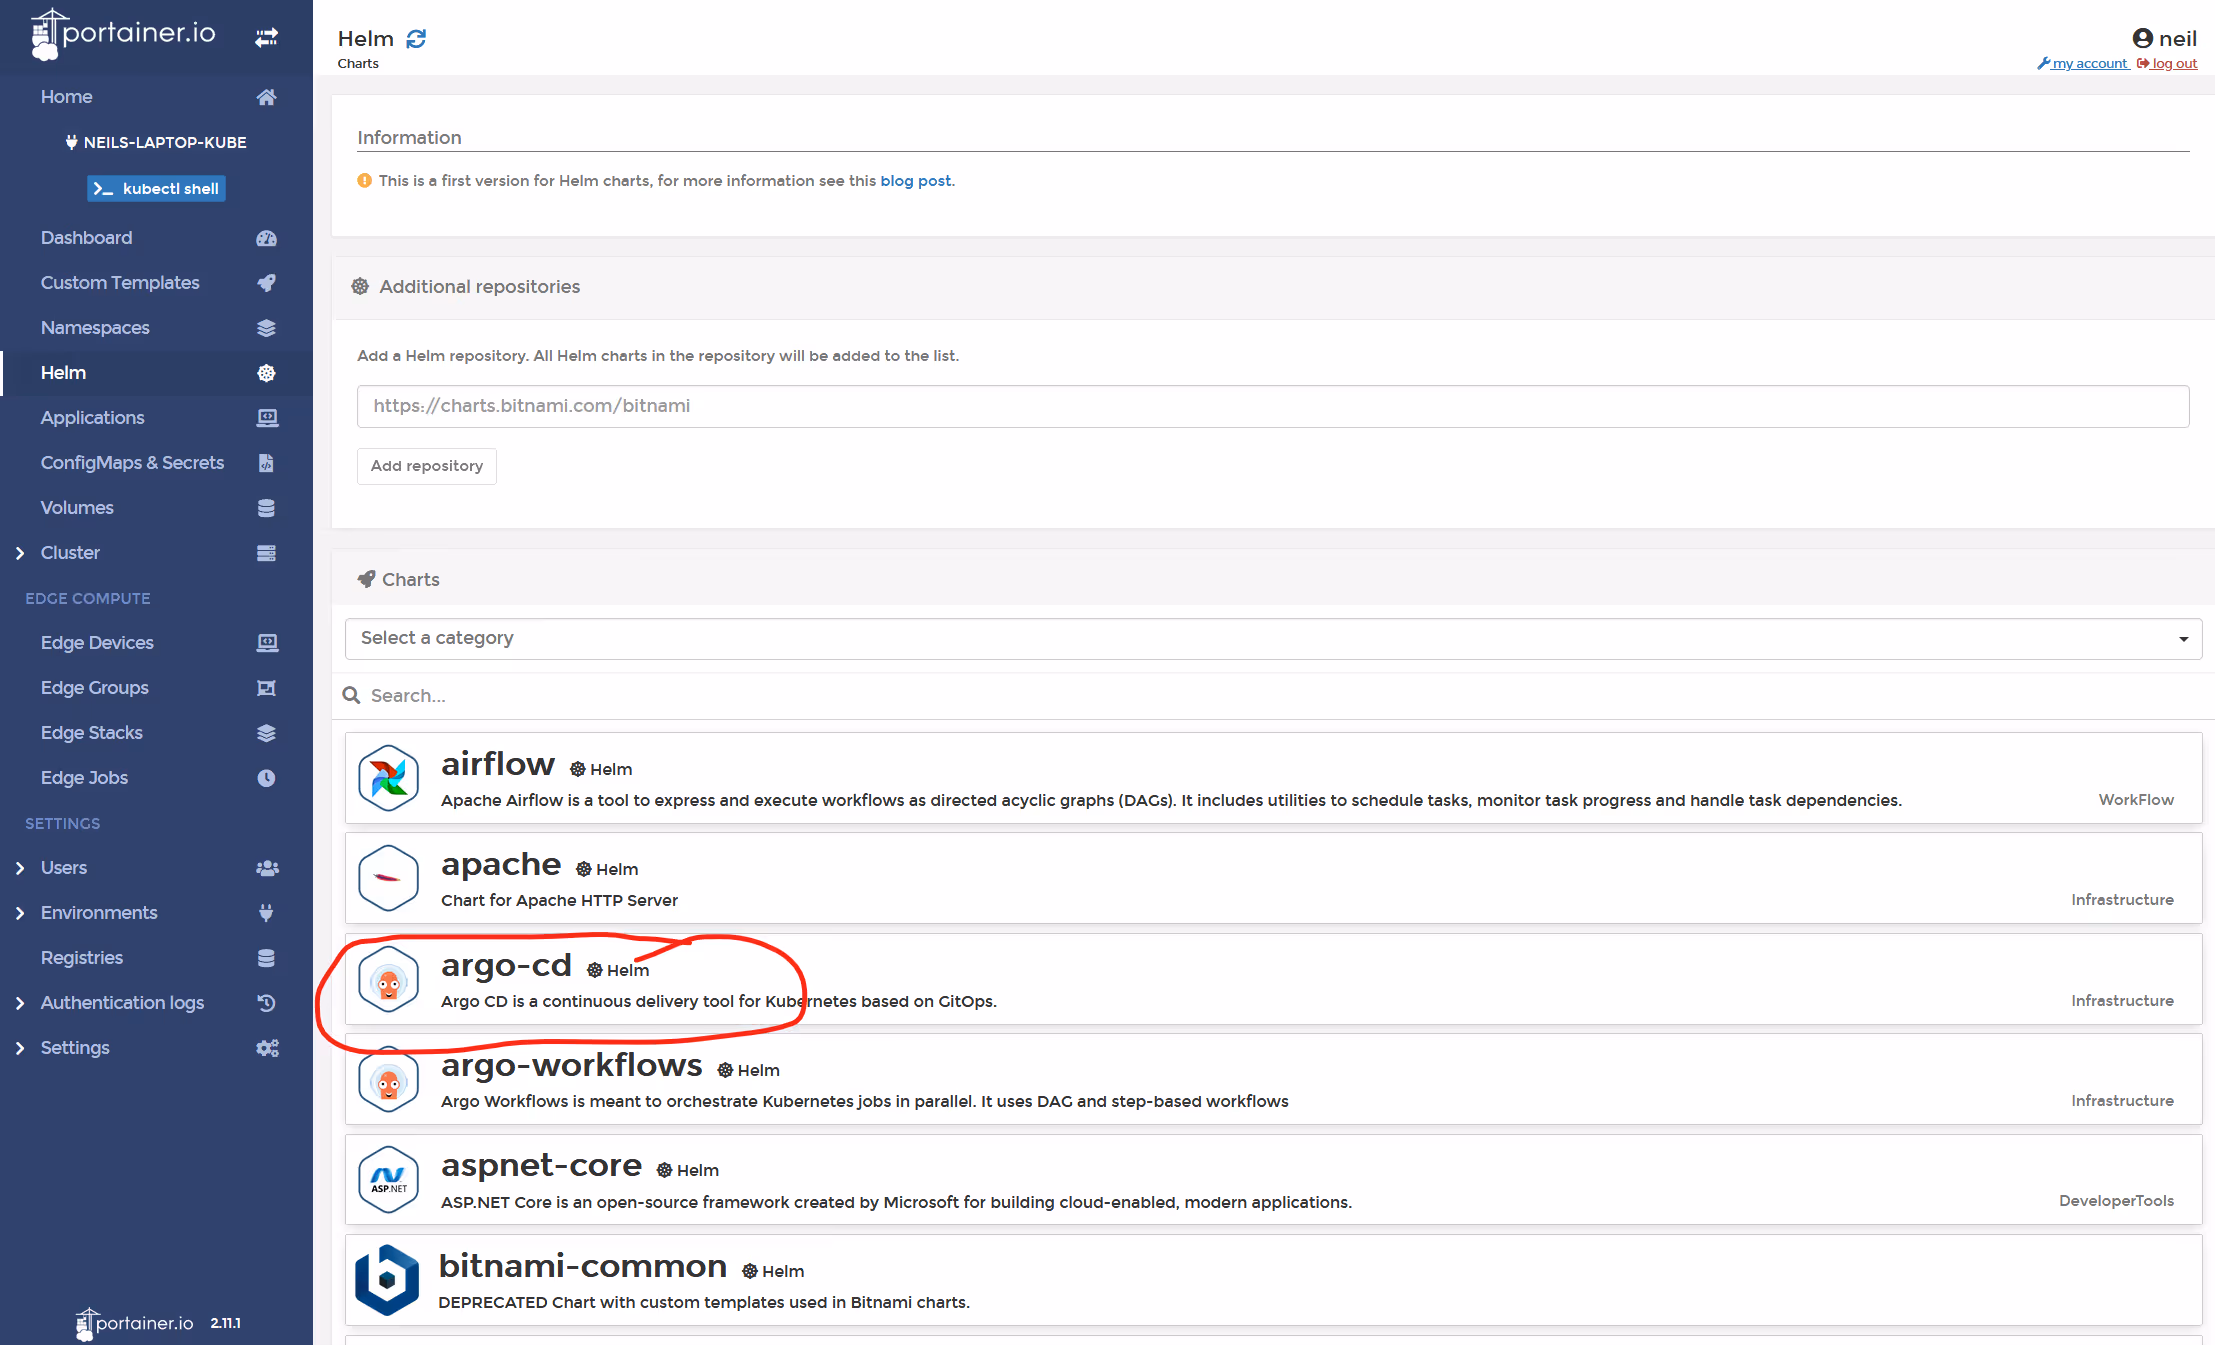
Now, click on "HELM", and then "Argo-CD"
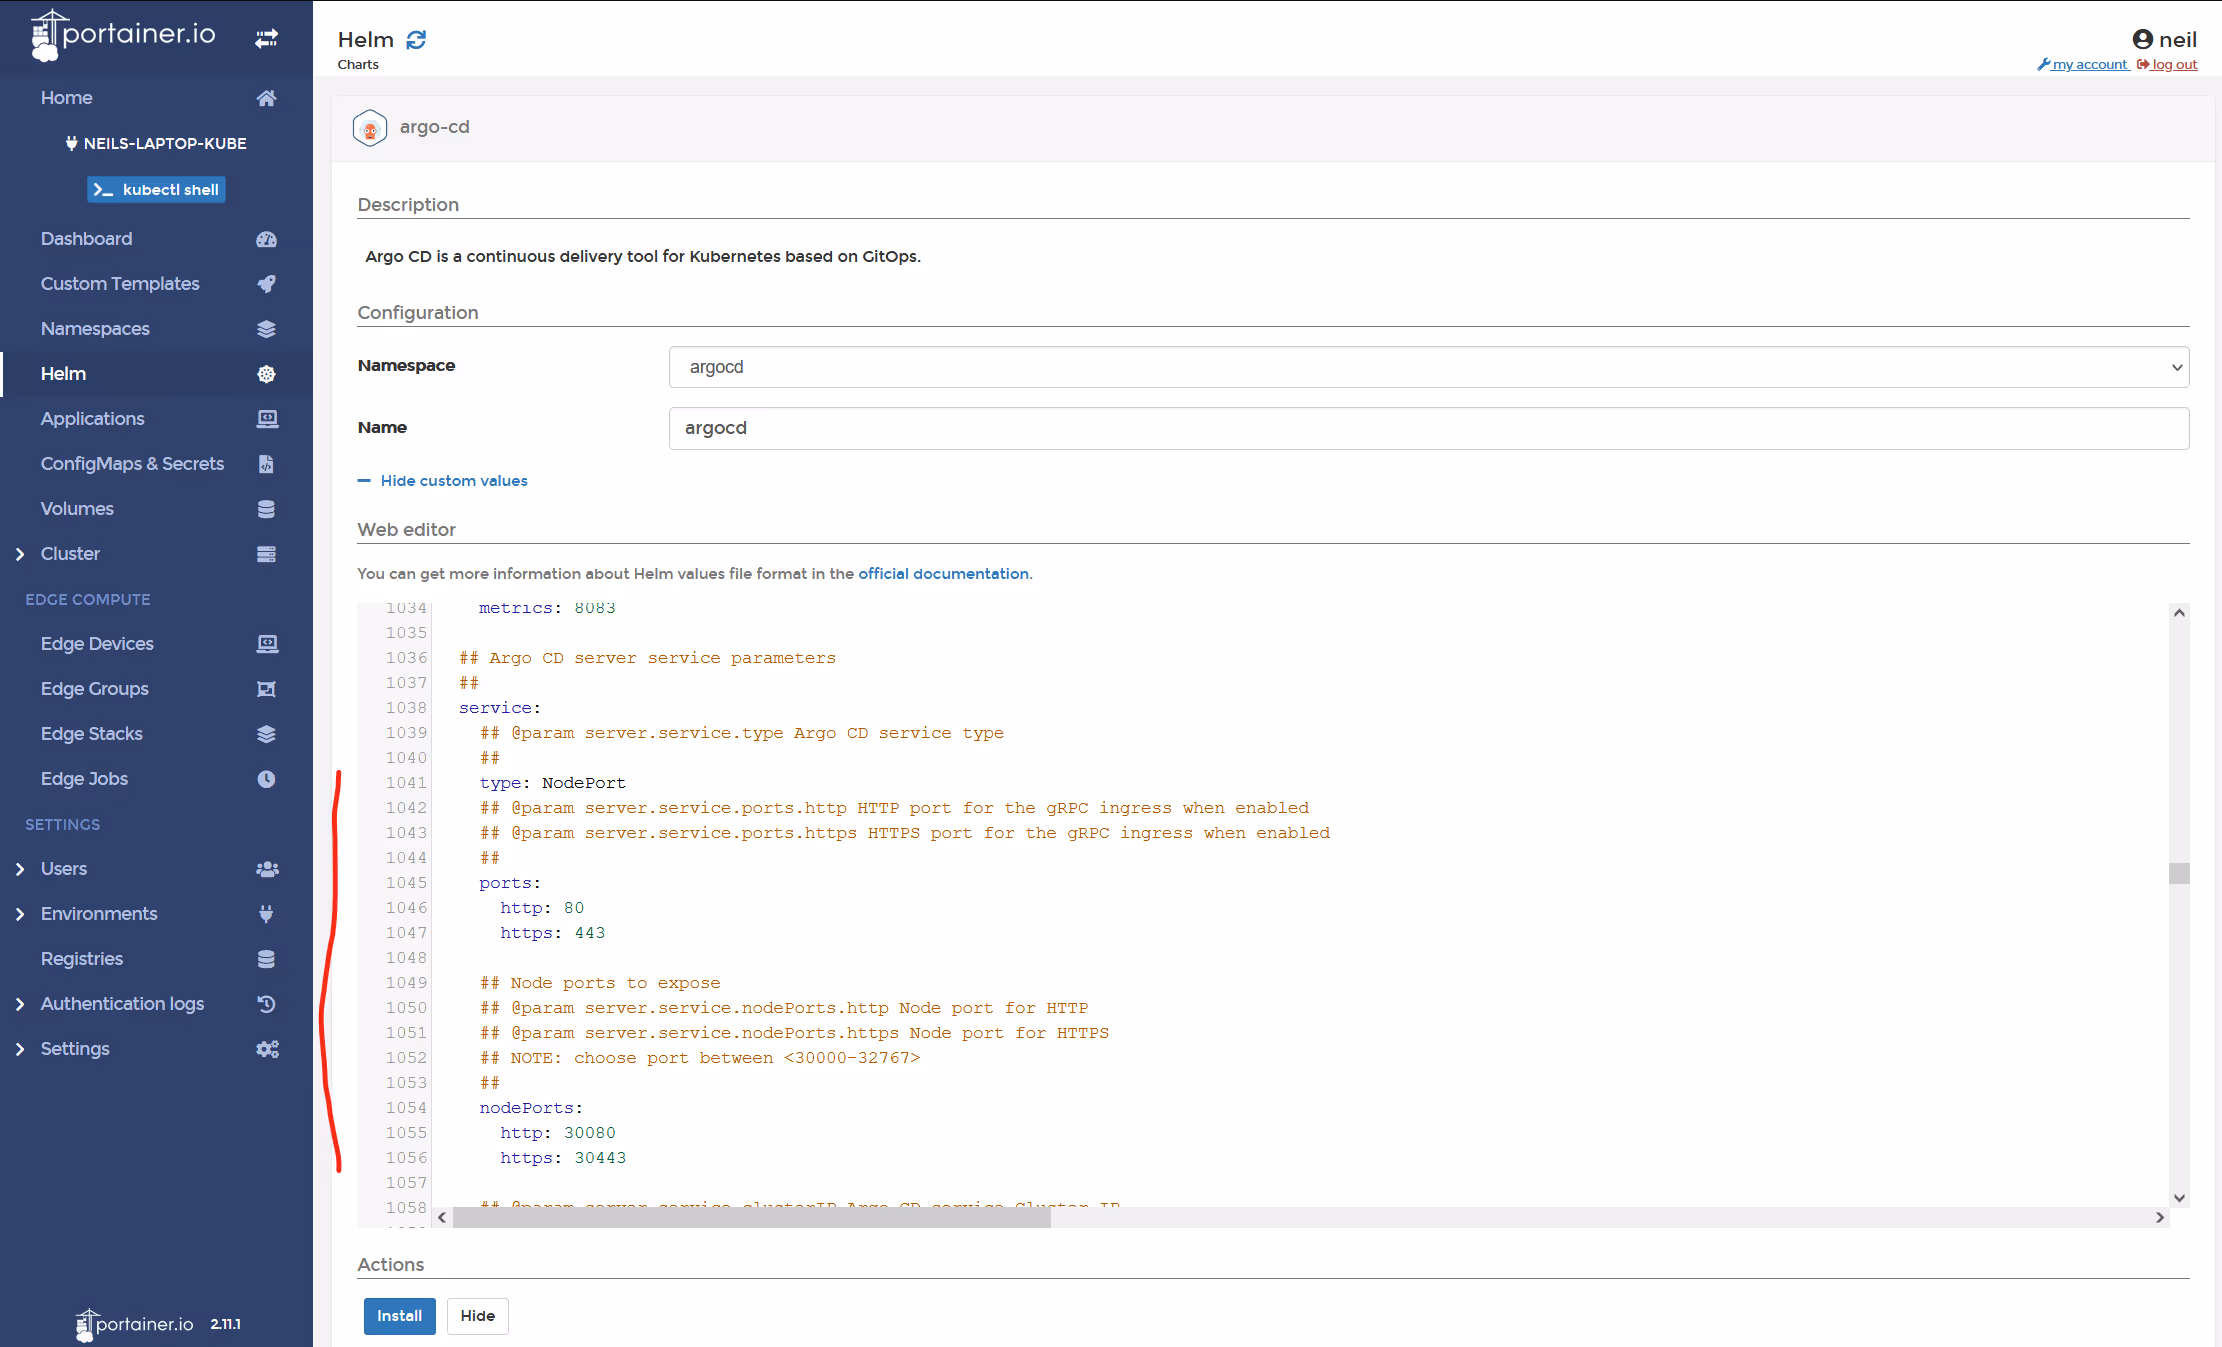
Select the "argocd" namespace, and give the deployment a name, argocd, then click the "show custom values".
In the web editor, scroll to lines 1041 and change the service type to NodePort, then on lines 1046/1047 and replace the " " with two free nodeports in your system. I used 30080 and 30443 (dont forget to remove the speechmarks), then click "Install"
Switch to "Applications" view, and wait for all 5 components go green.

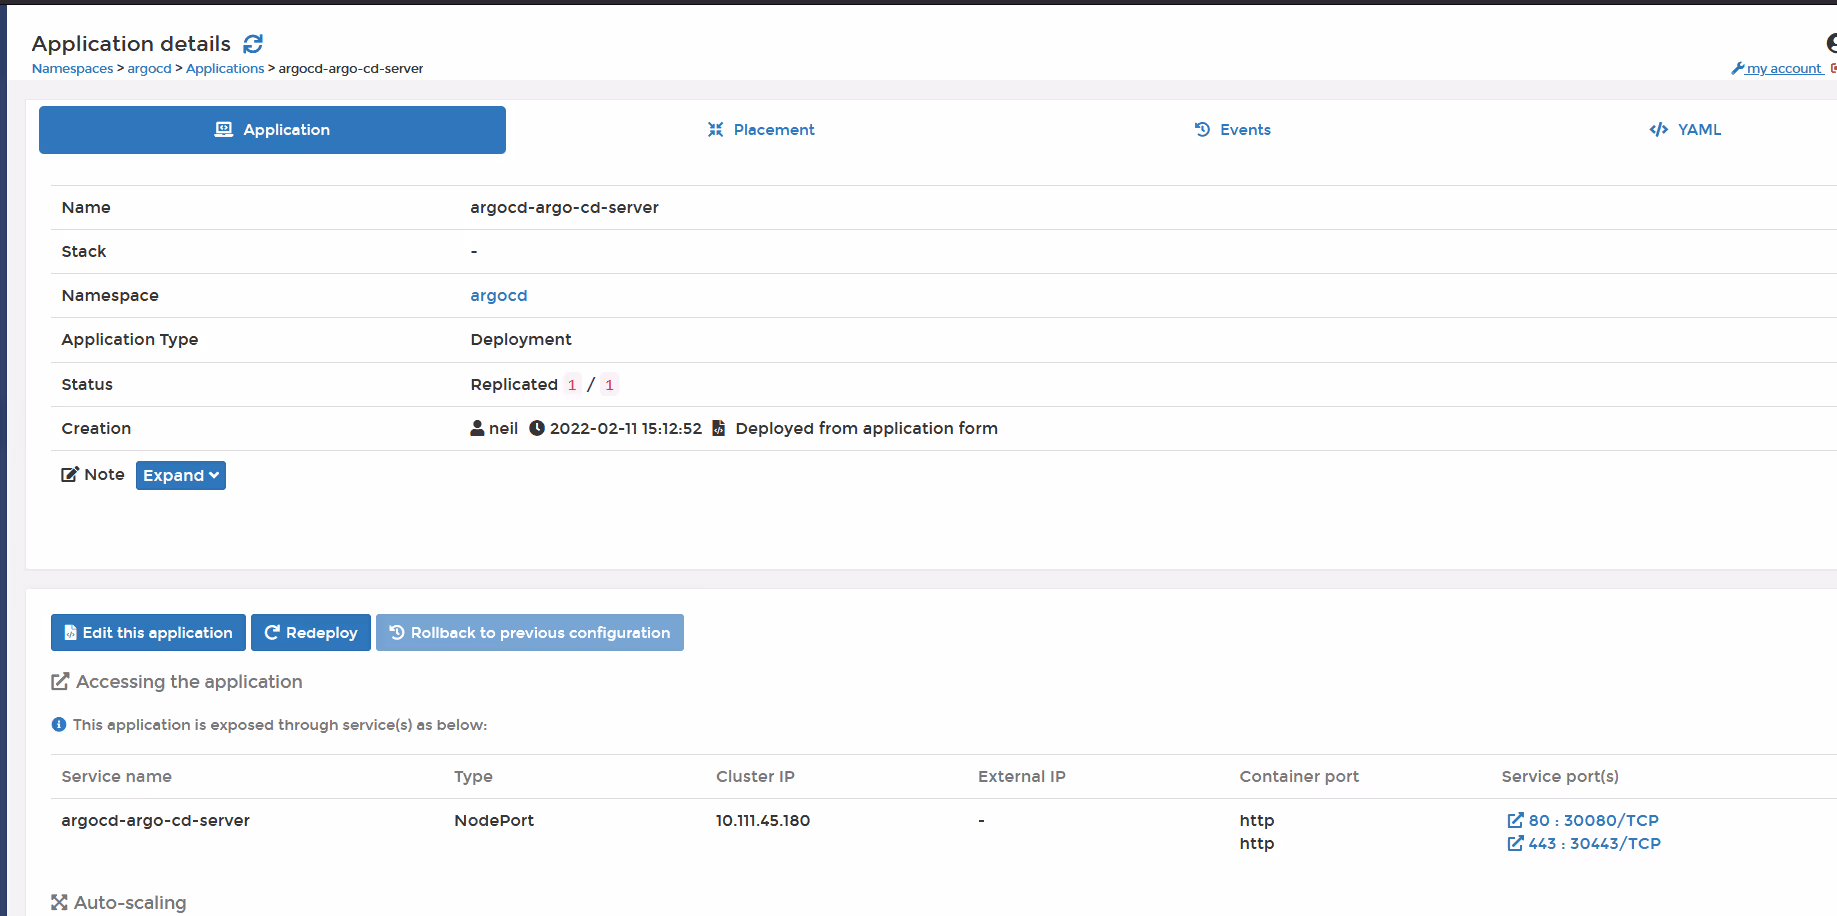
Click on the "argocd-argo-cd-server" component and see the 2x NodePorts you assigned.
Now let's open the ArgoCD UI. In my case, its https://localhost:30443

Ah, but what's the username and password? Well that was auto-generated by ArgoCD at install time, so let's retrieve it.
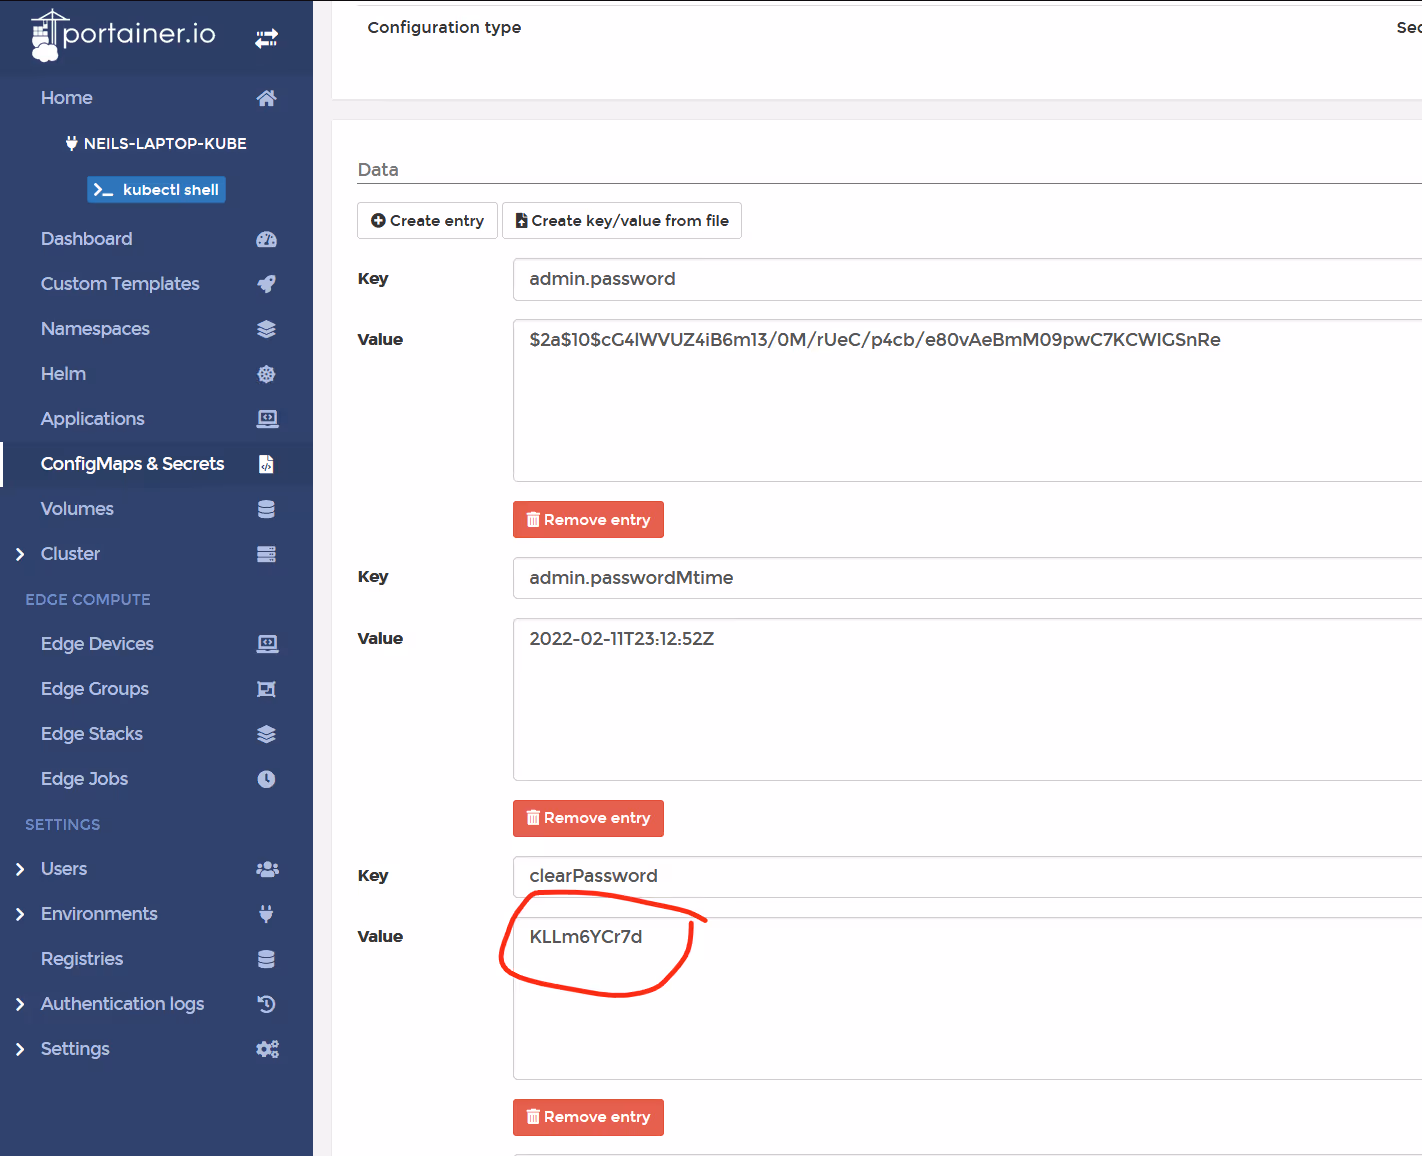
Go back to Portainer, and click on ConfigMaps&Secrets. Click on the secret called "argocd-secret". Look for "clearPassword". Copy the value, as that's the password for the "admin" user.
Now, login to ArgoCD UI as admin, with that password.
ArgoCD is now installed, and ready to be used. You can use this instance to deploy applications on this local cluster. Here's how:
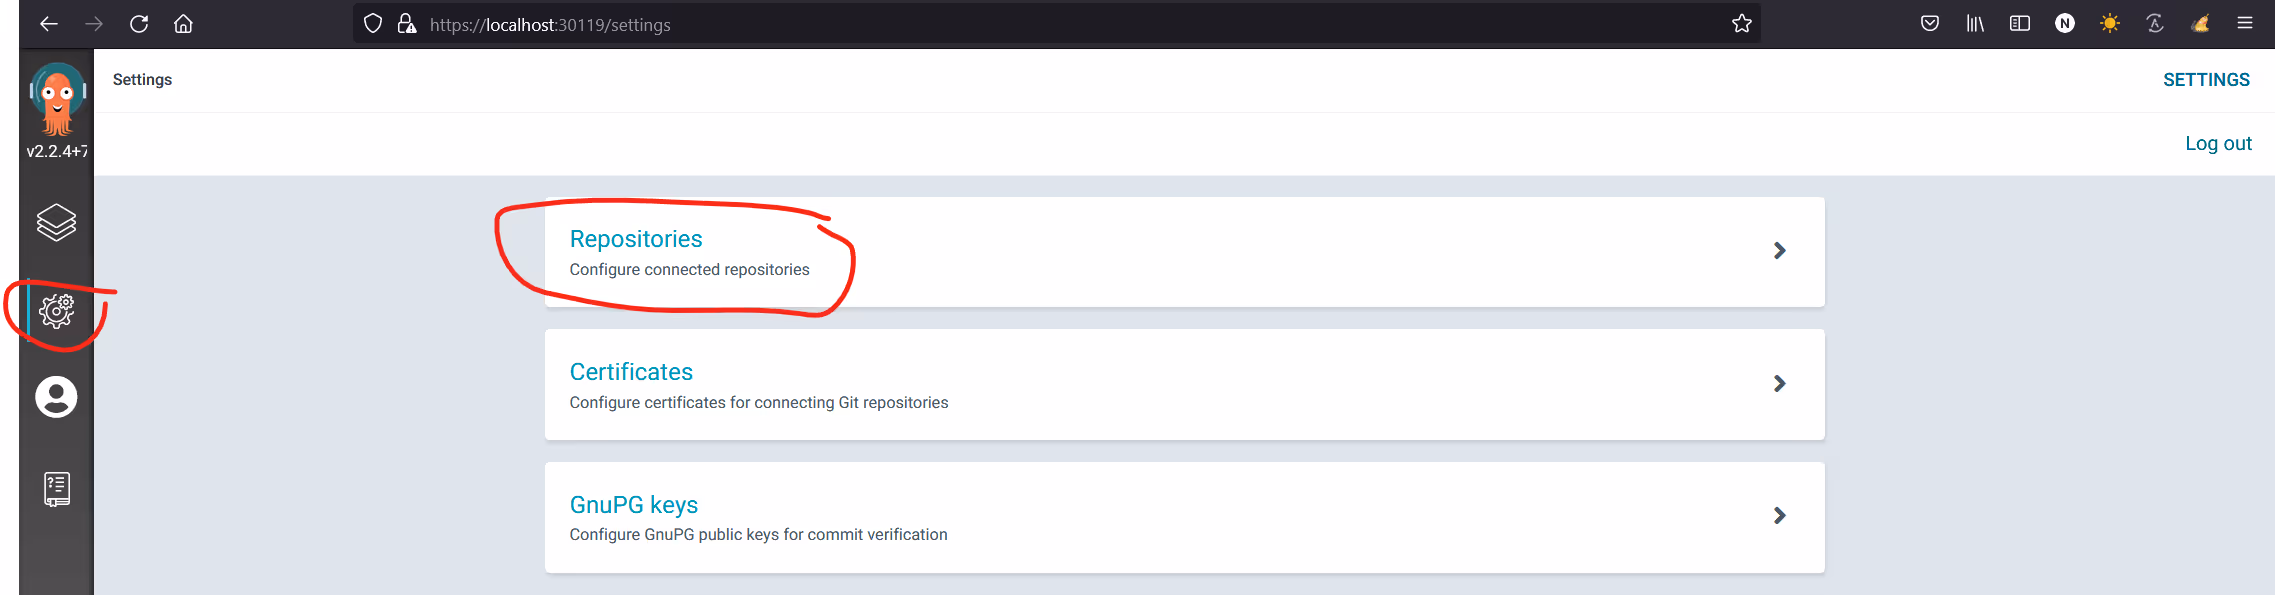
Click on Settings and then Repositories.
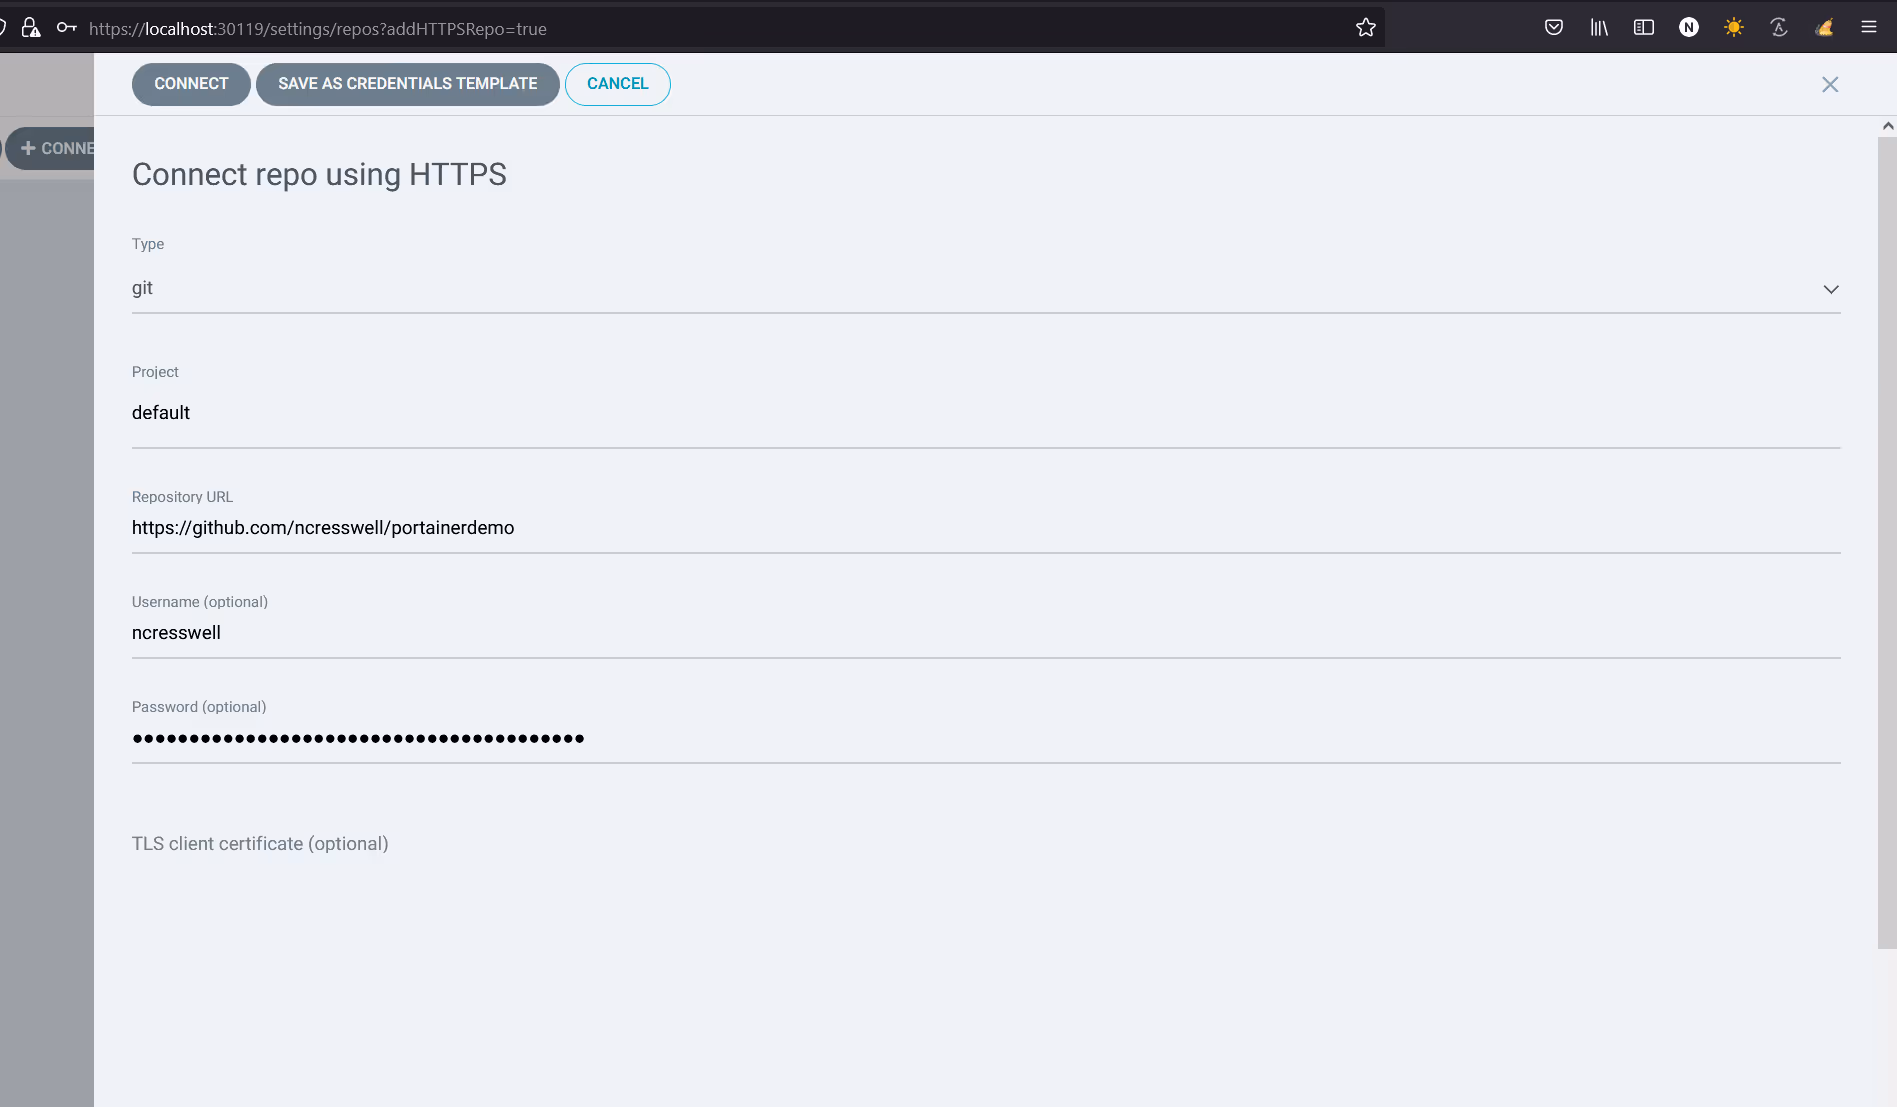
Add credentials for your Git repo. In my case, I am connecting to a repo using https. Click "Connect"
Make sure your repo has connected successfully.

Now that's done, you can deploy your first gitops app. Click on Apps, then "Create Application" and fill in the details for your Git repo.
Give your app a name, select the default project (unless you are using custom projects). Select "prune resources" and "self heal" if you want Kubernetes to ALWAYS reflect the settings you have for your app in Git.
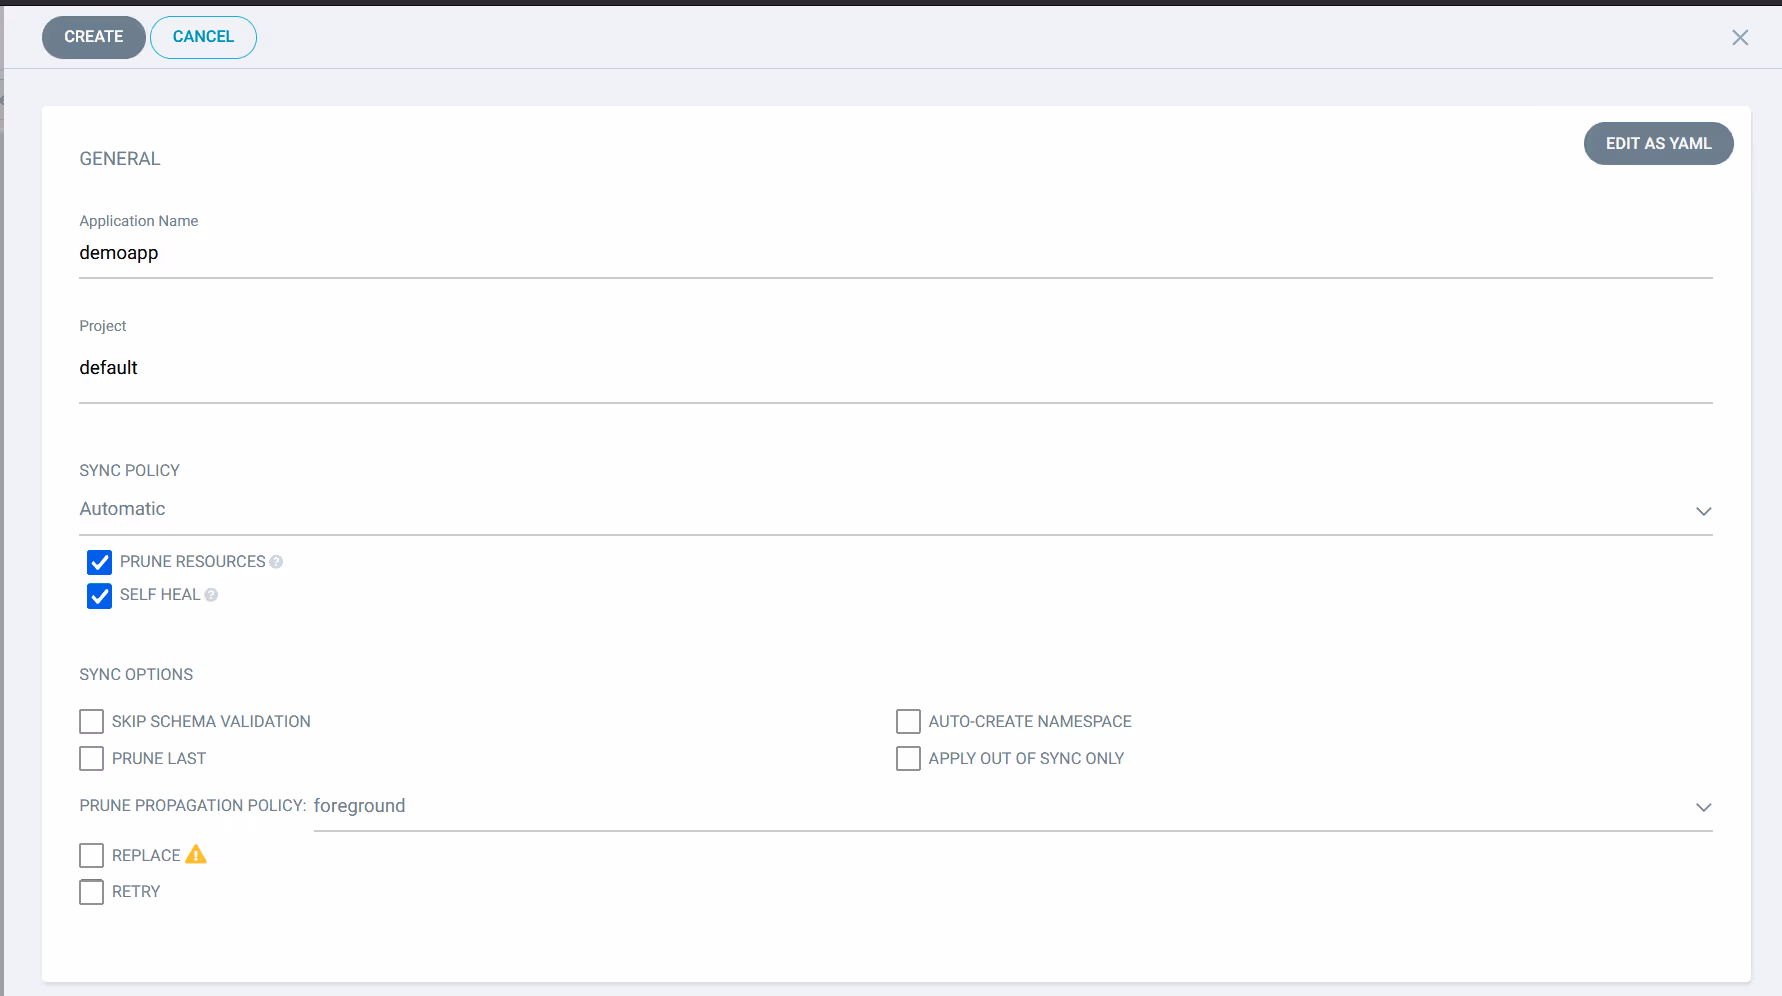
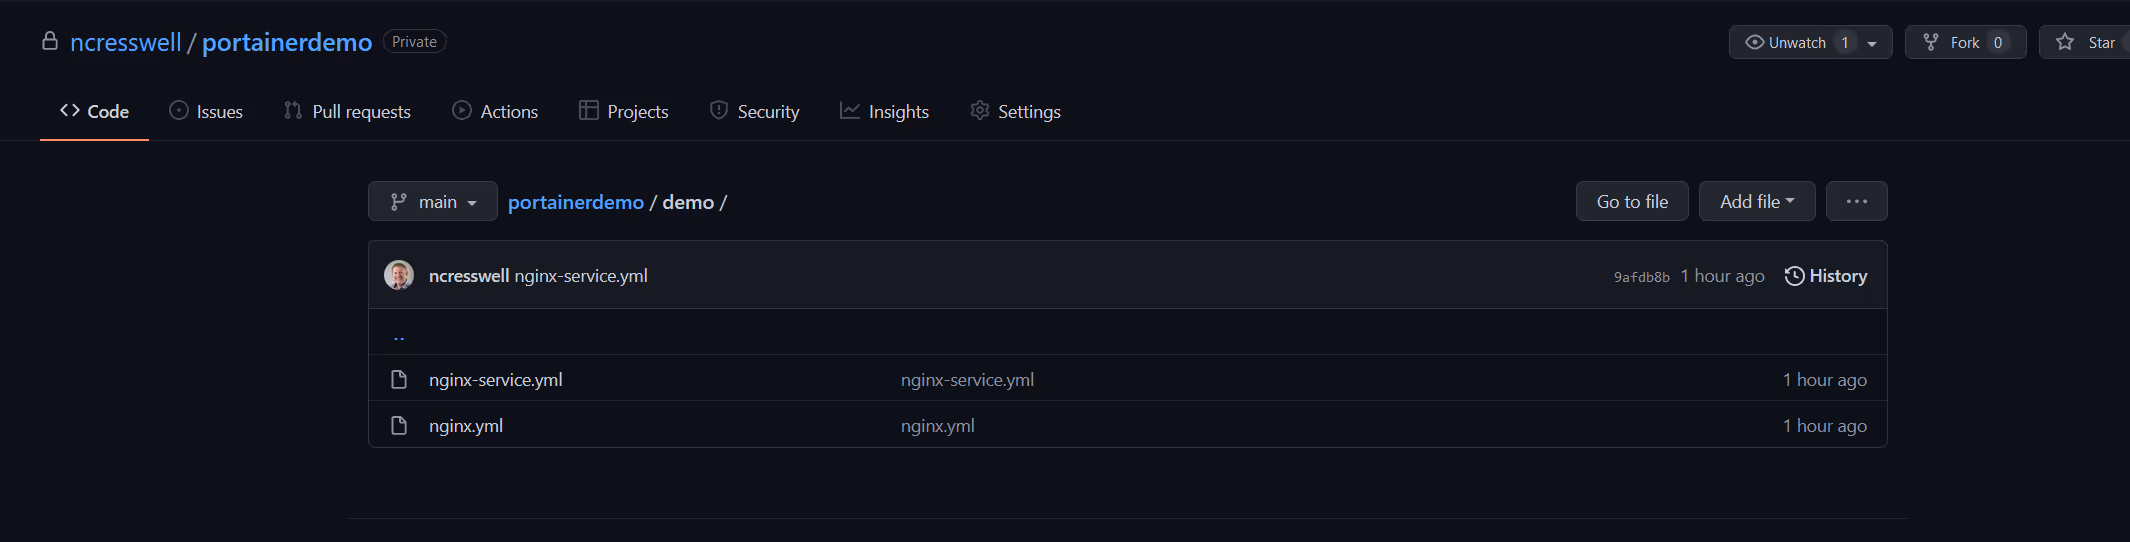
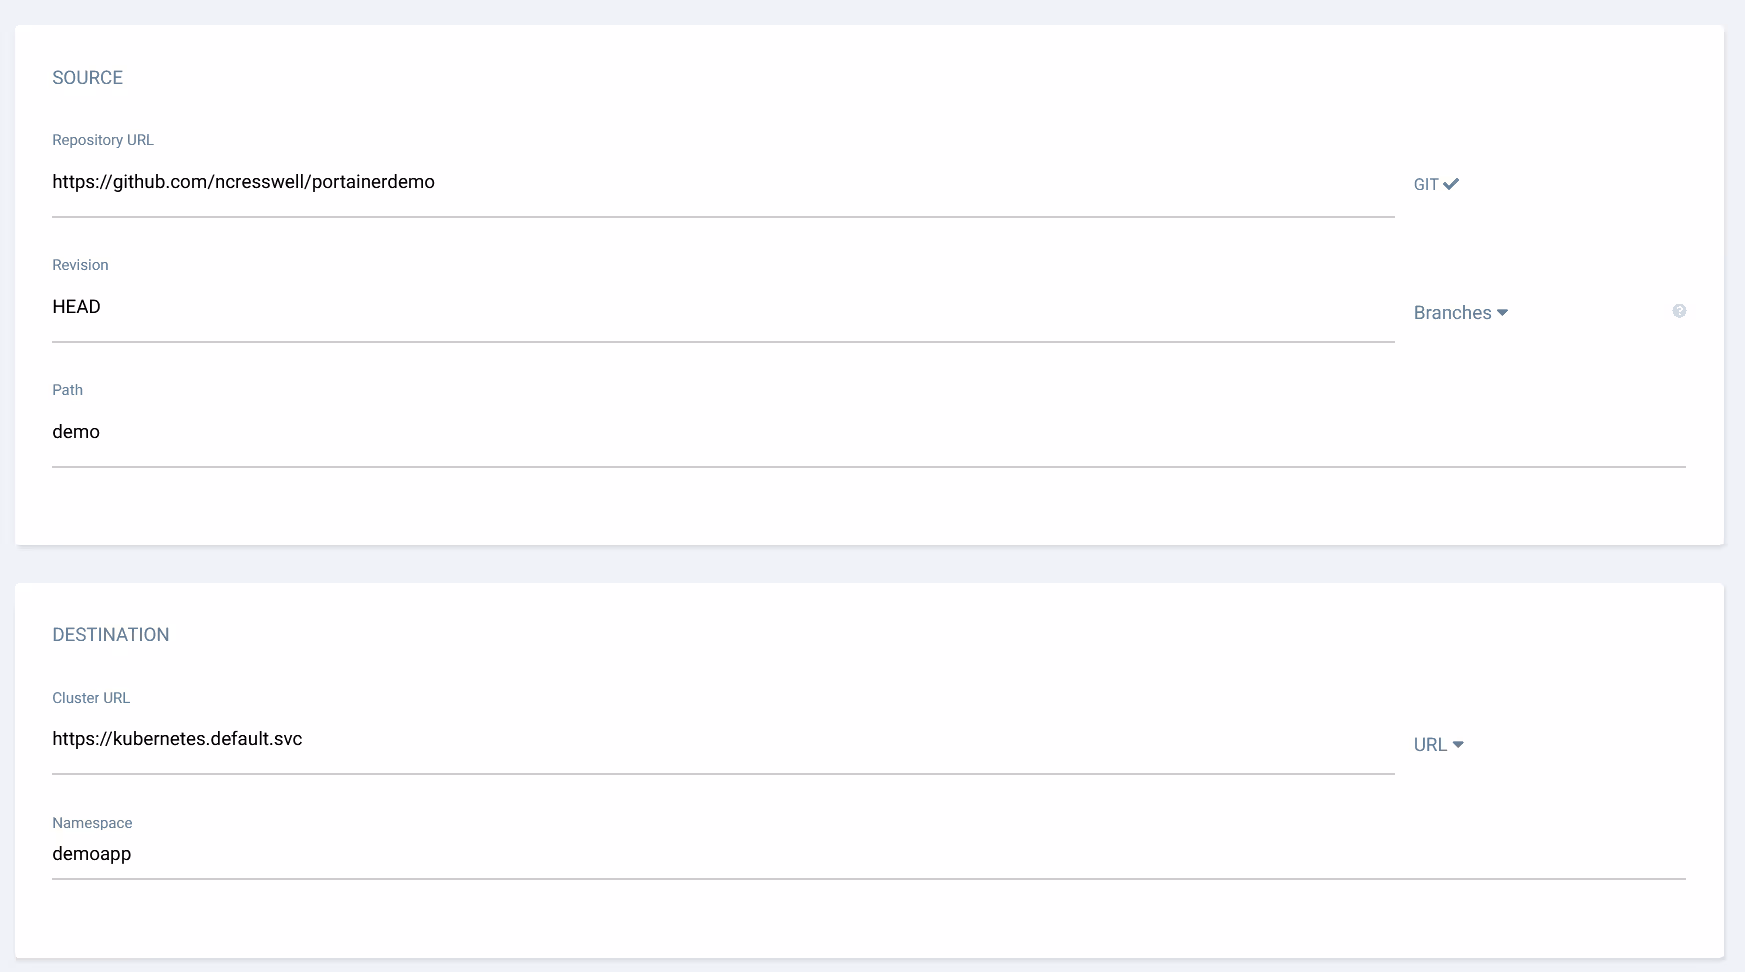
Now select the repository URL you defined previously, set the branch revision from git (in my case, its just HEAD), and set the path to the manifest files (in my case, demo).
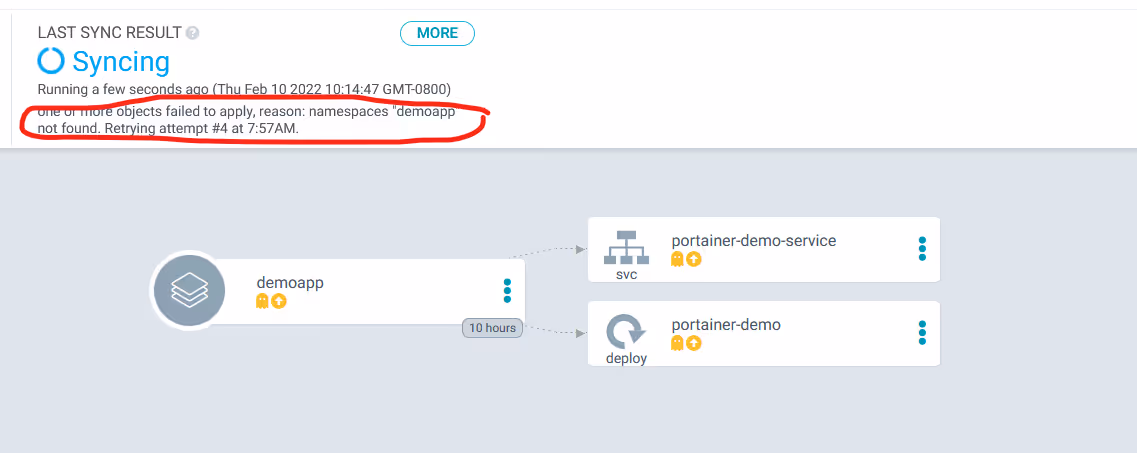
Set your destination cluster (we only have the local one defined at the moment), then select the target namespace. Note the namespace needs to exist first, else Argo will fail.
In my case, I selected a namespace that doesn't exist, and this is what you see in Argo UI.
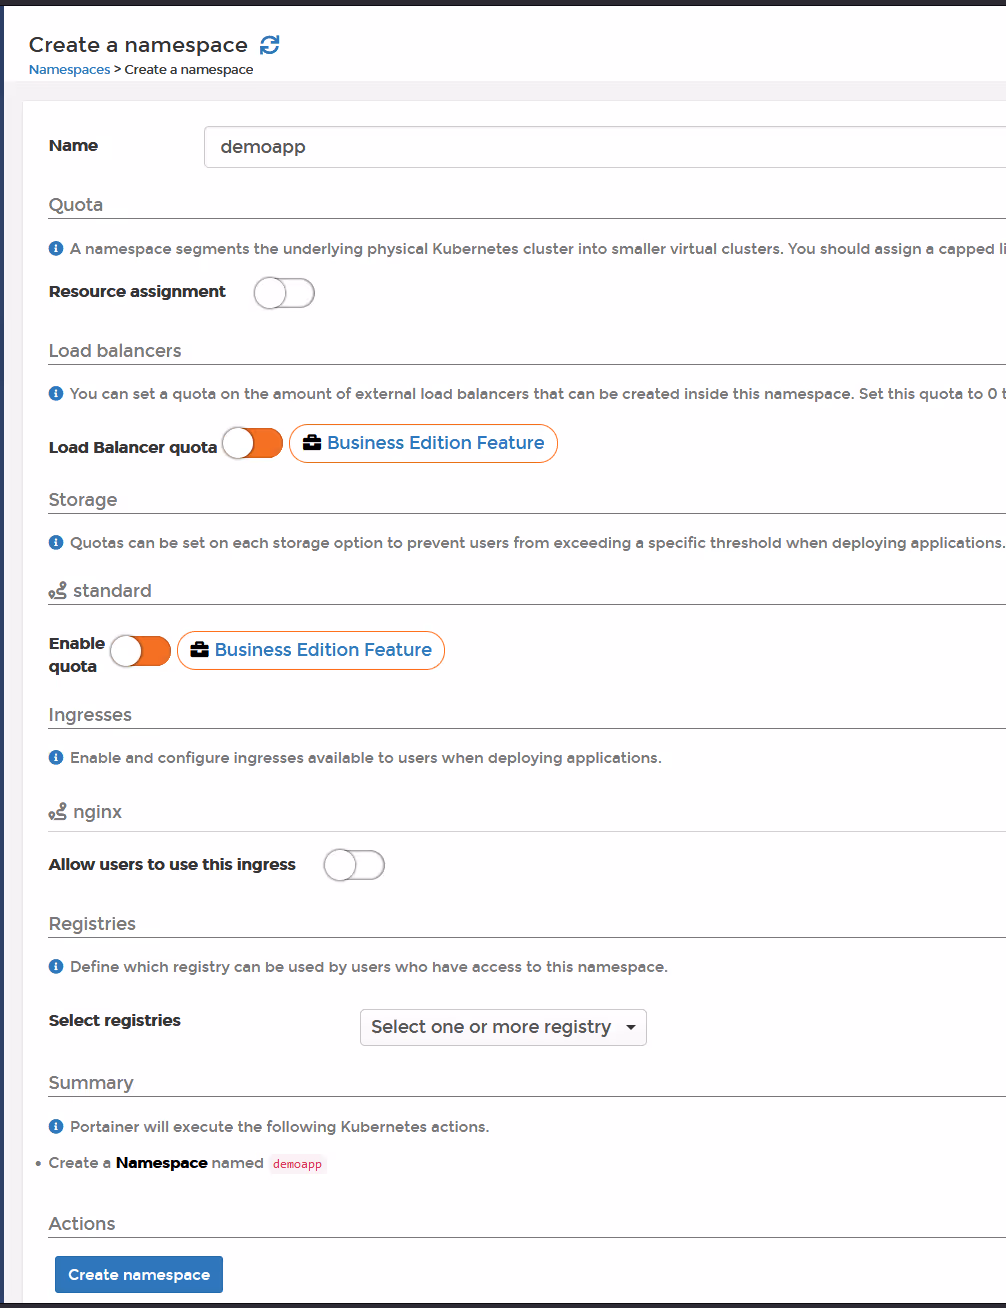
So let's go back into Portainer and create the namespace.
Click on "Namespaces", then click "Add namespace from form"
Name it demoapp (as used in your Argo deployment),disable resource assignment, and then click create.
Go back into Argo UI, click Applications, find your app, and click "Refresh"
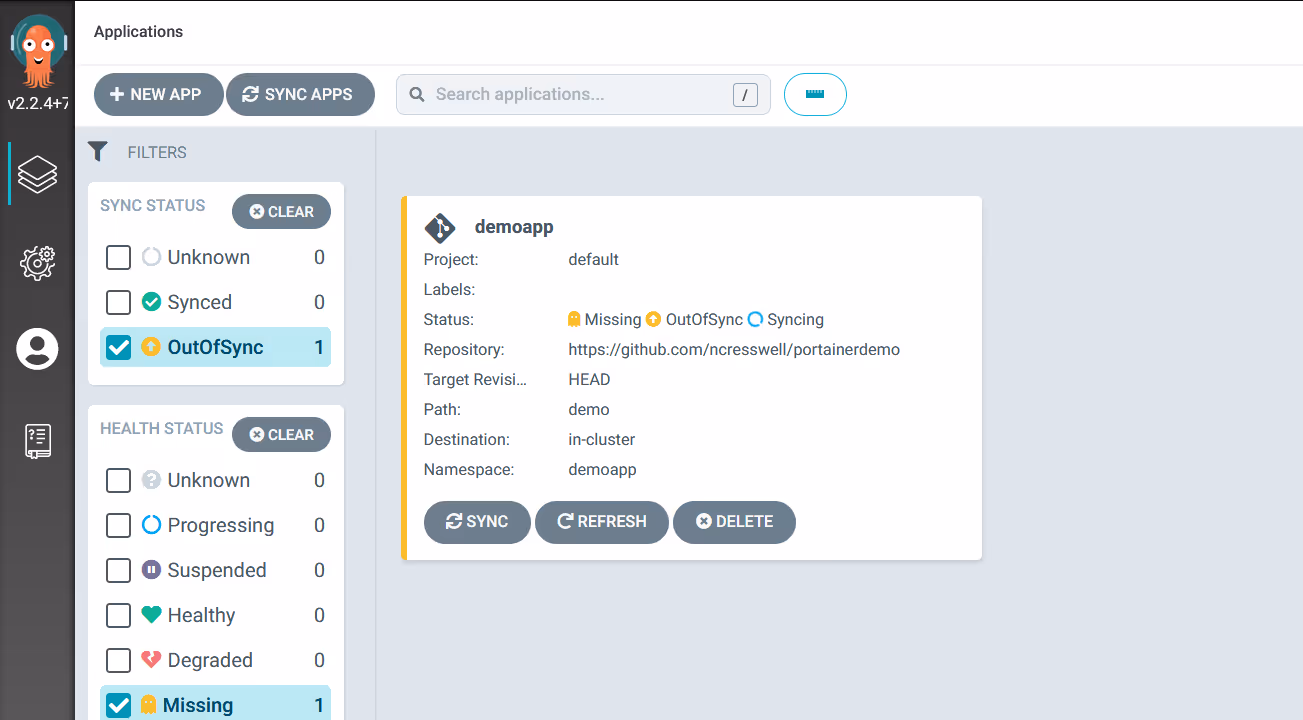
See that it now switches to "Healthy" and "Synced"

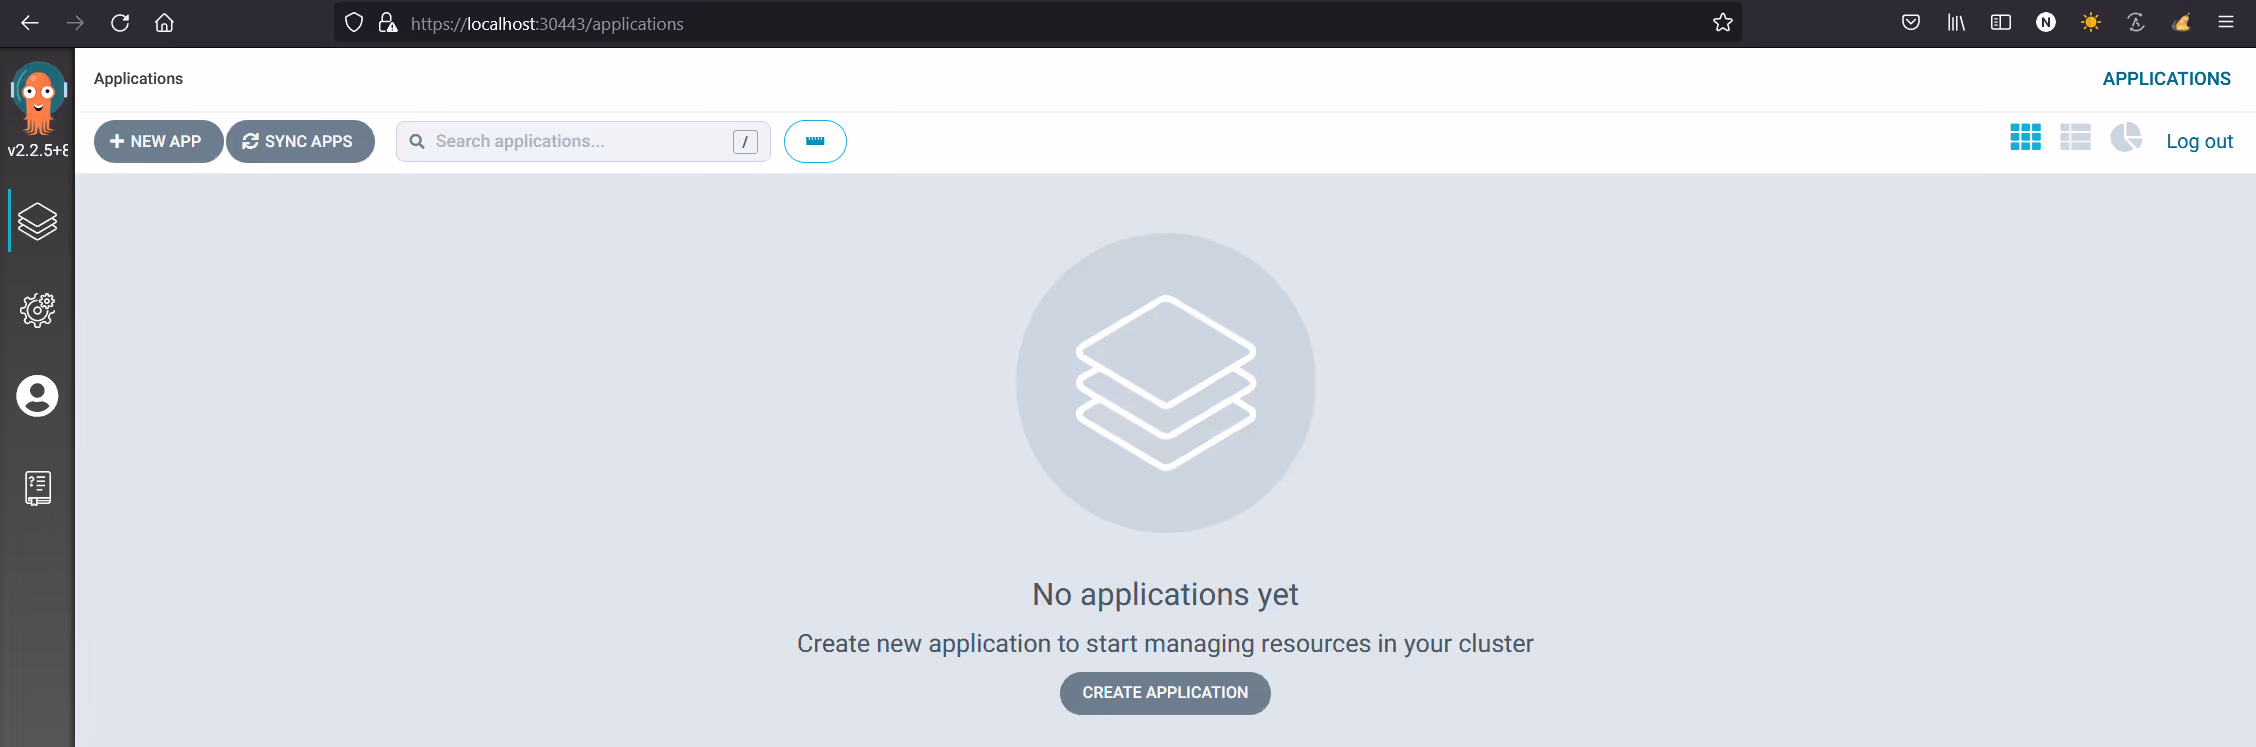
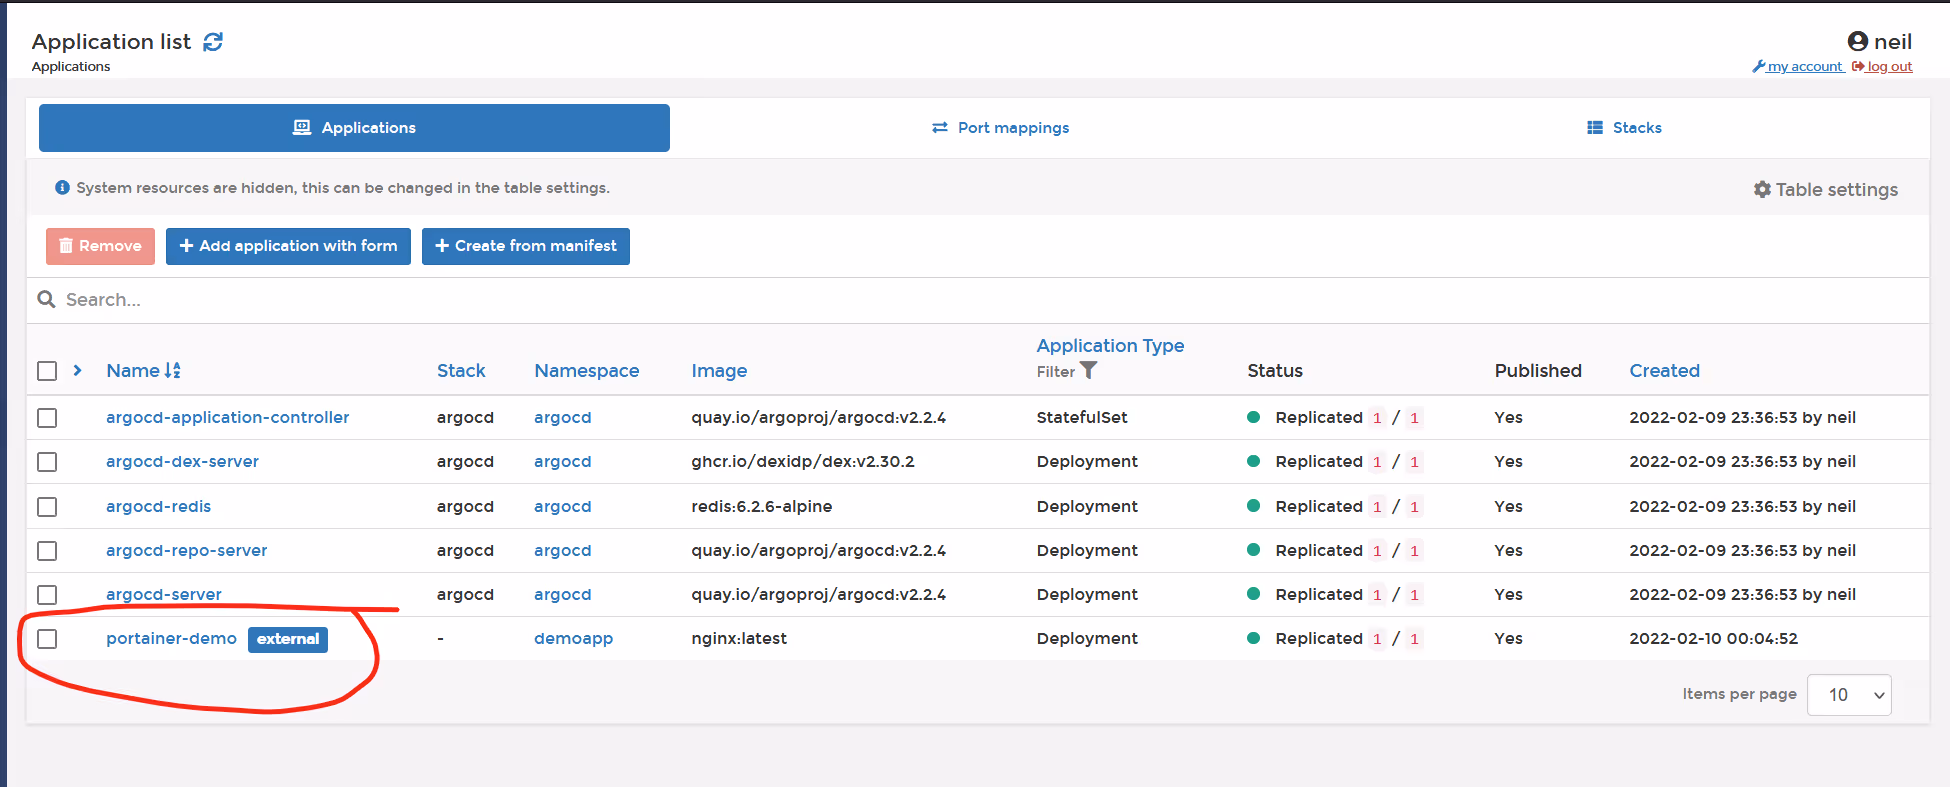
Back in Portainer, click on Applications, and see the app is deployed and running.
Now, go into Git, edit your deployment file, and then wait for the change to propagate. In my case, I will increase replicas to 2.

in a few minutes, Portainer will reflect 2 replicas.

This is how you use Portainer and ArgoCD together. Easy.
In PART 2 of the blog, I will show how to add Portainer Managed Kubernetes Clusters to this ArgoCD instance.


.png)