Share this post
Kubernetes deployment problems rarely announce themselves. One misconfigured YAML file, one missing resource limit, one wrong deployment strategy, and your application is down at the worst possible moment with no clear path to recovery.
If you have spent time debugging CrashLoopBackOff errors at midnight, watching pods stuck in Pending with no obvious cause, or rolling back a broken release while users complain, this guide is written for you.
Here you will find exactly how Kubernetes deployments work under the hood, which deployment strategies prevent downtime in real production environments, what actually goes wrong at scale, and the configuration practices that keep your clusters reliable before problems force you to learn them the hard way.
What are Kubernetes Deployments?
A Kubernetes Deployment is a declarative configuration that tells the cluster exactly what your application should look like and continuously enforces that state, automatically replacing failed pods, managing rolling updates, and maintaining the replica count you defined, without requiring manual intervention.
Instead of manually starting containers and tracking their state, you define the desired state in a configuration file: which container image to run, how many replicas to maintain, and how updates should roll out. Kubernetes continuously monitors the actual state of your application and reconciles any drift back to what you defined.
If a pod crashes, Kubernetes replaces it. If a node goes down, it reschedules the workload to other nodes. This matters in production because applications fail in unpredictable ways.
If you run containerized workloads at scale, deployments are the standard way to reliably manage stateless applications. A tool like Portainer makes it easier to visualize and manage these deployments without having to live entirely in the command line.
Choose your preferred pricing plan to see all your clusters in one place with Portainer.
Types of Kubernetes Deployments
Kubernetes gives you several ways to deploy applications, each suited to different risk tolerances and release requirements. Selecting the right approach often requires utilizing capable deployment automation tools to manage and switch between these strategies effectively. Here’s what each one does and when to use it:
Rolling Update Deployment
Best for: Standard application updates that require zero downtime.
Rolling updates are the default Kubernetes deployment strategy. Instead of replacing all pods at once, Kubernetes gradually swaps old pods for new ones, a few at a time.
Traffic keeps flowing throughout the process. If something breaks mid-rollout, Kubernetes stops, and you can roll back without users ever noticing an outage.
This deployment type works best for stateless applications where running two versions simultaneously for a short window is acceptable. Most production web services use rolling updates as their baseline strategy.
Recreate Deployment
Best for: Applications that cannot tolerate multiple versions running simultaneously, typically internal tools or batch processing workloads where brief downtime is acceptable.
With the Recreate strategy, Kubernetes stops all existing pods before spinning up the new version. There is a gap between shutdown and startup, meaning downtime is guaranteed.
This may not be the best choice overall, but it makes sense in specific scenarios. If your application cannot run two versions simultaneously, such as apps with strict database schema dependencies or singleton processes, a rolling update would cause conflicts. Recreate avoids that entirely.
Blue/Green Deployment
Best for: High-stakes releases where instant rollback capability is worth the extra infrastructure cost.
Blue/Green deployments run two identical environments in parallel. The blue environment serves live traffic while the green environment runs the new version. Once the green environment passes all checks, you switch traffic over instantly.
The old environment stays alive as a fallback. If the new version has issues, switching back takes seconds rather than triggering a full rollback process.
The tradeoff is cost. Running two full environments doubles your infrastructure footprint, at least temporarily. For large-scale applications, that adds up quickly.
Canary Deployment
Best for: High-traffic applications where you need to validate new releases against real user behavior before full rollout.
Canary deployments shift a small percentage of live traffic to the new version before rolling it out to the full audience. For example, 5% of users hit the new pods while the remaining 95% stay on the current stable version.
This allows you to validate real-world behavior without exposing every user to potential bugs. If metrics look healthy, you gradually increase traffic to the new version. If something breaks, only a fraction of users are affected.
Canary deployments require more configuration than rolling updates, but the risk reduction is significant for high-traffic or business-critical applications.
Challenges of Kubernetes Deployments in Real Environments
The hard part of Kubernetes deployment is keeping your clusters running securely in production, at scale, without wasting money or exposing your infrastructure to security gaps. See some practical challenges many DevOps teams experience when deploying Kubernetes:
Misconfiguration Causes Silent Failures
Misconfiguration is the common cause of Kubernetes deployment failures in production. The problem is that Kubernetes doesn’t require you to get it right.
Pods start without CPU and memory limits defined. Containers run as root by default. RBAC roles get assigned with far more permissions than necessary because it’s faster than figuring out the right scope.
Red Hat’s 2024 Kubernetes adoption and security report found that 40% of organizations detected misconfigurations in their container or Kubernetes environments, and 26% reported failing an audit as a direct result.
The deeper issue is that misconfiguration doesn’t always show immediately. A wrong RBAC role, a missing network policy, or an unpinned image tag can sit quietly in production until something exploits it or breaks under load. The CNCF notes that default settings are rarely secure, and that Kubernetes lacks built-in identity and access management, meaning every team is responsible for building those controls from scratch.
Resource Overprovisioning Inflates Cloud Bills
Most Kubernetes clusters are running with far more capacity than they actually use, and the gap is widening, not narrowing.
According to the Cast AI 2025 Kubernetes Cost Benchmark Report, average CPU utilization across Kubernetes clusters sits at just 10%, down from 13% the year before. Memory utilization is 23%. That means roughly 90% of provisioned CPU and 77% of memory across the average production cluster is sitting idle.
The gap between provisioned and requested resources is 40% for CPUs and 57% for memory, and 99.94% of the analyzed clusters are overprovisioned.
This happens for a straightforward reason: developers prioritize availability over cost. When in doubt, they overprovision. Without automated rightsizing or continuous feedback loops, those inflated requests never get corrected.
Laurent Gil, President & Co-founder, Cast AI, captures it well. He said, “Our report spotlights that overprovisioning is still a key issue for teams manually managing Kubernetes clusters in public clouds. While not unexpected, it is still frustrating to see because it is completely avoidable using automation.”
Security Gaps Accumulate Faster Than They Get Fixed
A report found that 67% of organizations delayed or slowed application deployment to production due to container or Kubernetes security concerns. That’s more than half the industry shipping slower because they don’t trust their own cluster configurations.
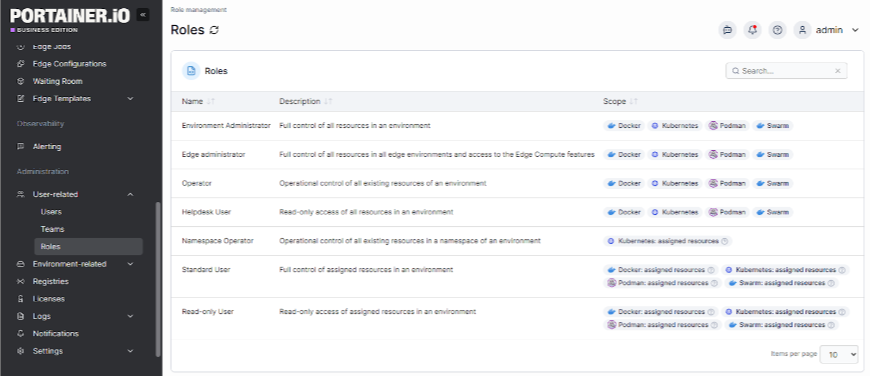
Portainer’s RBAC feature makes it straightforward to manage your access controls and apply security policies across multiple clusters from a single interface.
Book a demo to see how Portainer enforces least-privilege role-based access control across Kubernetes clusters for full auditability.
Lack of Observability Turns Incidents Into Guesswork
Kubernetes ships with no built-in observability. No dashboards. No alerting. No distributed tracing. Standard Kubernetes provides no observability features to alert you when problems occur, so memory spikes, pod evictions, and container crashes can go unnoticed unless you’ve proactively deployed a monitoring stack.
For ops teams already stretched thin, that gap is often what turns a routine memory spike into a 3 a.m. incident.
Self-Managed Control Planes Consume Engineering Time That Should Go Elsewhere
Running your own Kubernetes control plane sounds like the right call for control and flexibility. In practice, it becomes one of the heaviest ongoing operational burdens a platform engineer can take on.
One Kubernetes expert in the r/kubernetes community put it directly:
“Don’t run your own control plane unless you have to. We spent 6 months maintaining self-hosted clusters before switching to EKS. That’s 6 months of my life I won’t get back.”
Self-hosted control planes require you to manage etcd backups, API server certificates, version upgrades, high availability configuration, and failure recovery, all on top of the actual workloads you’re supposed to be running.
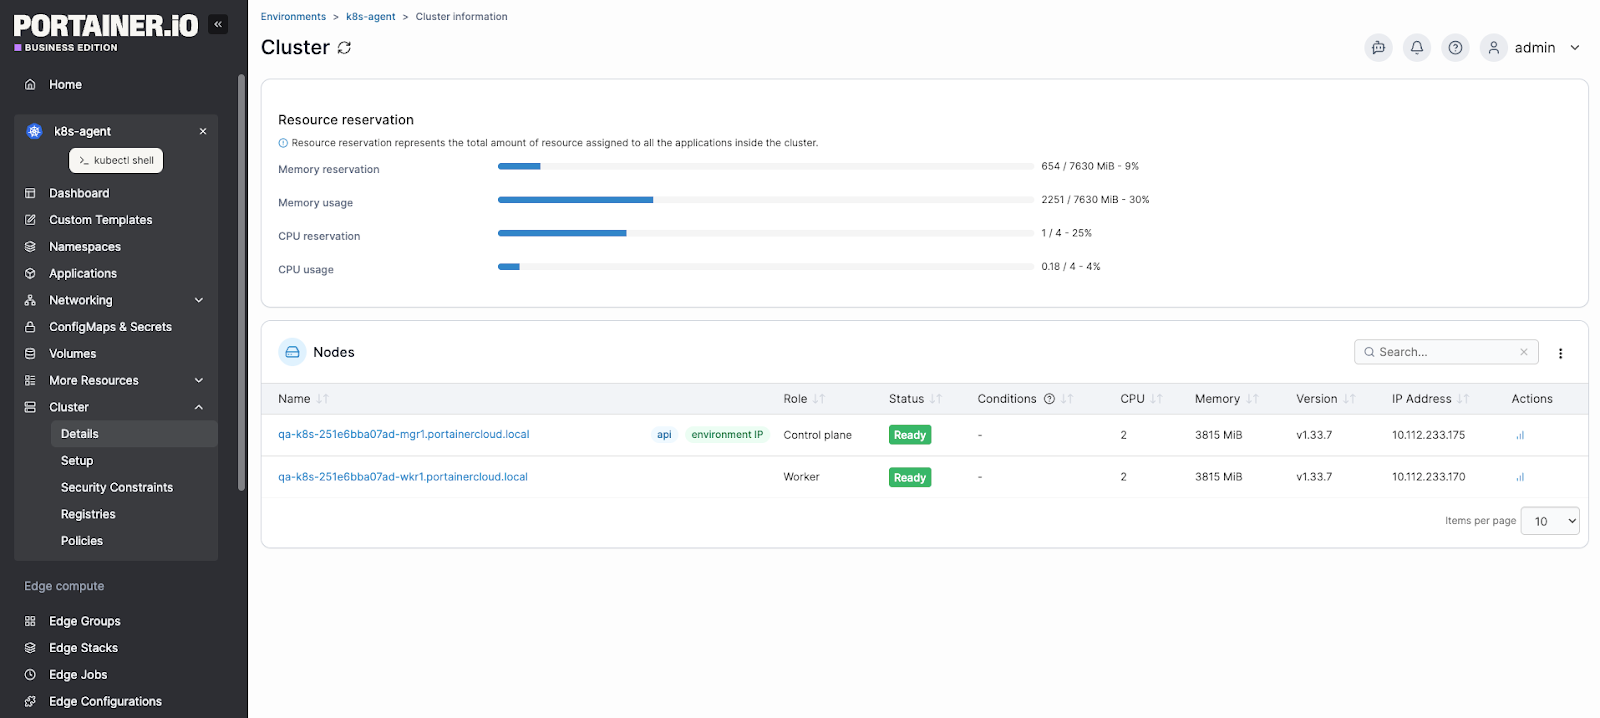
A centralized management platform like Portainer gives you a unified visibility and control layer across managed clusters so you retain operational oversight without the overhead of running disconnected tooling across environments.
Contact our technical sales team to safely deploy and manage your Kubernetes clusters without unnecessary operational risk.
How Kubernetes Deployment Works (Step-by-Step)
Here’s what Kubernetes does from the moment you apply a configuration to the moment your application serves traffic:
Step #1: Write and Apply the Deployment Manifest
Everything starts with a YAML file. The deployment manifest is where you define the desired state: the container image to run, the number of replicas, resource requests and limits, environment variables, labels, and the update strategy.
A minimal deployment manifest looks like this:
apiVersion: apps/v1
kind: Deployment
metadata:
name: my-app
spec:
replicas: 3
selector:
matchLabels:
app: my-app
template:
metadata:
labels:
app: my-app
spec:
containers:
- name: my-app
image: my-app:v1.2.0
resources:
requests:
cpu: “250m”
memory: “256Mi”
limits:
cpu: “500m”
memory: “512Mi”
Once the file is ready, you apply it with:

This command sends the configuration to the Kubernetes API server. From here, Kubernetes takes over.
Step #2: The API Server Validates and Stores the Desired State
The API server is the entry point for all cluster operations. When it receives your manifest, it first validates the configuration against the cluster’s admission controllers, checking for schema errors, policy violations, and missing required fields.
If validation passes, the desired state gets written to etcd, the cluster’s distributed key-value store. Etcd is the source of truth for everything Kubernetes knows about your cluster. From this point forward, the cluster’s job is to reconcile reality with what etcd says should exist.
If the manifest fails validation, Kubernetes returns an error before any workload changes are made. This is where tools like Kyverno or OPA Gatekeeper add value: they enforce organizational policies at this exact stage, blocking non-compliant deployments before they ever reach etcd.
Step #3: The Controller Manager Creates a ReplicaSet
Once the desired state is in etcd, the Deployment Controller inside the Controller Manager picks it up. It creates a ReplicaSet, which is the object responsible for maintaining the correct number of pod replicas at any given time.
The ReplicaSet watches for drift. If a pod crashes, the ReplicaSet detects that the actual pod count no longer matches the desired count and immediately creates a replacement. If you scale the deployment up or down, the ReplicaSet adjusts accordingly.
When you push a new version of your application, Kubernetes creates a new ReplicaSet for the updated pods while keeping the old ReplicaSet around. This is what enables rollbacks: the old ReplicaSet still exists with its configuration intact, so reverting is a matter of scaling it back up rather than rebuilding from scratch.
Step #4: The Scheduler Assigns Pods to Nodes
With the ReplicaSet created, Kubernetes generates pod specifications but doesn’t place them on nodes yet. The Scheduler handles this. It evaluates every available node against a set of criteria:
- Does the node have enough CPU and memory to satisfy the pod's resource requests?
- Do any node affinity or anti-affinity rules apply?
- Are there taints on the node that the pod doesn't tolerate?
- Are there topology spread constraints that affect placement?
The scheduler picks the most suitable node for each pod and writes that assignment back to etcd. If no node meets the requirements, the pod stays Pending until capacity becomes available or you intervene.
{{article-pro-tip}}
Step #5: The Kubelet Pulls the Image and Starts the Container
Once a pod is assigned to a node, the kubelet on that node takes over. It reads the pod specification and instructs the container runtime (typically containerd) to pull the specified image from the registry.
After pulling the image, the container runtime starts the container. The kubelet then begins monitoring it. If you’ve configured liveness and readiness probes, the kubelet runs them on the schedule you defined:
- Liveness probes determine whether the container is alive. A failing liveness probe triggers a restart.
- Readiness probes determine whether the container is ready to receive traffic. A pod that fails its readiness probe gets removed from the service's endpoint list until it recovers.
Skipping probes is one of the most common configuration mistakes in production. Without them, Kubernetes sends traffic to pods that are still initializing or already broken.
Step #6: The Service Routes Traffic to Healthy Pods
A deployment on its own doesn’t expose your application to traffic. A Service object sits in front of the pods and handles routing. It uses label selectors to identify which pods belong to it and distributes traffic across all pods that pass their readiness probes.
Kubernetes dynamically updates the service’s endpoint list. When a new pod becomes ready, it’s added. When a pod fails its readiness probe or gets terminated during a rolling update, it’s removed. This is how Kubernetes achieves zero-downtime deployments: traffic only flows to pods that are confirmed healthy.

For external access, you’d use a LoadBalancer service type or an Ingress controller, depending on your setup.
Step #7: Kubernetes Continuously Reconciles the Desired State
Deployment isn’t a one-time event. After your application is running, Kubernetes continuously compares the cluster’s actual state with the desired state stored in etcd. This reconciliation loop runs constantly.
If a pod crashes, Kubernetes replaces it. If a node goes down, Kubernetes reschedules its pods onto healthy nodes. If someone manually deletes a pod, Kubernetes creates a new one.
This self-healing behavior is what makes Kubernetes reliable in production, but it also means that changes made directly to pods (rather than through the deployment manifest) get overwritten.
{{article-cta}}
Kubernetes Deployments Best Practices & Solutions
These practices address the gaps that consistently show up in real production environments:
Use a Management Layer That Gives You Full Visibility Across Clusters
Raw kubectl works fine for a single cluster. Once you’re managing multiple clusters across environments, it becomes a liability.
Portainer bridges that gap by consolidating every cluster, workload, and deployment configuration into a single interface, without stripping away the control you need in production.
You can inspect deployments, manage resource configurations, apply updates, and monitor workload health without writing a single kubectl command.
Interestingly, if you have spent months maintaining self-hosted infrastructure before switching to managed services, Portainer adds the management layer that makes the transition even smoother. It sits on top of your existing Kubernetes setup, whether that’s EKS, GKE, AKS, or self-hosted, and removes the operational overhead of managing clusters through disconnected tooling.
Book a Portainer demo to see how it fits into your deployment workflow.
Treat GitOps as Infrastructure, Not a Nice-to-Have
A Redditor described resisting ArgoCD for a year because “kubectl apply works fine,” until they lost track of what was deployed across environments. That experience is common, and it’s avoidable.
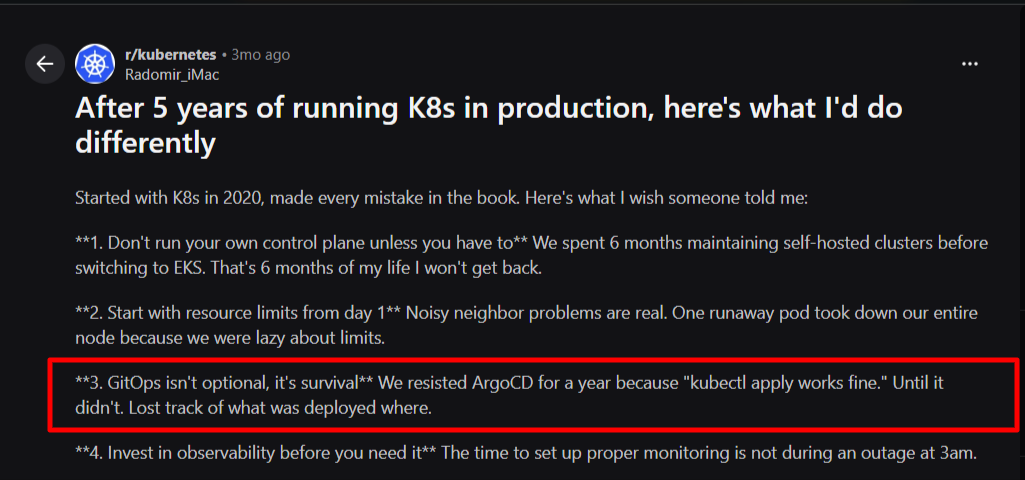
Source: Reddit
With GitOps, your Git repository becomes the single source of truth for cluster state.
Further Reading: CI/CD vs CI + GitOps: Why Kubernetes Demands a Different Deployment Model
Build Observability Before You Need It
A production-ready observability stack comprises three components that work together: metrics, logs, and traces.
Prometheus handles metric collection. Grafana visualizes them. A log aggregation tool captures pod and application logs. OpenTelemetry provides distributed tracing across microservices.
Portainer integrates with these Kubernetes monitoring stacks. It monitors your pod restart counts, memory utilization trends, and readiness probe failure rates. It also offers built-in alerting for your Kubernetes events, environment uptime, and resource usage,
Use Namespaces to Create Hard Boundaries Between Workloads
Namespaces give you the ability to apply resource quotas per workload group, scope RBAC permissions precisely, enforce network policies between services, and isolate failures so a misbehaving workload can’t affect unrelated applications.
A practical namespace structure separates by environment (prod, staging, dev), by team or domain (payments, auth, notifications), and by infrastructure tier (monitoring, ingress, logging). This structure makes it far easier to apply consistent policies and control access without granting permissions that are broader than necessary.
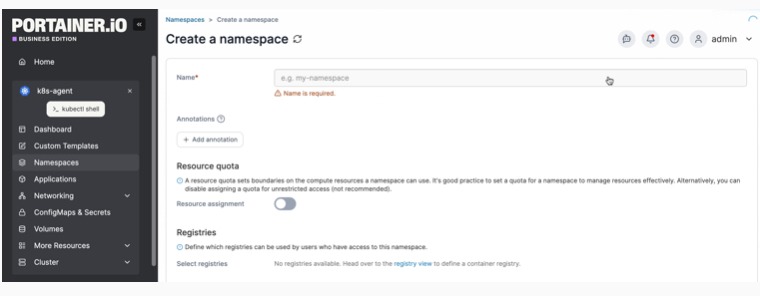
Use Portainer to create and manage your Kubernetes namespaces to isolate resources and enforce multi-tenancy.
Never Skip Liveness and Readiness Probes
Liveness probes restart containers that are alive but unresponsive. Readiness probes gate traffic routing, keeping pods out of the service endpoint list until they’re genuinely ready.
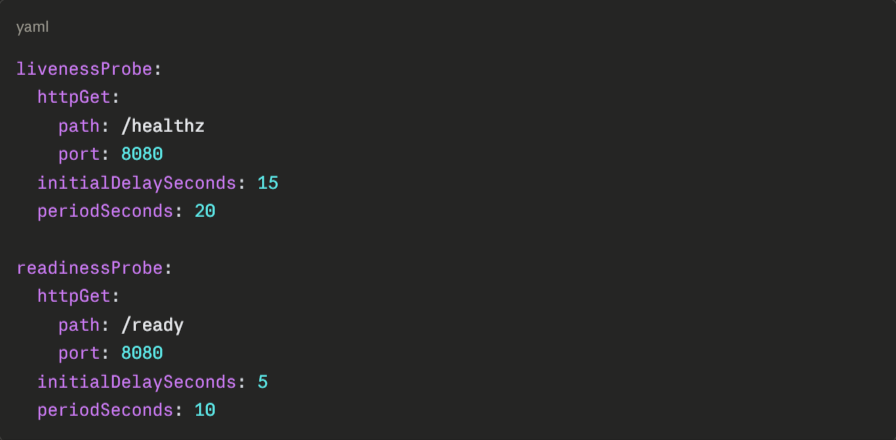
Set initialDelaySeconds based on your application’s actual startup time. Too short, and the probe fails before the app is ready. Too-long and broken pods stay in rotation longer than necessary.
Test Your Rollback Procedure Before You Need It
Knowing exactly how to roll back and having confirmed it works is the difference between a 5-minute recovery and a 45-minute incident.
Kubernetes makes rollback straightforward:
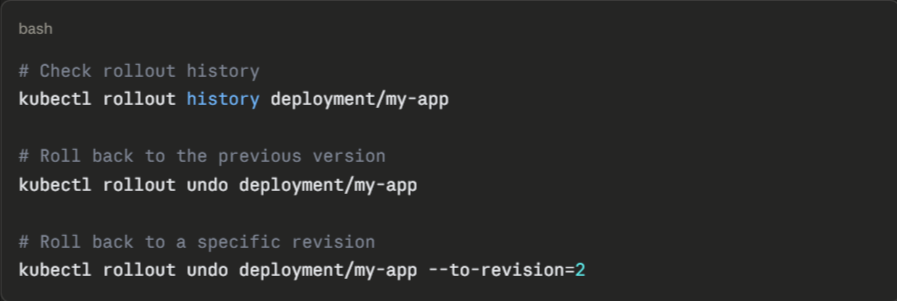
Run rollback drills in staging regularly. Confirm that your rollback procedure works against your actual deployment configuration, including any database migrations or external dependencies that could make reverting the pod version insufficient on its own.
Take Control of Your Kubernetes Deployments with Portainer
Running Kubernetes in production gets complex fast, and the complexity rarely announces itself. Configuration decisions made in week one create incidents in month six. Deployment strategies that worked at ten pods break at a hundred. Kubernetes Observability gaps stay invisible until something fails at the worst possible moment.
Portainer gives you a unified interface to manage every cluster, workload, and deployment configuration across your entire infrastructure. Instead of context-switching between terminals and scattered kubectl commands, you get a single control plane with real-time visibility into resource usage, access controls, and cluster health, whether you’re running on EKS, GKE, AKS, or self-hosted Kubernetes.
FAQs on Kubernetes Deployment
- What is the difference between a Kubernetes Deployment and a Pod?
A Pod is a single running instance of your application. A Deployment manages Pods, ensuring the right number of Pods stay running, handling updates, and automatically replacing failed instances. Pods created outside a Deployment have no self-healing behavior.
- When should you not use a Kubernetes Deployment?
Stateful applications with strict data persistence requirements need a StatefulSet instead. Deployments treat pods as interchangeable, which causes problems when each instance needs a stable identity, dedicated storage, or a guaranteed startup order.
- How do Kubernetes Deployments handle failed updates?
Kubernetes detects a failed update when new pods fail to reach a ready state within the configured deadline. The rollout stops automatically, leaving the existing pods running. Running kubectl rollout undo deployment/<name> immediately restores the previous working version.
- Can Kubernetes Deployments work without CI/CD or GitOps tools?
Yes, but not reliably at scale. Running kubectl apply manually works for a single cluster. Without a GitOps tool like ArgoCD or a CI/CD pipeline, configuration drift, deployment inconsistencies, and lost change history become unavoidable as your infrastructure grows.
- How do you manage Kubernetes Deployments across multiple clusters?
Use a combination of GitOps tooling and a centralized management platform. Portainer offers both functions. It syncs deployment state across clusters from a single Git repository and provides a unified dashboard to manage, monitor, and update deployments across all clusters.