Thanks to Luka from @blackvoidclub who recently posted this blog post about docker-compose and how to use Portainer's Stacks feature to use docker-compose files, as well as what benefits you might have when using Portainer compared to the Docker command line.
If you have ever started Portainer, you will notice its main menu on the left-hand side; most of the options here are self-explanatory. One thing that sticks out, is Stacks.
So what is the Stacks option? In Portainer, a Stack is a set of features that will allow you to start and run your container(s) using a well-structured docker-compose.yml file.


You might be wondering why would you need to run a docker-compose container in the first place. If you look at Synology's Docker UI, you’ll soon find it doesn’t cover all the options and features you may need for certain solutions you want to run in Docker. That leads you to a docker-compose file containing all the instructions needed to run the container. To run it, you typically open the command line and execute a simple one-liner.
So what's the advantage of running a Stack using Portainer? You get a user-friendly UI that will give you all the tools you need, including a web editor that will check if the YML file is formatted and structured correctly. In other words, you'll have a color-coded docker-compose file ready to execute and change on the fly if needed.
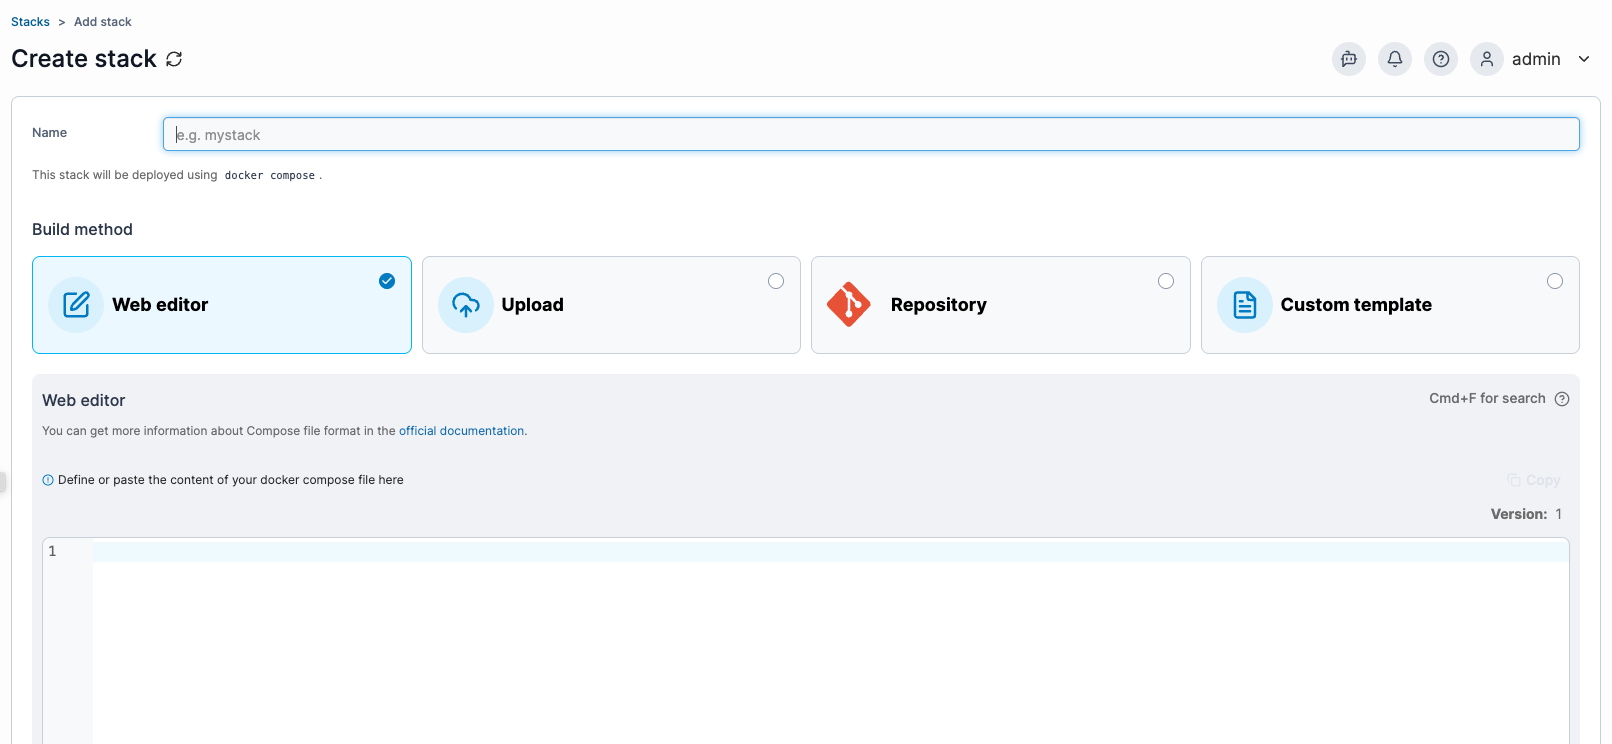
There are several ways you can start with docker-compose in Portainer. As shown in the image above, there are four methods to do this.
Web editor, uploading a file, using a GIT repository, or using a custom template.
For my personal use case, I use the web editor or upload methods because most of the time I write my own compose files, or if I already have them saved, I simply upload their contents into the web editor. Another reason I favor the web editor is that I can just quickly edit (and correct, if needed) the composed file and redeploy the container.
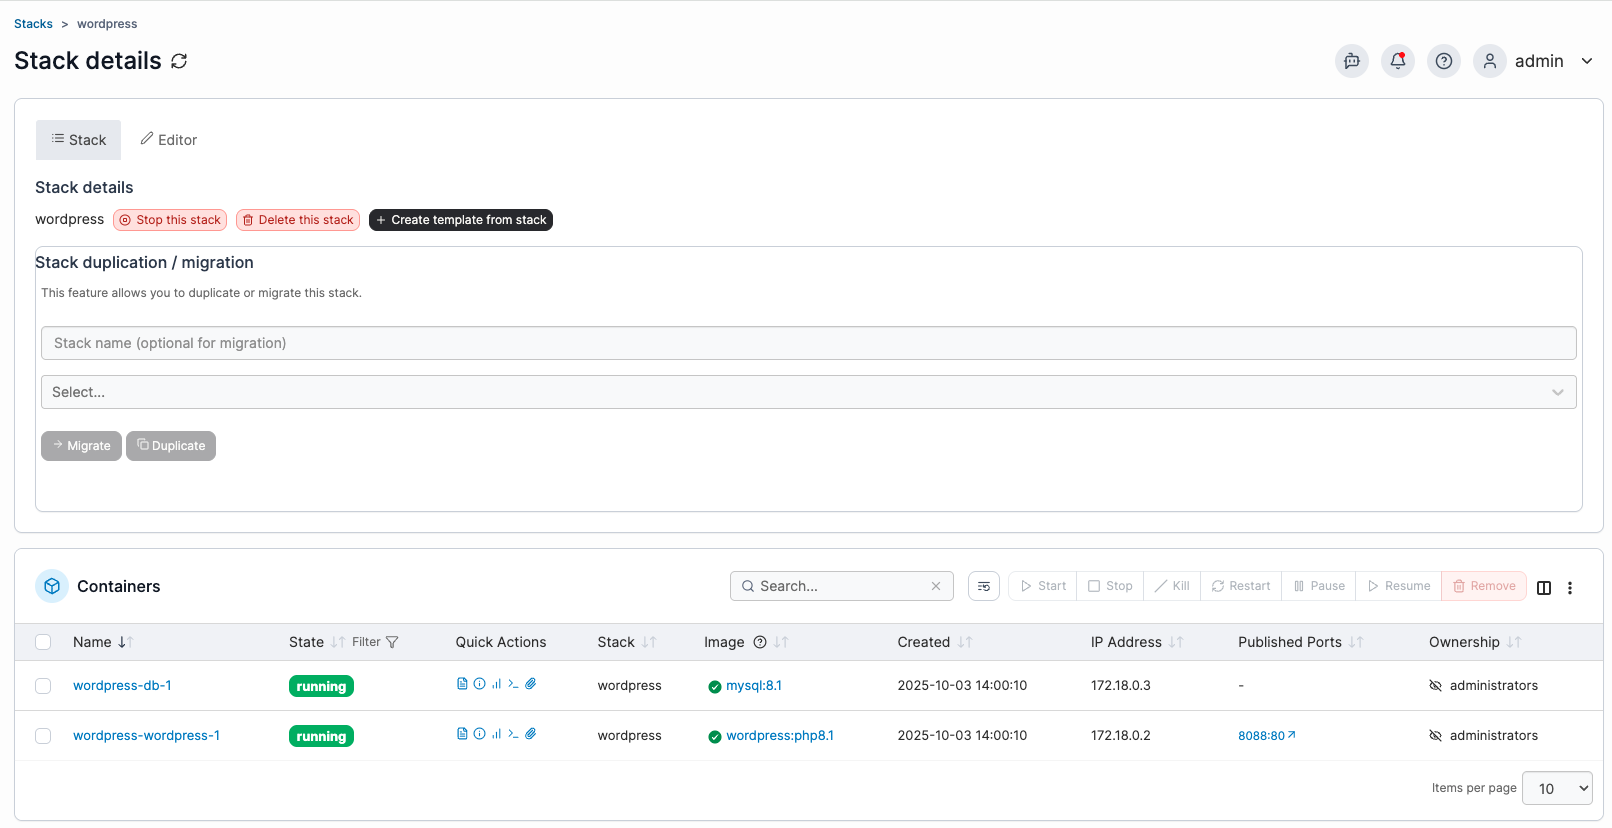
To be clear, you can still use and manipulate your container created via a Stack the same way as you would any other container, there are still tools that allow you to start, stop, kill or restart your container. In addition, there’s a Stack tools section where you can stop, delete, or create a template from the stack. If you were wondering, stopping the Stack will stop all containers in the stack with no exceptions, so choose carefully which containers you want to be part of a single Stack.
While the container and stack are running, you also have access to the Stack's Editor. While the Container is in a running state, you can edit the docker-compose file and update the Stack to remove the old container and redeploy a new one. This is useful if you want to change the port number on the fly, use a different image tag to deploy the same container with a new repo tag, or simply change the name of the container. The point is, everything is available in a single window - no need to use a separate code editor, save changes, and run docker-compose up/down on the CLI.
Manage Stacks created outside Portainer

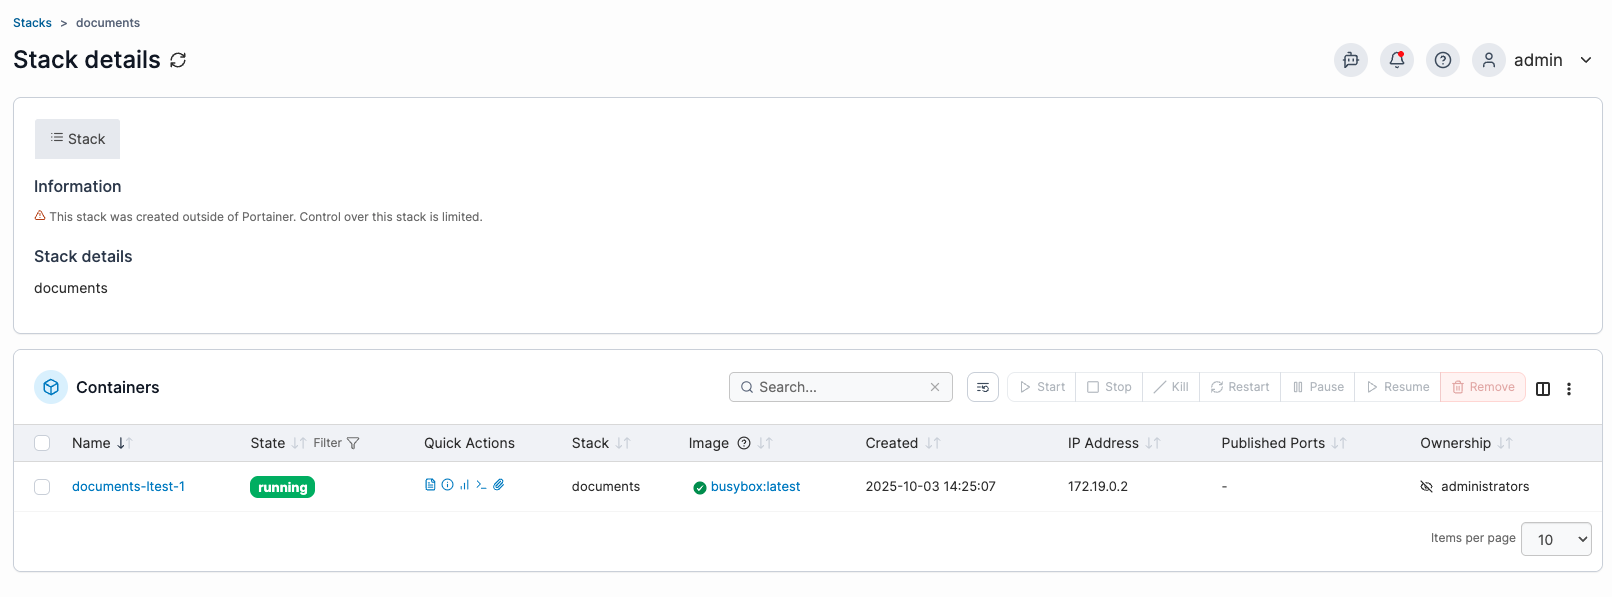
There are cases right now where you can’t use the full capability of Docker Compose CLI commands inside Portainer - for example, the env_file directive. To illustrate, here’s how a Stack (called a “project” in Compose) created via the command line appears in Portainer. If we compare the images, you’ll notice the Stack tools are missing, so there’s no option to stop, delete, or create a template from this Stack if it wasn’t initiated in Portainer. You do still get an overview, and you can manage the containers that result from the Stack.
Portainer agents - aggregate your Docker hosts in a single UI
Another way that a web editor can be handy is for quickly deploying the same container on multiple Docker hosts. Templates, or again the web editor, can make it easy to switch from one host to the other using the same Portainer UI.
Say you have Portainer running on one of your Docker hosts, but you also have a number of other Docker hosts as well. Instead of running multiple Portainer instances on all of those hosts, and the need to log into each of them, why not pull them together under a single Portainer instance with Agents? (See Luka’s article here, under “Add Docker host to your Portainer using an agent.”)
The reason I mention this is that, in this setup, you get additional benefits when running Stacks with Portainer.
Migration and duplication of Stacks

If you have a Docker Swarm cluster managed by Portainer, or simply have multiple hosts connected with Agents, you can migrate your Stack from one host to the other. After choosing the Stack you want to migrate, give it a new Stack name and select the host from the list of endpoints.
Keep in mind:
- Volume bind and content will NOT be migrated.
- Any volume binds or mounts must be prepared beforehand on the destination side.
- If there will be any clash of the port mappings (port already in use), your migration will fail.
So, treat the migration like creating a fresh container/Stack on the destination and make sure all prerequisites are met before you migrate.
Conclusion
If you are serious about Containers on any platform, you should consider using Portainer. It will allow you all the features that Docker offers, as well as allow use with Kubernetes, Docker Swarm, and Azure ACI.
Some people prefer the CLI, and of course and there is nothing wrong with that, but Portainer provides a powerful UI to do all those tasks. With built-in support for users and teams, Portainer will be a one-stop-shop for all your collaborative needs.
Try Portainer with 3 Nodes Free
If you're ready to get started with Portainer Business, 3 nodes free is a great place to begin. If you'd prefer to get in touch with us, we'd love to hear from you!
First published: July 2021
Updated: October 2025


.png)
.png)
