
This article describes the recommended steps when accessing Portainer for the first time, including creating the initial administrator account and securing access to the instance.
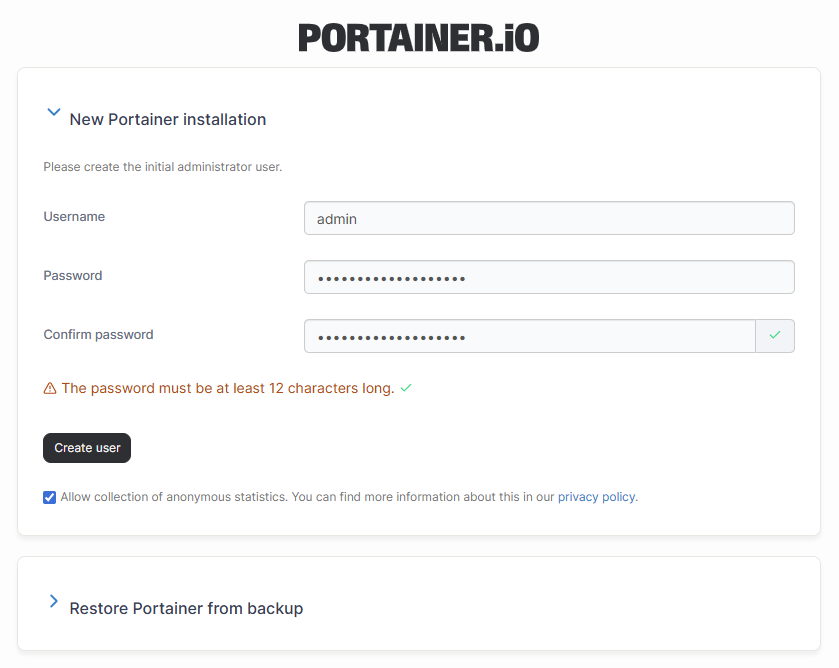
Create the first administrator user
When you access Portainer for the first time, you will be prompted to create the initial administrator account.
- Enter a username for the administrator account.
It is recommended not to use the default nameadmin. Choose a unique username instead. - Set a secure password.
The password should include a combination of letters, numbers, and special characters. - Complete the setup to create the administrator account.
This account will have full administrative access to the Portainer instance.
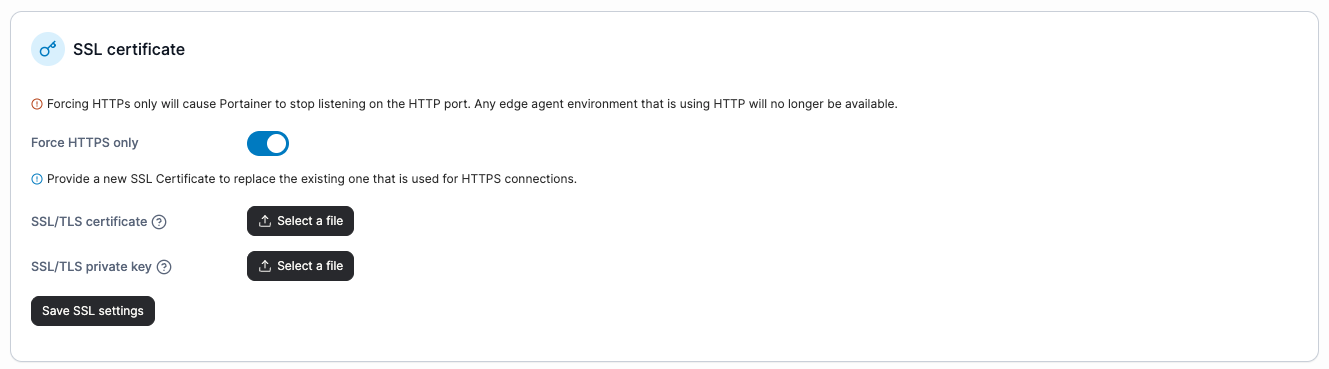
Enable HTTPS access
To ensure secure access to the Portainer UI, enable HTTPS-only access.
- Within Portainer, go to Settings in the left hand Administration menu.
- Scroll to the SSL Certificate section.
- Enable Force HTTPS only.
- Click Save SSL settings.
After enabling this option, Portainer will only be accessible over HTTPS on port 9443.
For example, if your Portainer instance IP address is:
192.168.10.50
You would access the UI at:
https://192.168.10.50:9443
You can also upload your own SSL/TLS certificates from within this menu if you prefer to use custom certificates.
See the Portainer documentation for more details.
Access Portainer through a VPN (WireGuard)
If you want to avoid exposing your Portainer instance directly to the internet, consider accessing it through a VPN.
A common approach is to run Portainer behind a WireGuard VPN, allowing secure end-to-end access to the instance without opening public ports.
For a step-by-step guide, see the Portainer article on running Portainer behind a WireGuard VPN.
This approach restricts access to authenticated VPN clients while keeping the Portainer UI private.
Try Portainer with 3 Nodes Free
If you're ready to get started with Portainer Business, 3 nodes free is a great place to begin. If you'd prefer to get in touch with us, we'd love to hear from you!


