
Prerequisites
Before starting, ensure you have:
- A DigitalOcean account
- A running Portainer instance
- Access to a Docker environment managed by Portainer
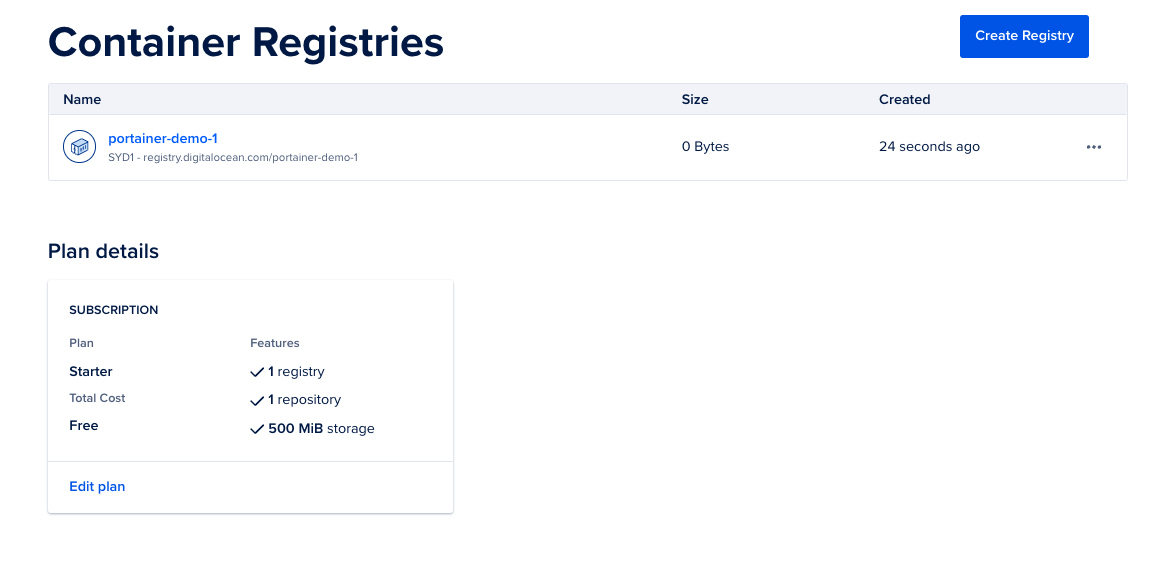
1. Create a DigitalOcean Container Registry
- Log in to your DigitalOcean account.
- From the left had menu, select Container Registry and then Create Registry.
- Configure the registry:
- Name: Choose a unique name.
- Region: Select the appropriate region.
- Plan: Select the commercial plan that fits your requirements.
- Click Create.
For more information on DigitalOcean container registries, see the DigitalOcean documentation.
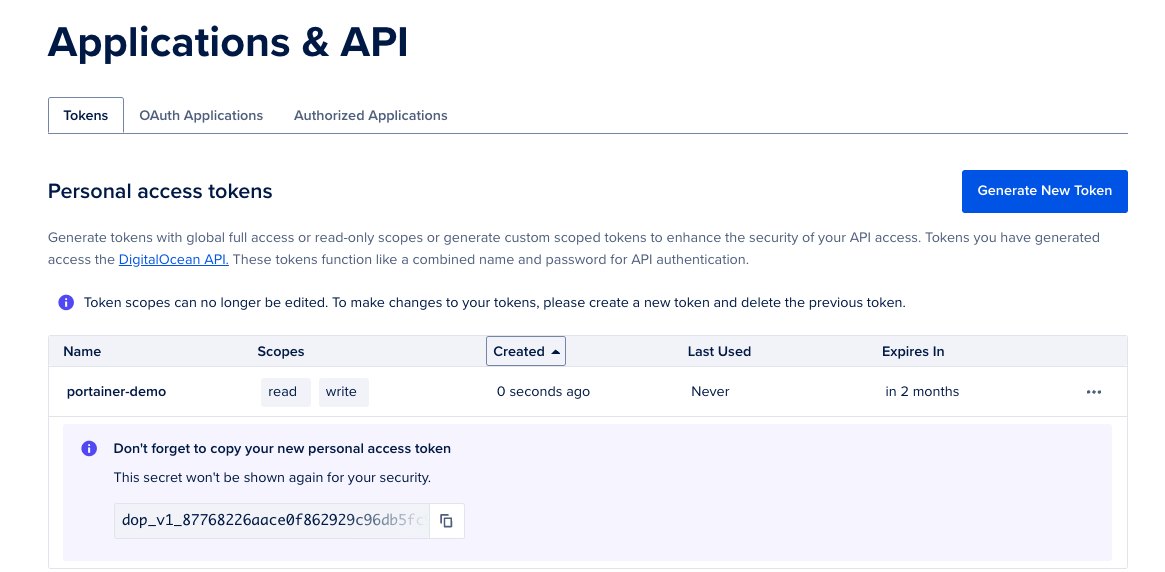
2. Generate an API token for Registry access
Next, create an API token that Portainer will use to authenticate with the registry.
- From DigitalOcean, open API from the left hand menu.
- Click Generate New Token.
- Configure the token:
- Validity: Set an expiration period if required.
- Permissions: Enable Full Access so images can be pushed to the registry.
- Generate the token.
Save the API token securely. It is only displayed once.
For more information on DigitalOcean APIs, see the DigitalOcean documentation.
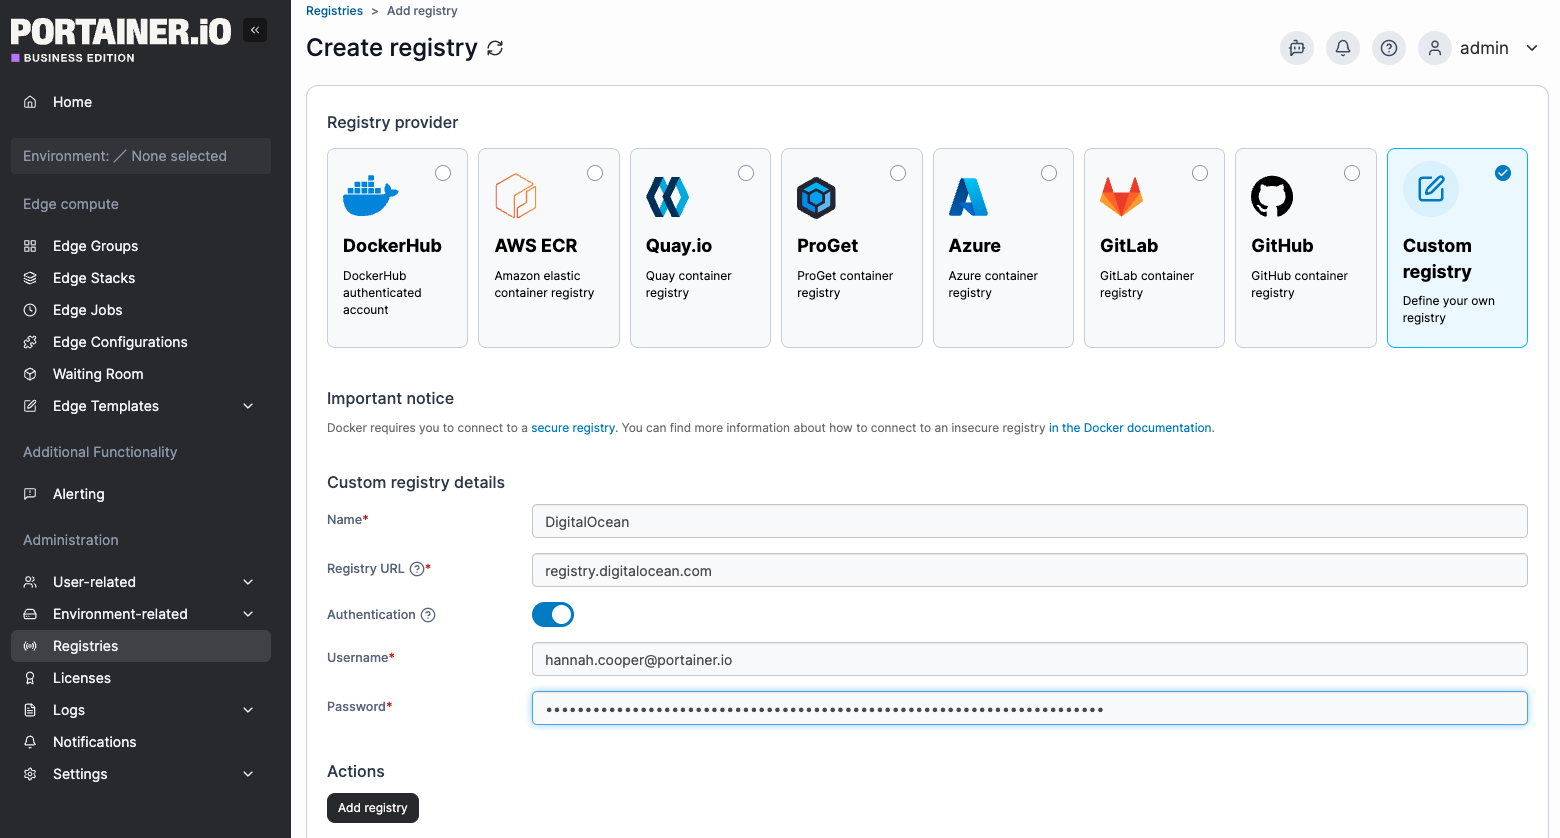
3. Add the Registry in Portainer
- Log in to Portainer.
- In the left navigation menu, select Registries.
- Click Add registry.
- Specify it is a Custom Registry
- Enter the registry details
- Name: A name for your registry
- Registry URL:
registry.digitalocean.com - Authentication toggled on
- Username: Your DigitalOcean account email
- Password: The API token you generated
Click Add registry to save the registry configuration.
Further information on Portainer registries can be found in the Portainer documentation.
4. Enable Registry browsing
To allow Portainer to browse repository contents:
- In Registries, locate the registry you added.
- Click Browse under Actions.
- Select Configure this registry.
- Enable the following settings:
- TLS enabled
- Disable certificate verification
- Click Test configuration to confirm connectivity.
- After the success notification appears, click Save configuration.
You can now browse the registry from Portainer.

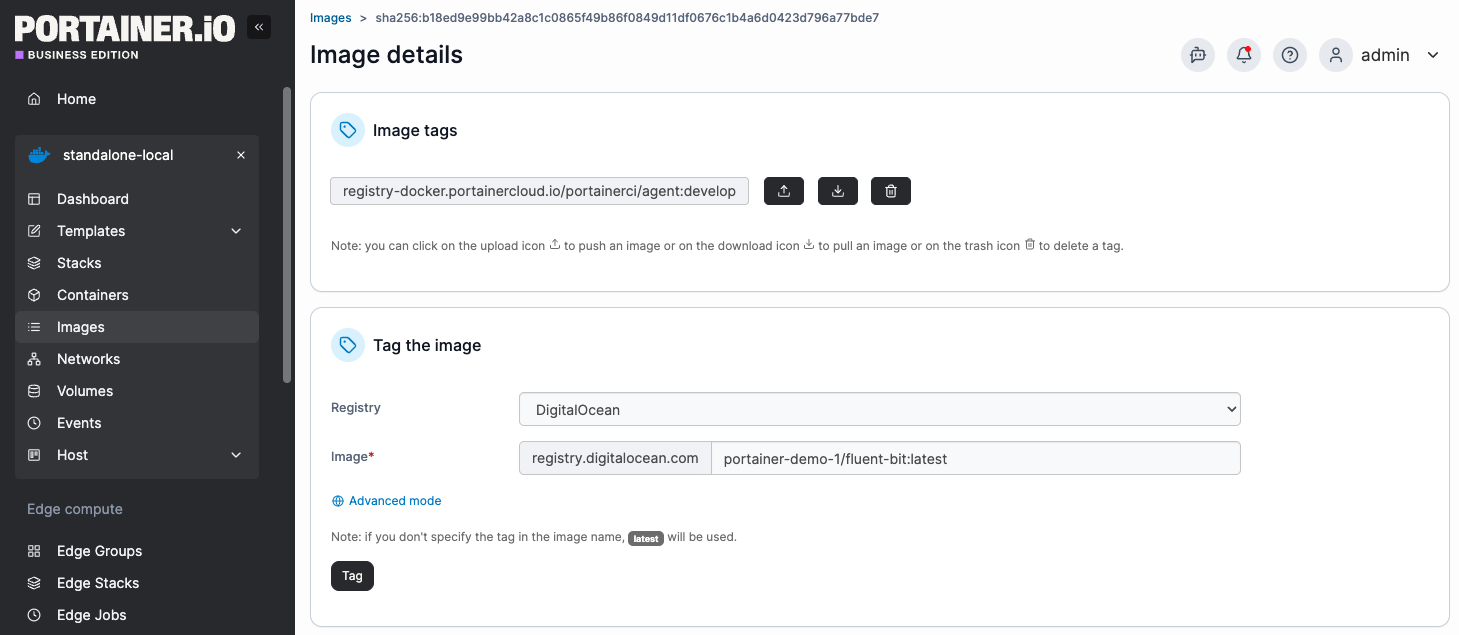
5. Push an Image to the Registry
If the registry is empty, push an image from one of your Docker environments.
- Open the Docker environment in Portainer.
- Navigate to Images in the left hand menu.
- Select an image to use as a test. For example:
fluent-bit:latest - Click Tag.
Next, push the image:
- Under the new image tag you have just created, click the Push icon (up arrow).
- Select your DigitalOcean registry
- Wait for the success notification confirming the image has been pushed.
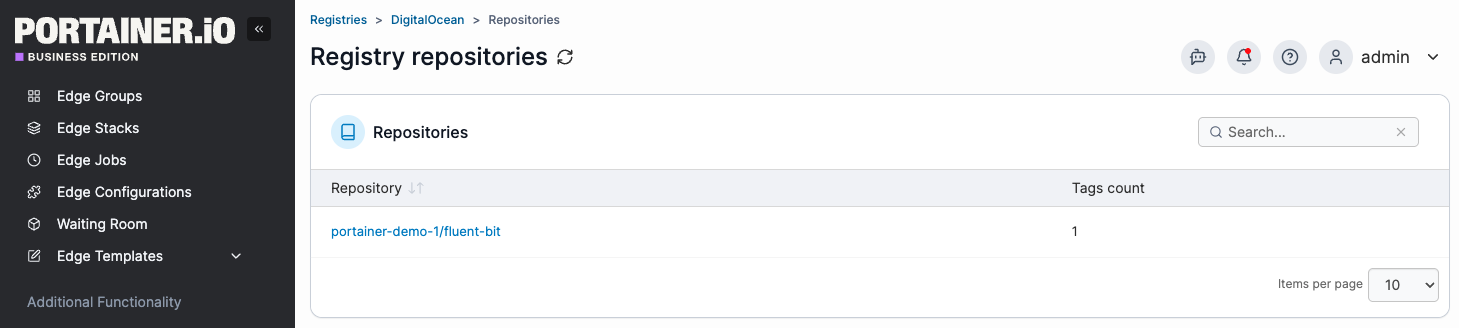
6. Verify the Image in the Registry
- Return to Registries in Portainer.
- Click Browse on your DigitalOcean registry.
The pushed image should now appear in the repository list.
You can now deploy containers using images stored in your DigitalOcean Container Registry.
For more details on containers, see the Portainer documentation.
Try Portainer with 3 Nodes Free
If you're ready to get started with Portainer Business, 3 nodes free is a great place to begin. If you'd prefer to get in touch with us, we'd love to hear from you!


