
Portainer provides a comprehensive web UI for managing Kubernetes environments. However, many Dev and Ops users prefer working with CLI tools such as kubectl or desktop tools like Lens.
Portainer supports this workflow through its secure Kubernetes API proxy. Any cluster access granted in Portainer can also be used securely from external tools via a generated kubeconfig file.
This guide walks through using both kubectl and Lens with a real example.
Scenario
Assume:
- A user named Bethany exists in Portainer.
- Bethany has access to two Kubernetes clusters:
- Prod
- Dev
Bethany’s Access in Portainer
Prod cluster
- Namespaces:
defaultwebapp
- Deployment in
webapp:nginx
Dev cluster
- Namespaces:
defaultwebapp-dev
- Deployment in
webapp-dev:nginx-dev
Bethany’s access is namespace-scoped and restricted by Portainer RBAC.
Part 1: Using kubectl
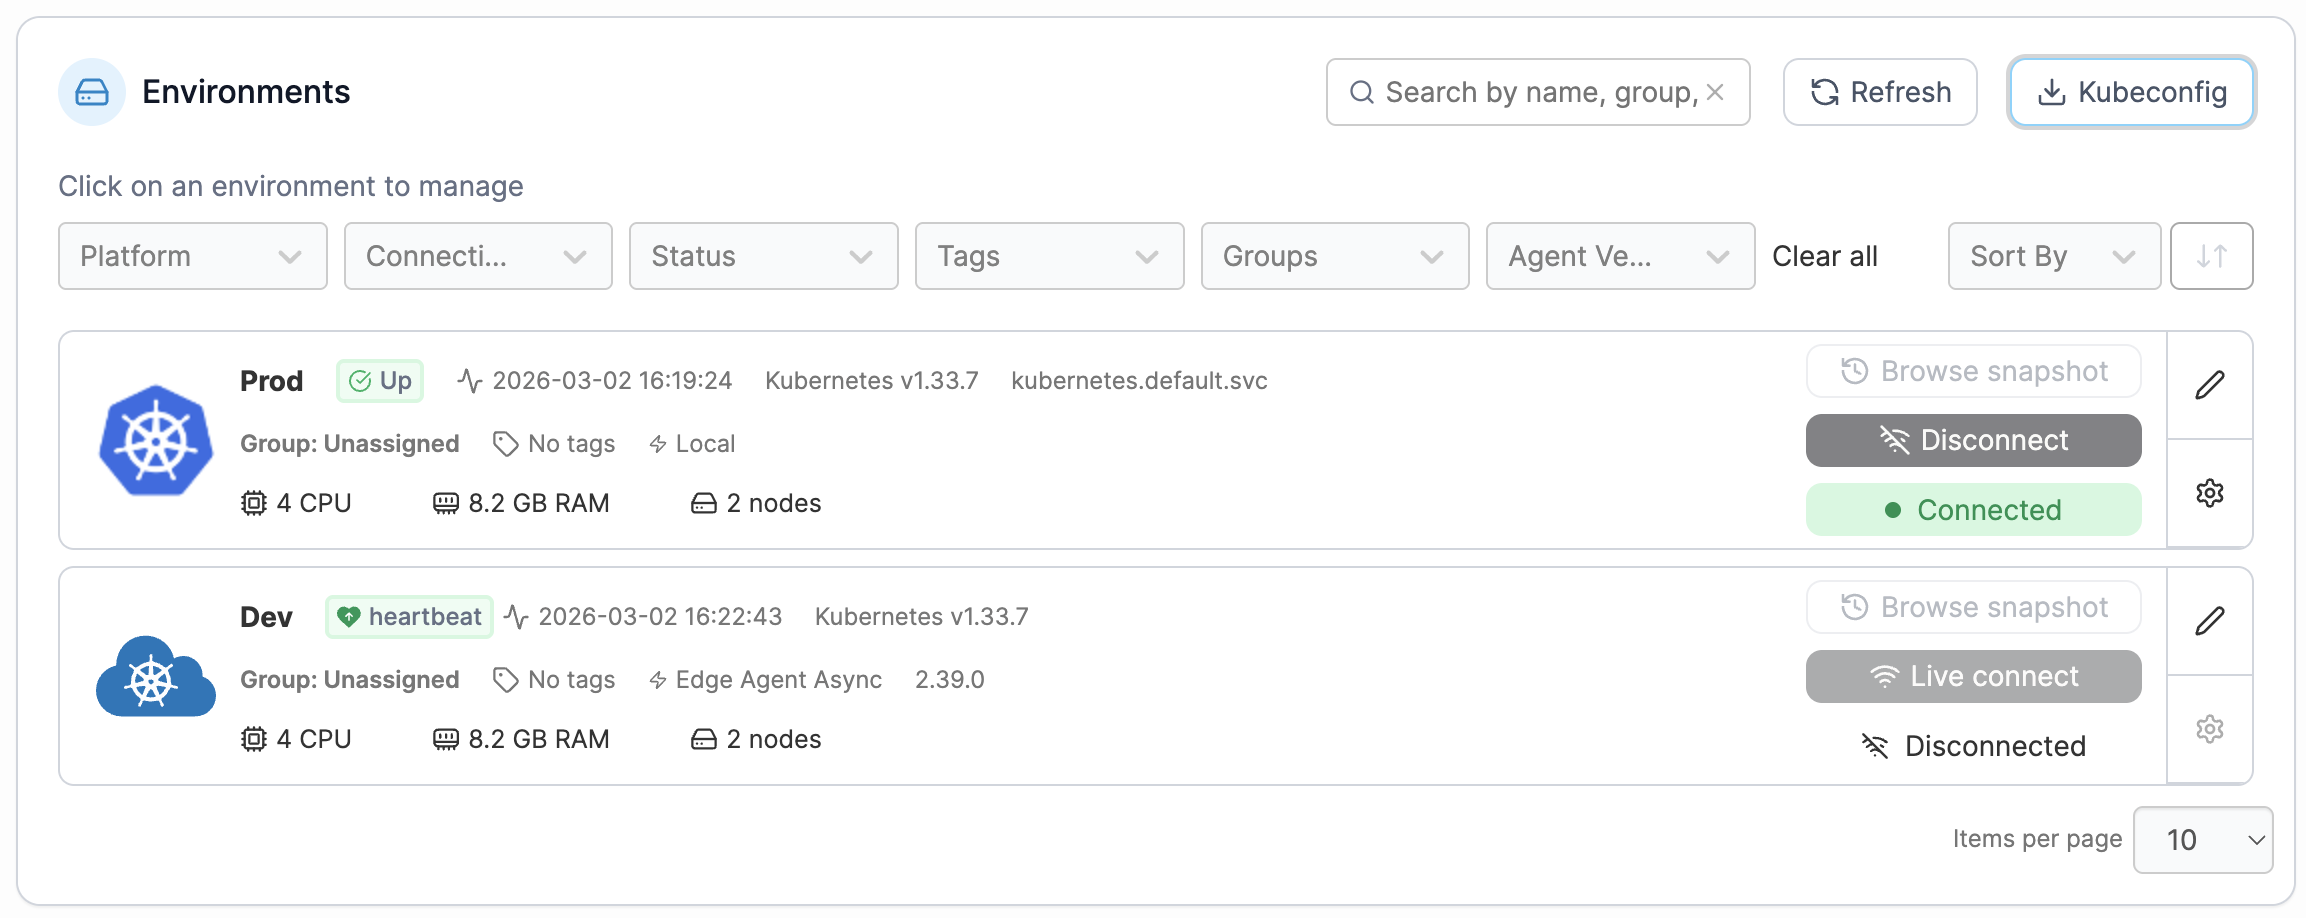
Step 1: Download the Kubeconfig from Portainer
- Log into Portainer.
- Click Home.
- Select Kubeconfig in the top right corner of your environments.
- Select both clusters (Prod and Dev).
- Click Download File.
This downloads a kubeconfig file that contains:
- Cluster endpoints
- User authentication details
- Context definitions
Step 2: Configure kubectl (Windows example)
On Bethany’s PC:
- Navigate to:
C:\Users\Bethany\.kube\
- Create a file named:
config
If a config file already exists, you can replace its contents.
- Open the downloaded kubeconfig file.
- Copy its contents.
- Paste them into
config. - Save the file.
kubectl is now configured to authenticate via Portainer.
Step 3: Verify cluster access
Open Command Prompt and run:
kubectl config get-contexts
Both clusters should appear.
If Prod is the default context, verify namespaces:
kubectl get namespaces
Bethany may see additional namespaces listed, but access is enforced when interacting with them.
To confirm restricted access:
kubectl get pods -n kube-system
This should return an authorization error if she lacks access.

Step 4: Manage the deployment
List deployments in the webapp namespace:
kubectl get deployments -n webapp
List pods:
kubectl get pods -n webapp
Scale the nginx deployment:
kubectl scale --replicas=2 deployment nginx -n webapp
Verify:
kubectl get pods -n webapp
Now refresh the Applications view in Portainer. The change is reflected immediately.
This confirms that kubectl operations are enforced and synchronized through Portainer’s Kubernetes API proxy.
Part 2: Using Lens
Lens automatically discovers clusters from the local kubeconfig file.
Step 1: Install and open Lens
Download and install Lens if needed.
Launch the application.
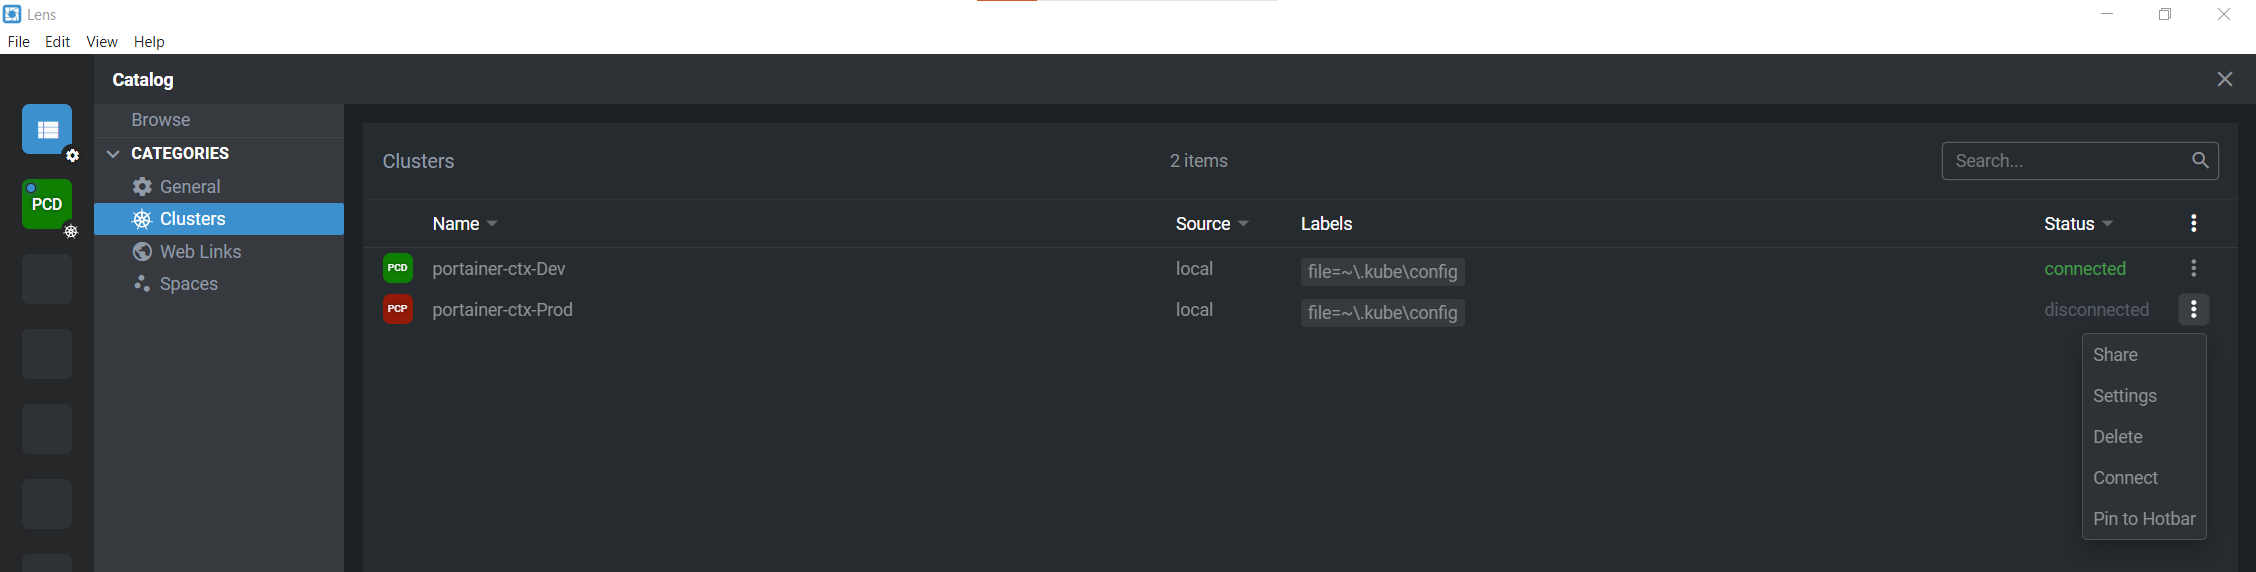
Step 2: Add clusters
- Click Browse Clusters in Catalog.
- Locate your clusters.
- Click the three dots.
- Select Pin to Hotbar.
Your clusters now appear in the left sidebar.
Step 3: View deployments
- Select a cluster.
- Click Deployments.
- Change the namespace from
defaulttowebapp.
Because Bethany is restricted to specific namespaces, Lens may display authorization errors when attempting to access unauthorized namespaces.
Step 4: Restrict visible namespaces in Lens
To reduce ACL errors:
- Open the cluster menu in the sidebar.
- Click the three dots.
- Select Settings.
- Specify allowed namespaces:
defaultwebapp
- Press ESC.
- Click Disconnect, then Reconnect.
Lens will now only display authorized namespaces.
Step 5: Scale from Lens
Scale the deployment via the Lens UI.
Refresh Portainer.
The change is visible in both interfaces.
What this means
Portainer acts as:
- A Kubernetes management UI
- A secure Kubernetes API proxy
- A centralized RBAC enforcement layer
Users can:
- Manage clusters through the Portainer UI
- Use kubectl locally
- Use third-party tools like Lens
All access remains governed by Portainer’s role-based access control and namespace permissions.
Want to move beyond the command line? Here are several kubectl alternatives that make Kubernetes more approachable.
Try Portainer with 3 Nodes Free
If you're ready to get started with Portainer Business, 3 nodes free is a great place to begin. If you'd prefer to get in touch with us, we'd love to hear from you!


