

Share this post
This Blog post is meant to give you a better understanding of the process to get Portainer up and running. It will also allow you to see how it interacts with docker, and to learn how Portainer works from a ground roots level. We are installing the latest version of Ubuntu Server and the most recent version of docker. We are also installing an instance of Portainer as a delivery platform for microservices / apps.
Portainer and Docker will make your day-to-day duties easy.
- sudo apt update
- sudo apt -y full-upgrade
- sudo nano -c /etc/hosts
192.168.1.100 host.domain.com host
- sudo apt -y install docker-compose
- sudo mkdir -p projects
- cd projects/
- sudo mkdir -p portainer
- cd portainer-ee/
- sudo nano -c docker-compose.yml
note: copy the below text in to the file above.
Portainer and Agent install (copy and paste)
version: '3.2'
services:
agent:
image: portainer/agent
volumes:
- /var/run/docker.sock:/var/run/docker.sock
- /var/lib/docker/volumes:/var/lib/docker/volumes
networks:
- agent_network
deploy:
mode: global
placement:
constraints: [node.platform.os == linux]
portainer:
image: portainer/portainer-ee:latest
#image: portainer/portainer-ce:2.11.0
command: -H tcp://tasks.agent:9001 --tlsskipverify
ports:
- "9000:9000"
- "8000:8000"
- "9443:9443"
volumes:
- portainer_data:/data
networks:
- agent_network
deploy:
mode: replicated
replicas: 1
placement:
constraints: [node.role == manager]
networks:
agent_network:
driver: overlay
attachable: true
volumes:
portainer_data:
Agent only install (copy and paste)
note: add the below text only if just adding a cluster/swarm to an instance of Portainer
version: '3.2'
services:
agent:
image: portainer/agent
volumes:
- /var/run/docker.sock:/var/run/docker.sock
- /var/lib/docker/volumes:/var/lib/docker/volumes
ports:
- target: 9001
published: 9001
protocol: tcp
mode: host
networks:
- portainer_agent
deploy:
mode: global
placement:
constraints: [node.platform.os == linux]
networks:
portainer_agent:
driver: overlay
attachable: true
On the master node
a – sudo docker swarm init
b – sudo docker stack deploy -c portainer-agent-stack.yml portainer
On the Worker node use the Following
c – sudo docker swarm join –token
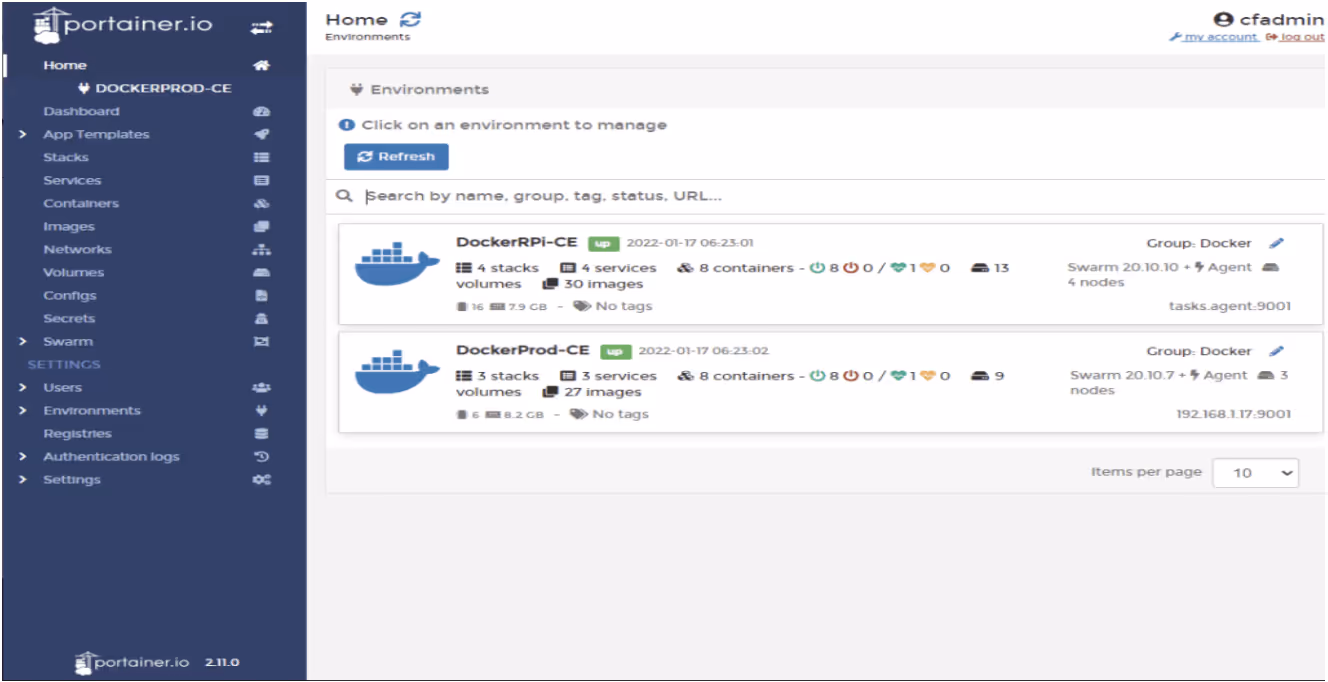
Now let’s login to Portainer
1 – Open your browser and go to the https://server.ip:9443
2 – login to w/admin credentials
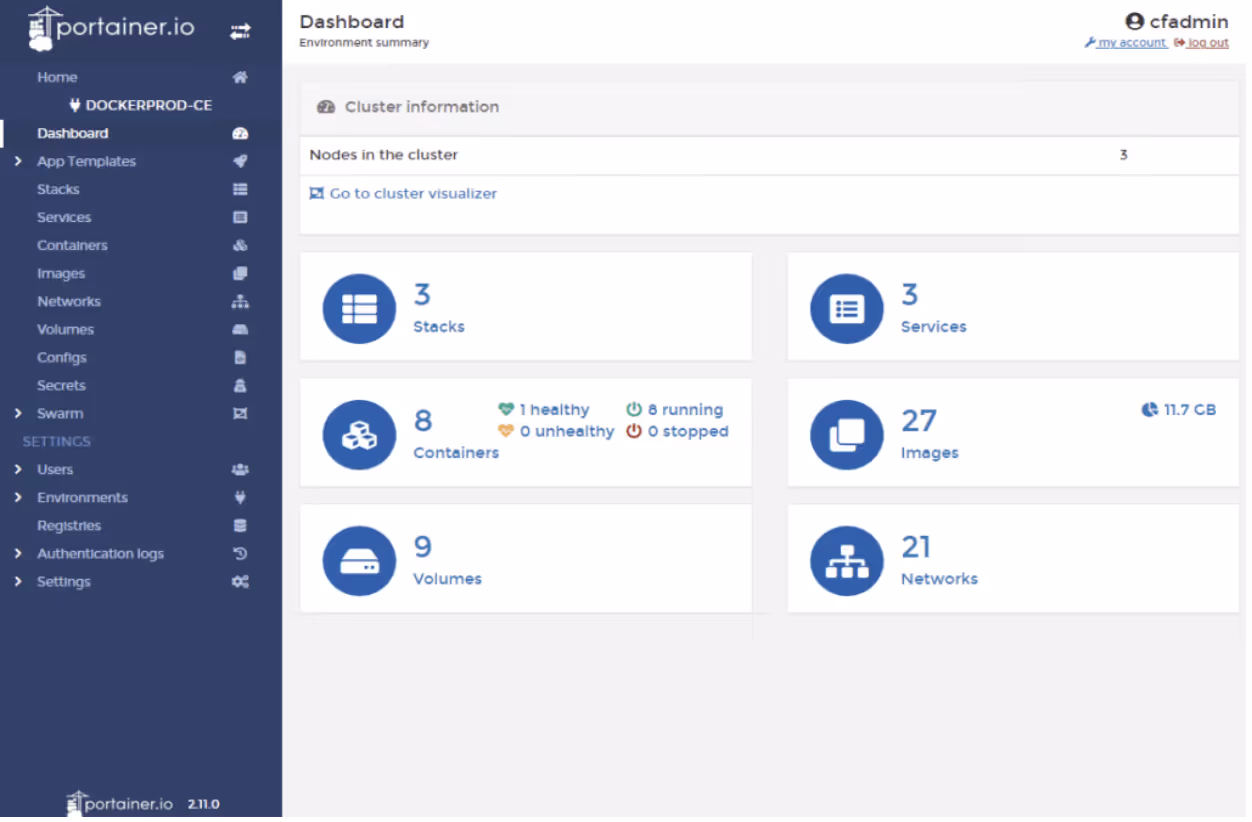
Portainer Dashboard -> I choose DockerProd-CE Click on Stacks -> Click Add a Stack Give your stack a name and then copy the docker-compose file in to Web editor
You can copy in your docker-compose file or use an App Template
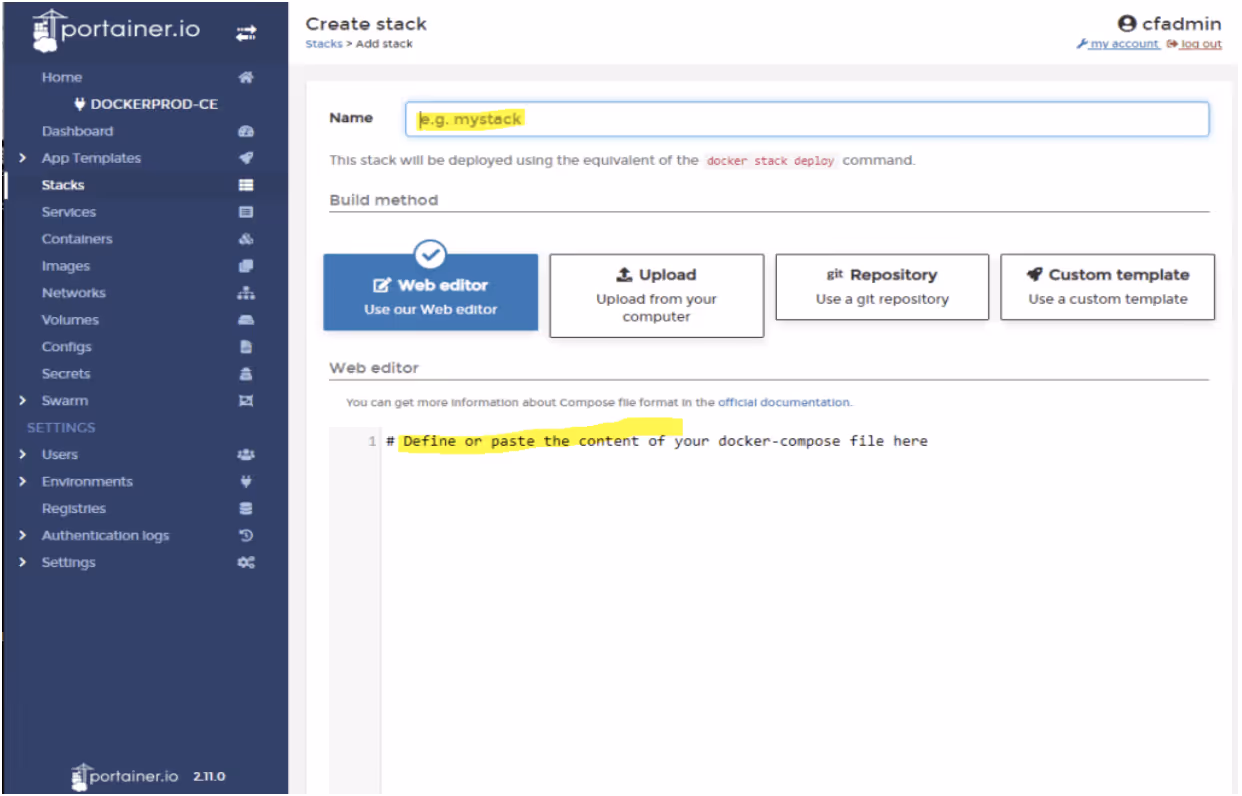
Click on the Deploy Stack and you should see something similar to the following:

Click on the stack you created
Check and make sure your stack is healthy
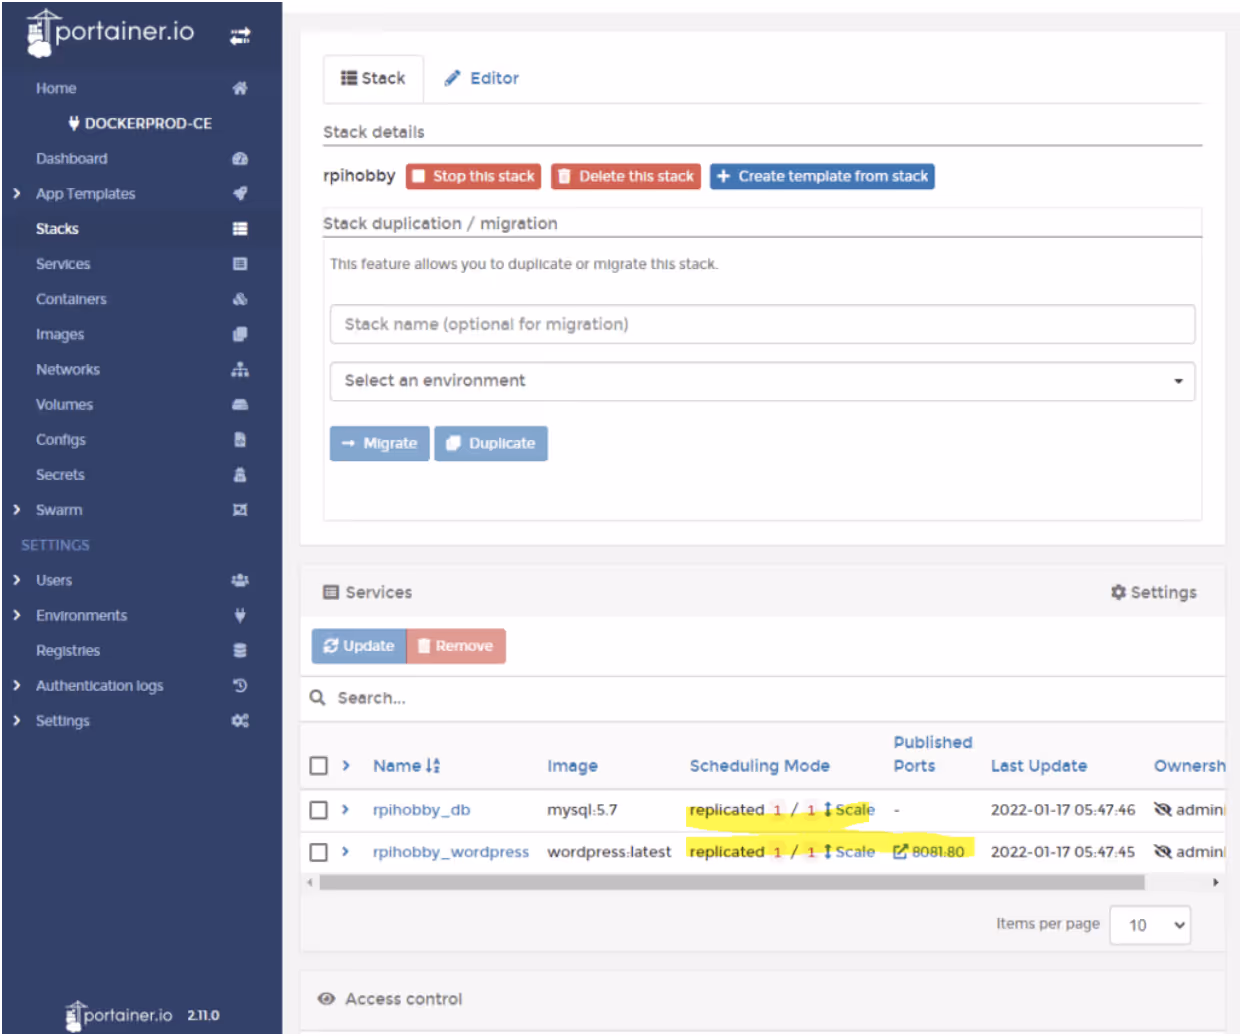
Healthy Stack
Click on the Published Ports
This let’s you know you did it properly.
That’s it for now, I hope you learned something and had fun I certainly did writing this. Let me know if you want any other articles. Thank you for coming by and staying for bit.


.png)